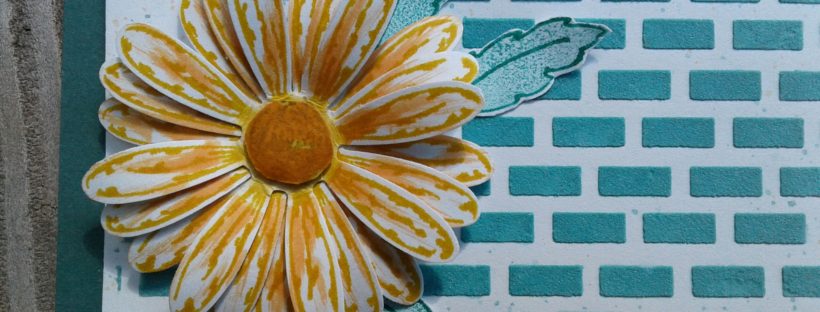
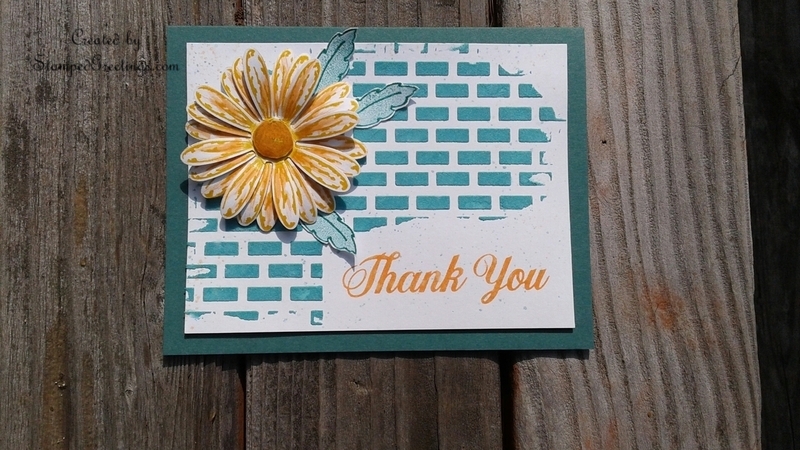
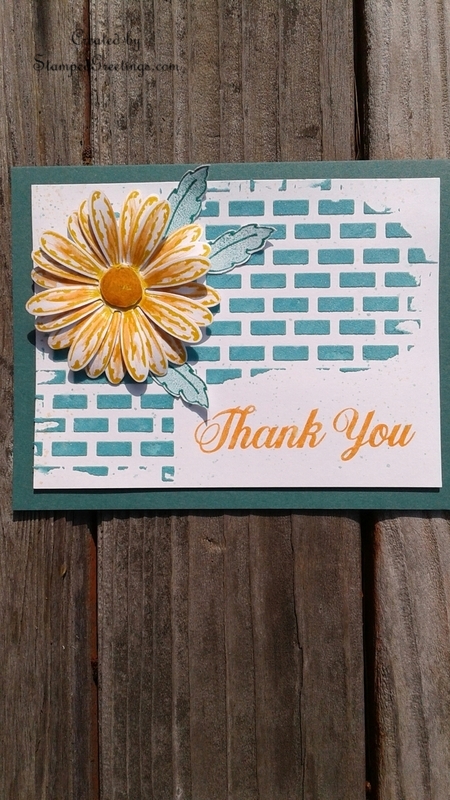
I had the great privilege of stamping with two of our grandkids recently. Angie and John were instant experts using embossing paste, stamps, dimensionals, bone folders, and everything else on the table! Here is our creation:
You will absolutely love the embossing paste! The actual paste is white, but a few drops of reinker will give the embossing paste wonderful color. I added a few drops of Tranquil Tide (great new in-color) reinker to the paste before I mixed it for this card. The paste works incredibly well with the Pattern Party Decorative Masks. We used the Palette Knives to spread the embossing paste over the mask. To mask off the area for the stamped Thank You, we used a piece of Post-It note with torn edges.
Take a look at the pictures of us having fun creating!
- The base of our card is Tranquil Tide cardstock. I already really love this new color. It takes on greens or blues depending on the colors around it.
- The card front is a piece of Whisper White cardstock cut to 5″ x 3 3/4″.
- Stamp “Thank You” from the Daisy Delight stamp set using Peekaboo Peach ink on to the bottom right corner of the Whisper White cardstock piece. Mask the “Thank You” with a large Post-It note. Tear the Post-It note (not the adhesive part) to make sure you don’t have a straight line on the mask.
- Use a palette knife from the Palette Knives set to scoop a small amount of Embossing Paste onto a Silicone Craft Sheet. Add a few drops of the Tranquil Tide Classic Stampin’ Ink Refill to the embossing paste and mix the paste with the palette knife. [Tip: Use a small, sealable container to save your colored embossing pastes. I saved a few small jam jars for this purpose. Also, make sure that you quickly seal your embossing paste containers. You don’t want your paste to dry.]
- Place your Whisper White cardstock on a scrap piece of paper. Put your choice of masks from the Pattern Party Decorative Masks set on top of the cardstock. Use either washi tape or painter’s tape to tack down the mask. You don’t want the mask to move when you’re spreading the embossing paste. Use a palette knife to put a small amount of colored embossing paste on top of the mask and spread it over the mask. It’s almost as if you are frosting the mask! Put as much or as little embossing paste on top of the mask as you like.
- When you’re done spreading the embossing paste, lift the mask to reveal the magic. [Tip: Be sure to wash your palette knife and mask very quickly after you finish spreading the embossing paste. I literally lift the mask off the Whisper White cardstock and walk to the sink to clean the knife and mask. Pump soap and water do the trick very easily and very quickly. Dry with a paper towel, and you’re ready to go!] Set the Whisper White cardstock piece aside to allow the embossing paste to dry. It should only take a few minutes – 10 minutes max!
- For a little pop, add a 3D image to the card. For the card pictured above, we added a paper daisy made from the Delightful Daisy Bundle. I stamped the flower using Crushed Curry ink. After punching out the flowers with the Daisy Punch, I accented the flower petals by simply swiping them with the paintbrush side of a Peekaboo Peach Stampin’ Write Marker. The end result is a fun color combination for the flower! The leaves are from the Daisy Delight stamp set. They are stamped with, believe it or not, Emerald Envy ink! The leaves are fussy cut and attached over the embossing paste with glue.
- Dimensionals are used to add the flower to the top of the card front. They are also used to attach the card front to the card base.
I really loved making this card with Angie and John. We had a great time. You will enjoy using the embossing paste. Give it a try!
In my next post, I will share another great card using multiple colors of embossing paste. It’s another WOW factor technique that is pretty easy to master.
Below are the main products that were used to make the pictured card. If you click on any picture, you’ll go to my on-line store.
Happy stamping!
Laurie
|
|
|
|
|
|
|
|
|
|
||
|
|
|


