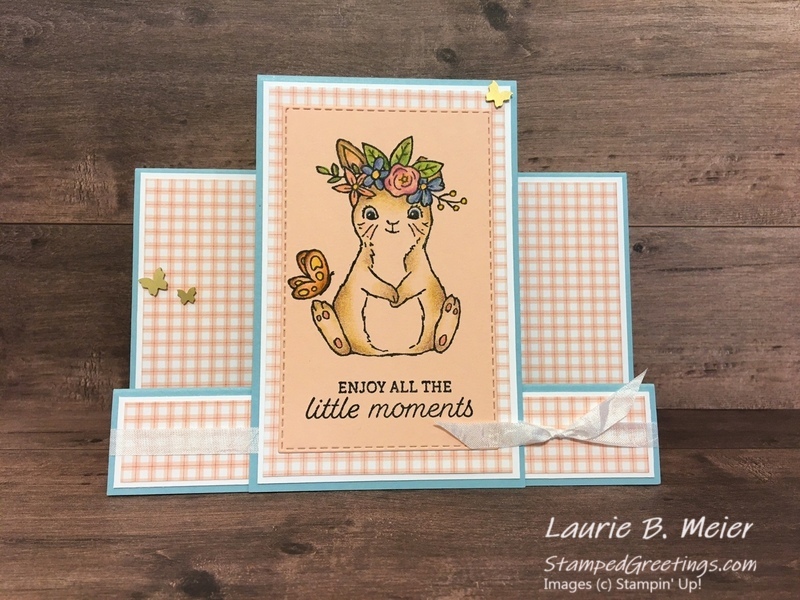
As a demonstrator, I have been able to get a sneak peek of the new Stampin’ Up! Annual Catalog. And, as you can imagine, there are awesome new products that we will all soon have the opportunity to add to our collections – yay! Also, there are some wonderful current products that will continue to be available. One of those products is the adorable Easter Bunny Stamp Set.
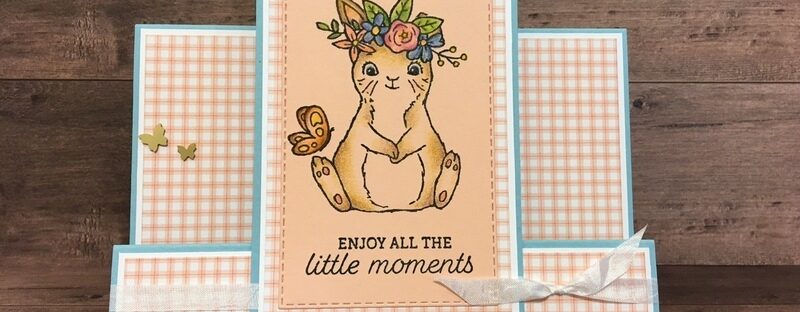
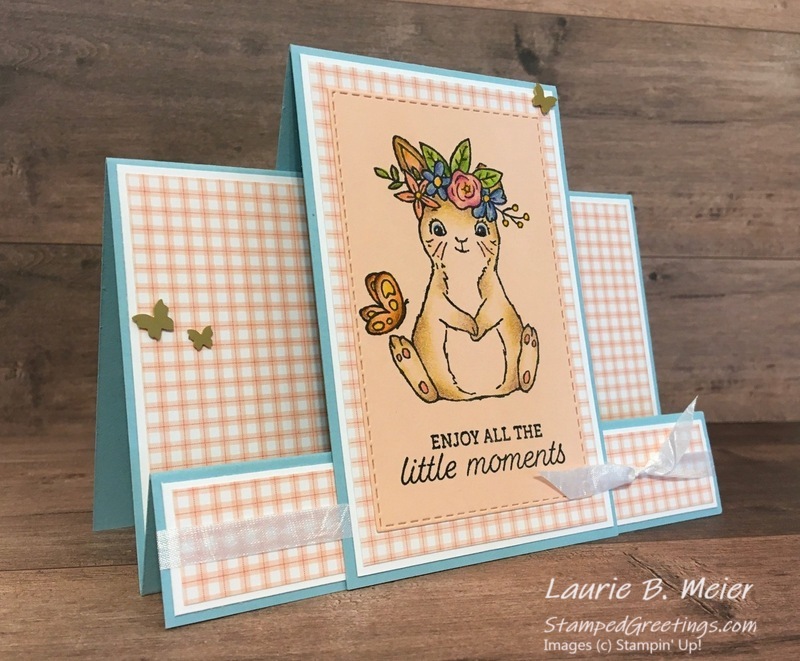
This stamp set is definitely not just useful for Easter cards. It is perfect for baby cards, children’s birthday cards, a cute greeting card,…. you get the picture! Take a look below at a fun baby card that I made with the stamp set.
Below you’ll find step-by-step instructions to create your own center easel card. If you would prefer visual directions, you can check out a recent post that I have with a similar easel card. It will give you some great tips on making this style of card.
Paper that I used for the project:
- Card Base: Balmy Blue cardstock cut to 8 ½” x 5 ½”, scored at 3 ¼”, 6 ½”, and 7 ½” on the 8 ½” side
- Balmy Blue cardstock cut to 2 ¾” x 8 ½”, scored at 4 ¼” on the 8 ½” side
- Basic White cardstock cut to 5 3/8” x 3 1/8”
- Basic White cardstock cut to 4 1/8” x 2 5/8”
- Basic White cardstock cut to 5 3/8” x 7/8”
- Country Gingham Designer Series Paper (DSP) cut to 5 ¼” x 3”
- Country Gingham DSP cut to 4” x 2 ½”
- Country Gingham DSP cut to 5 ¼” x ¾”
- Scrap piece of Petal Pink cardstock
Instructions:
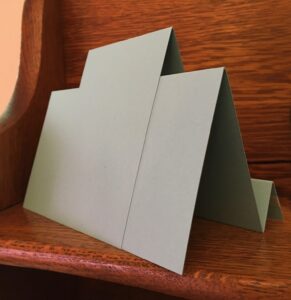
- Fold the card base as pictured above. You will end up with two mountain folds and one valley fold. Burnish the score lines.
- Adhere the largest piece of Country Gingham DSP (5 ¼” x 3”) to the center of the largest piece of Basic White (5 3/8” x 3 ¼”). Adhere the combined piece to your card base, as pictured. It will go between the 3 ¼” score line and the 6 ½” score line.
- Adhere the thinnest piece of Country Gingham DSP (5 ¼” x ¾”) to the center of the thinnest piece of Basic White (5 3/8” x 7/8”). Adhere the combined piece to your card base, as pictured. It will go between the 6 ½” score line and the 7 ½” score line.
- Next, take the Balmy Blue piece that is 2 ¾” x 8 ½” and burnish the 4 ¼” score line. This piece will be the center of your easel card. Adhere one end of the piece to the middle of the front of your card, as pictured above. Make sure the edge is flush with the bottom of the card. Then, adhere the other end of the piece to the back of your card. Again, make sure the edge is flush with the bottom of the card. See below as a reference for the back of your card.
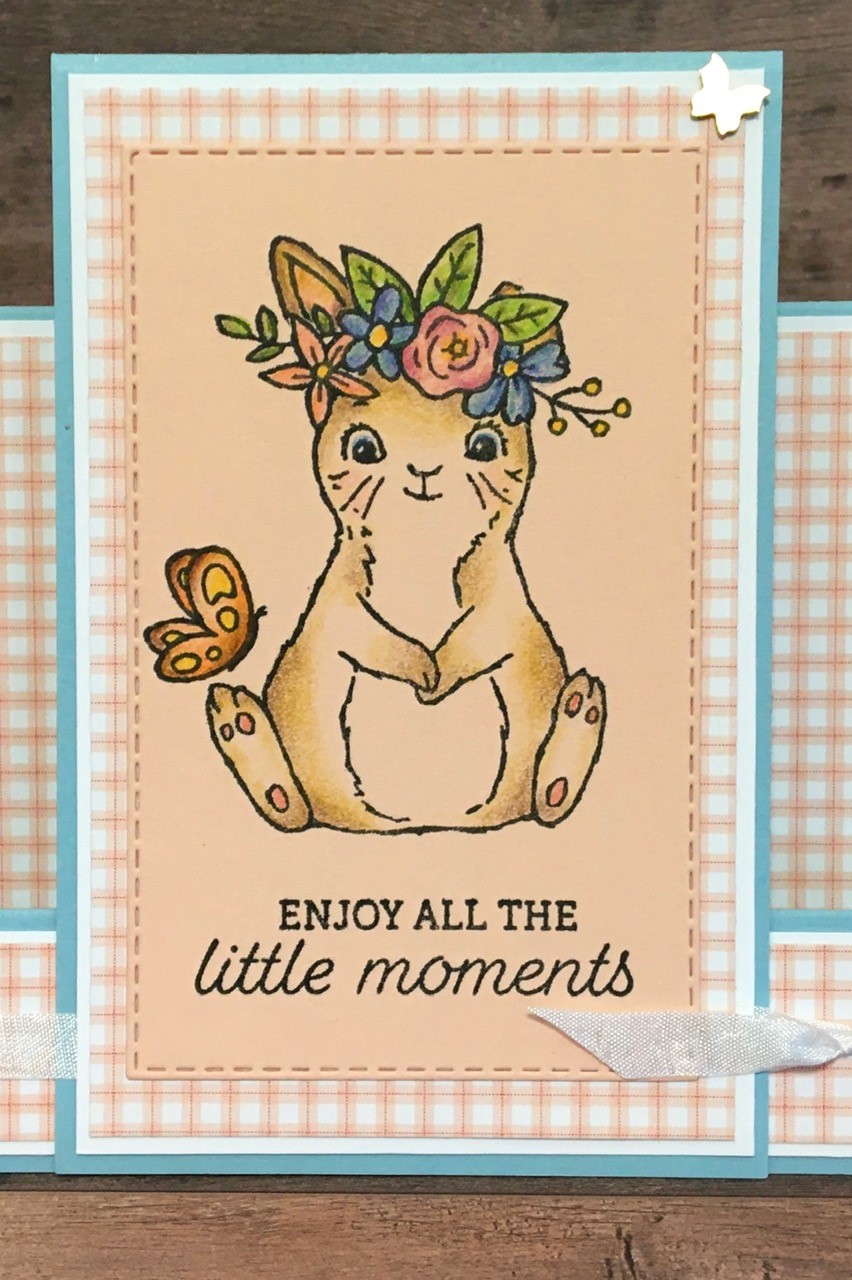
- Use the flower crown stamp from the Easter Bunny stamp set and Tuxedo Black Memento Ink to stamp the image onto a piece of scrap Petal Pink. Stamp the same image onto a piece of Post-it note or thin copier paper. Cut out the second image since it will be used as a mask. Lightly adhere the mask directly over the stamped image on the Petal Pink cardstock. Use the pictured bunny stamp from the set and the Tuxedo Black Memento Ink to stamp the bunny image directly over your masked flower crown. The result will have the flower crown appear as if it is on the bunny’s head.
- Next, use the butterfly stamp from the Easter Bunny stamp set and Tuxedo Black Memento Ink and stamp the image as if the butterfly is just about to land on the bunny’s foot.
- The last stamping is the “enjoy all the little moments” sentiment. This is also from the Easter Bunny stamp set. Use Tuxedo Black Memento Ink to stamp the sentiment directly under your bunny image.
- Use your choice of watercolor pencil colors from both assortments of Watercolor Pencils to add color and shading to your stamped bunny, flowers, and butterfly. The colors used in the example include Pumpkin Pie, Early Espresso, Rich Razzleberry, Garden Green, Balmy Blue, Bermuda Bay, Night of Navy, Calypso Coral, Crushed Curry, Granny Apple Green, Daffodil Delight, and Old Olive.
- Die cut your bunny using the 5th largest Stitched Rectangle Die.
- Tie a piece of the White Crinkled Seam Binding Ribbon around the front of the card, as pictured. The ribbon will go in front of the Balmy Blue center easel piece.
- Adhere the final piece of Country Gingham DSP (4” x 2 ½”) to the center of the final piece of Basic White (4 1/8” x 2 5/8”). Adhere the combined piece to the center of the center easel piece.
- Adhere your bunny colored and die cut piece to the center of the easel piece.
- Add a few Brushed Brass Butterflies to finish your card.
Be sure to check out the products shown below if you’re interested in adding any to your stash. Some of these items are on the soon to be retired list and are only available while supplies last! Click on any picture, and you’ll go directly to my online store.
Inky hugs,
Laurie
|
|
||
|
|
||
|
|
|
|
|
|
|
|
|
|
|
|
|
|
