Welcome to the December NC Demos Blog Hop! Our theme for this month is “What New With You?”. Each of us is sharing something new – a new technique, a new project, or (in my case) a new product suite from the soon-to-be-available Occasions Catalog! You probably just came from Tracie Evans Langley’s blog. Tracie’s project always inspire me! Thanks for continuing on the blog hop and stopping in to see my project.
If you’re like me, you spend a lot of time looking through SU!’s amazing catalogs. In fact, I bet you look through them multiple times. I know I do! One suite that stood out to me in the Occasions Catalog is called Painted with Love. It is featured on pages 18 and 19. The products in the suite are gorgeous! For this month’s blog hop, I created two boxes that are centered around products in the suite.
After the business of the holidays, I really appreciated a stunning project that came together very easily. It’s honestly a little embarrassing that there is absolutely no stamping involved in either box. But, I think they are pretty without adding ink!
The Painted with Love Specialty Designer Series Paper (DSP) is truly gorgeous. It has rich colors mixed with gold and, while there are abstract designs on some of the papers, there are more uniform designs on others. You will find this DSP collection incredibly versatile and one that I’m sure you’ll use for many occasions.
In the next few days, I’ll post further instructions on how to make the box. In fact, I’m going to attempt to post a video. Check back to see how that (mis)adventure goes! The basic steps for the boxes are listed below.
- Start with your choice of paper from the Painted with Love Specialty DSP cut to 4 1/2″ x 7″. Use the box die from the Lots to Love Box Framelits Dies to cut the DSP.
- For the other half of the box, use the same box die but a piece of Whisper White cardstock (cut to 4 1/2″ x 7″) for the other half of the box. I chose to use white cardstock for the back of my boxes. There were a few reasons for this – I like to conserve on using DSP, and the white backing for the box looks very finished.
- Use your bone folder to burnish the score lines on the box die cuts.
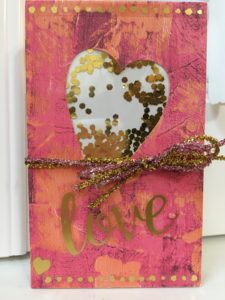
- Use the largest heart die from the Lots to Love Box Framelits Dies to cut a heart shape from the box half made with the DSP. Be sure to save the die cut heart shape for another project!
- Take two pieces of acetate, both cut in squares and just a little wider and taller than the heart opening. Put one of the acetate pieces on top of the heart opening, and use a pen to trace the heart outline onto the acetate. This will be your guideline of where to put the Gold Glitter Flakes. When you trace the heart, make your heart just a little bit larger than the true size of the heart. You won’t be able to see the pen markings if the traced heart is bigger than the opening.
- On your traced piece of acetate, add a pinch of two of the Gold Glitter Flakes inside the heart that you traced. You should add enough flakes to make sure the gold accent is visible. Glue the second piece of acetate directly on top of the first piece. You’ll capture the gold flakes in the middle of the two acetate pieces.
- Adhere the glued acetate pieces on the inside of the DSP side of the box. Line-up the acetate so the gold flakes align with the heart die cut. The technique of gluing the acetate pieces together and capturing the gold flakes helps keep the flakes in place. The flakes will move a little; however, you’ll be able to stand the box up and still see the flakes behind the heart. The flakes won’t move around as they would in a shaker card.
- Choose the color that you want behind the gold flakes. For one of the boxes, I added Calypso Coral cardstock. For the other box, I added Whisper White cardstock. It’s fun to try different background colors to see which you like the best. Adhere a piece of your chosen color behind the acetate pieces.
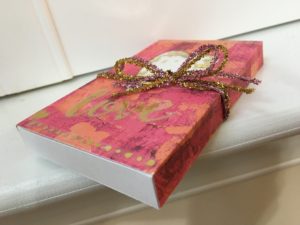
- Now, you’re ready to assemble your box. Since I use white cardstock for the back of your box, I glue the flaps on the white cardstock box piece and adhere them to the DSP piece. Visual cues work for me!
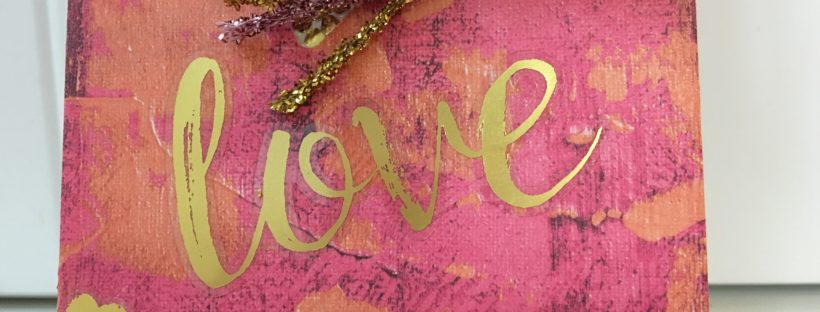
- Decorate your box as you would like. I decided to try the new Painted Love Gold Vinyl Stickers. This was definitely a stretch for me and something new. I’m usually not a huge sticker fan, but these stickers are very likely to change my mind. They are very easy to use and add a really nice touch to the box.
- I also used the new Love Mini Tinsel Trim Combo Pack. It has two really pretty colors – Gold and Powder Pink.
There is also a stamp set called Sure Do Love You that is part of the Painted With Love Suite. Check back to see a project that I’ll make using that set and the new Whisper White Narrow Note Cards and Envelopes. You’re going to be impressed with the options that you’ll have with the Painted Love Suite.
Please be sure to continue through the NC Demos Blog Hop! Hop on over to Sue Root’s blog. She has a great project to share this month. All participants in this month’s blog hop are listed below. Thanks so much for stopping by to see my projects. Please be sure to check back in the next few days for more inspiration using products from the Painted with Love Suite.
Pictured below are the products I used to make the boxes. The products will be available to purchase on January 3rd. Be sure to stop back then and click on any picture to go to my on-line store.
Happy Stamping,
Laurie
|
|
||
|
|
||
December Blog Hoppers
Laurie Meier <— YOU ARE HERE


