Welcome to the June NC Demos Blog Hop! I hope you just came from Amanda’s post. Didn’t she have an amazing project (as always) to share?! As you know, this month our blog hop is featuring projects that celebrate summer. Thank you so much for stopping by to see my project for this month!
When I think about summer, one of the first things that comes to my mind is bright, vibrant color. The beautiful colors from nature really impact my mood during the summer. I tend to make bolder, brighter cards and use fun, playful designs. And, recently, I’ve been having a lot of fun creating projects that make more than one card by creating one main focal point. For this month’s blog hop, I wanted to continue that trend and created a “4 for 1” summery project. Essentially, I created my own “DSP” on a standard sheet of Basic White card stock and, then, used the “DSP” to make four unique, summery cards.
Here are the basic steps that I used to create the cards.
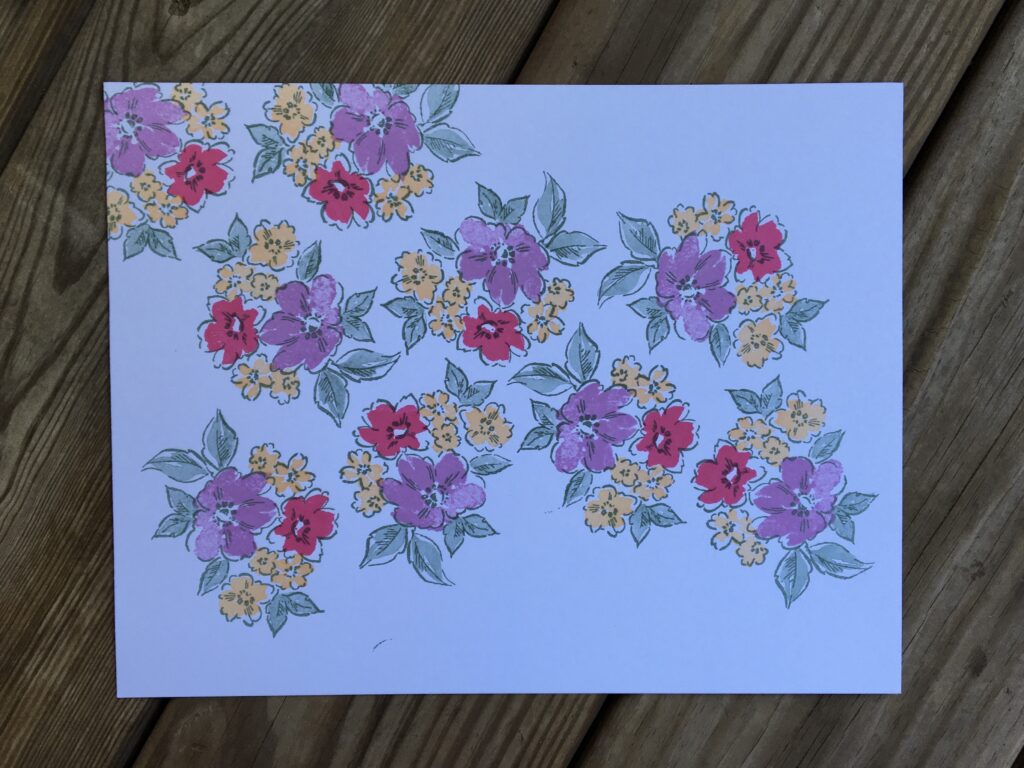
- The Hand-Penned stamp set just says summer to me! I decided to use one of the stamps from that set to be the basic design in my “DSP”. Below are pictures of how the stamping came together. I used all of the new In-Colors (Evening Evergreen, Fresh Freeshia, Polished Pink, Pale Papaya, and Soft Succulent) to make my paper. You can see the progression of the stamping below. It was such a fun process!
- Below is a picture of the final “DSP”. I really love the way that all five colors work together so well!
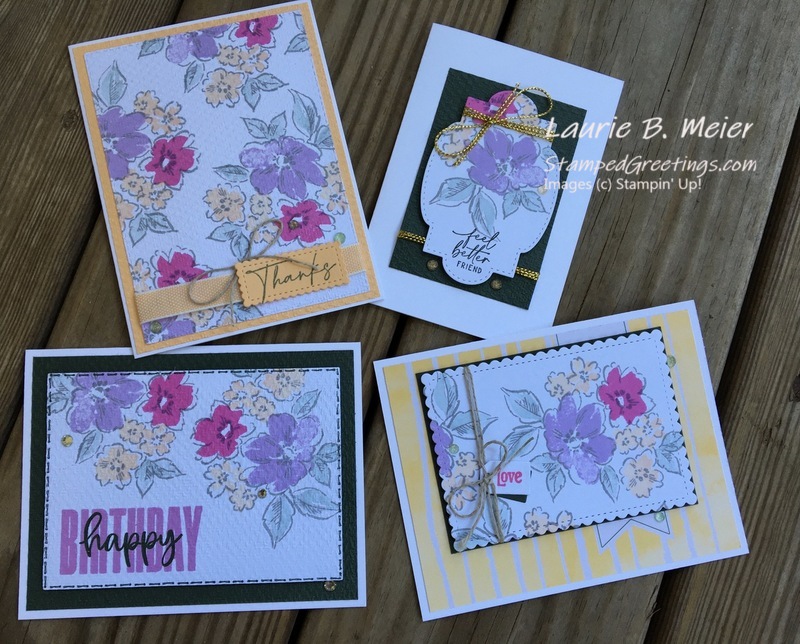
- Even though it was a little emotionally difficult to cut my paper, I did cut it into quarters. Each of the quarters was used to create a different summer-themed card. The four cards are pictured below in a group. Further down in my post, each card is pictured separately, and the recipe for each is given.
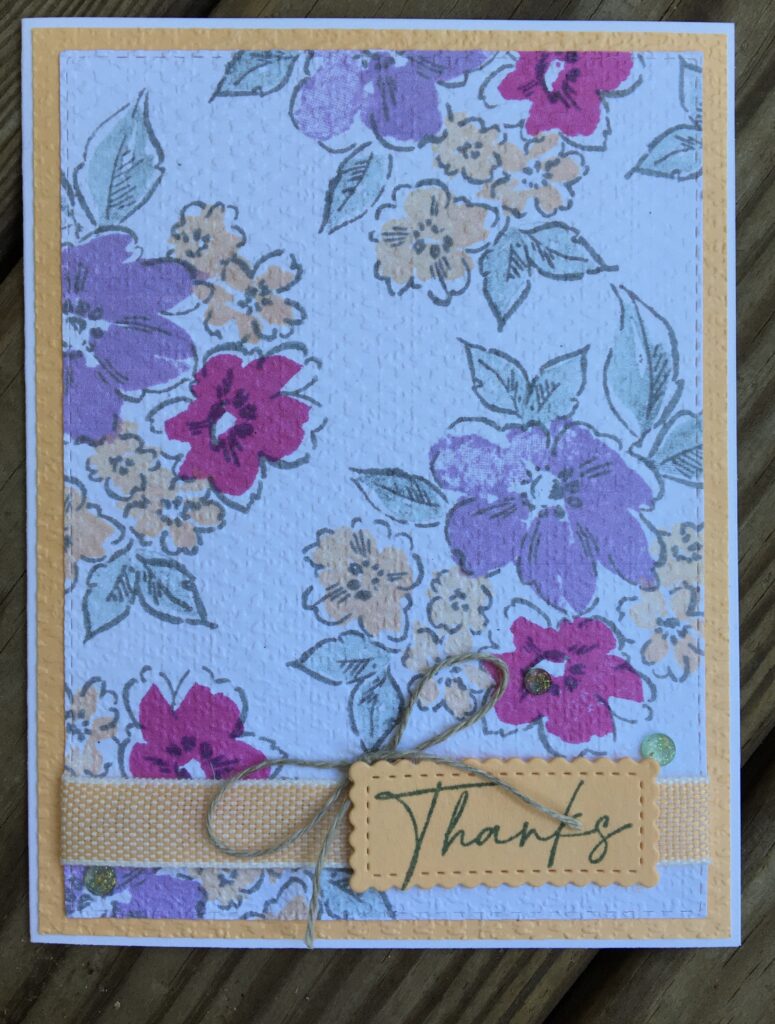
Card #1 – This card allows the “DSP” to really be the focal point.
Here are the main products that I used for the first card –
- Card base – Standard A2 size in Basic White card stock
- Frame on the front – Pale Papaya card stock cut just larger than the focal point
- Focal point – The “DSP” die cut with one of the Stitched Rectangle Dies.
- The sentiment is from the Hand-Penned Petals stamp set and is stamped in Evening Evergreen ink onto Pale Papaya card stock. It is die cut from the smallest scalloped rectangle die in the Stitched So Sweetly Dies collection.
- The embellishments include a piece of the Pale Papaya & White Ribbon, some Linen Thread, and a few Genial Gems.
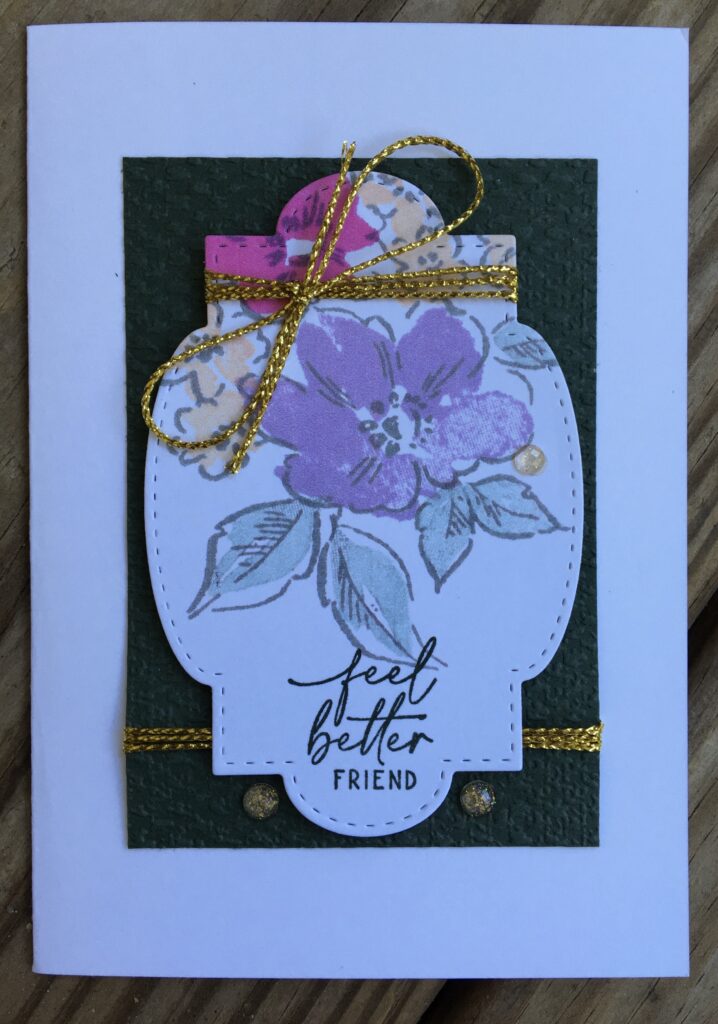
Card #2 – This is a note card size and shows off a fun die from the Stitched So Sweetly collection.
Here are the main products I used for the second card –
- Basic White Note Cards & Envelopes are the base for this card.
- A piece of Evening Evergreen card stock is cut to be just a bit bigger than the die cut focal point. The card stock is embossed with the Tasteful Textile 3D embossing folder.
- The focal point is die cut with one of the dies in the Stitched So Sweetly dies collection.
- The sentiment is from the Hand-Penned Petals stamp set and is stamped with Evening Evergreen ink.
- Embellishments include Simply Elegant Gold Trim and Genial Gems.
- The focal point is attached with dimensionals.
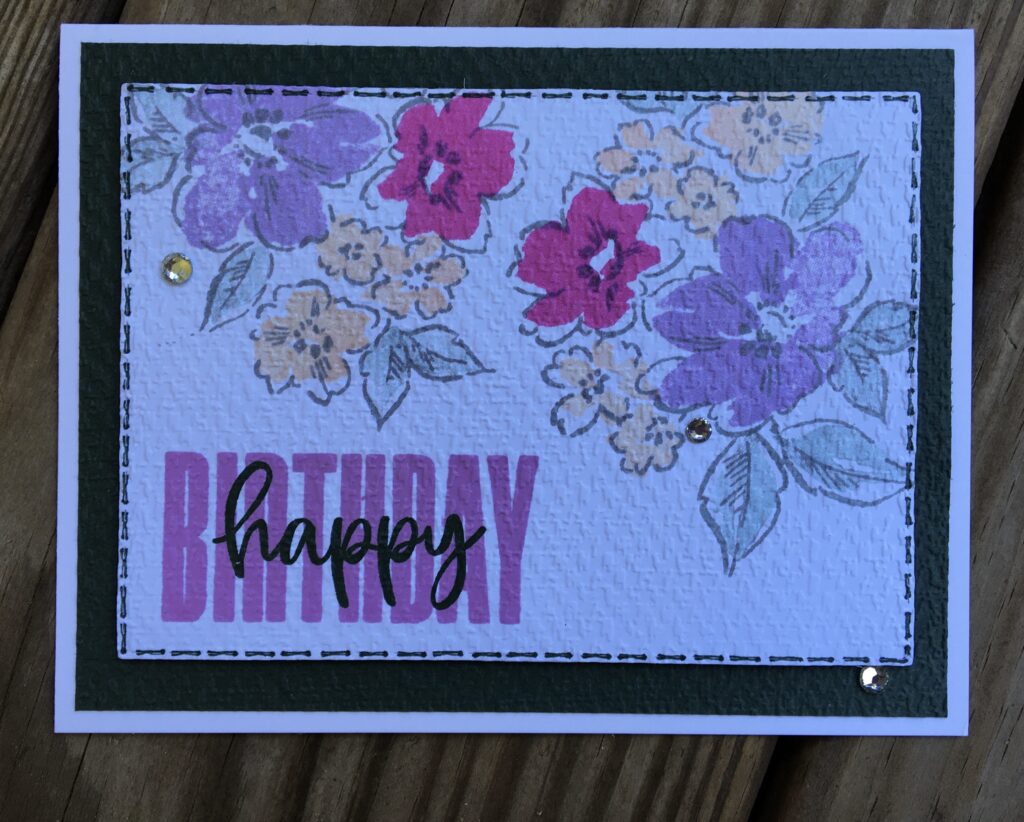
Card #3 – This card has a little bit of whimsy with the faux stitching and bold sentiment.
Here are the main products I used for the third card:
- Card base – Standard A2 size in Basic White card stock
- The frame is a piece of Evening Evergreen card stock cut to have a nice border around the focal point. It was embossed with the Tasteful Textile 3D embossing folder.
- The focal point was die cut using one of the dies in the Stitched Rectangles Dies Collection and then embossed with the Tasteful Textile 3D embossing folder.
- Faux stitching was added with an Evening Evergreen Stampin’ Write marker, using the narrow end.
- The sentiment is from the amazing Biggest Wish stamp set. “BIRTHDAY” is stamped in Fresh Freesia ink, and “happy” is stamped in Evening Evergreen ink. This stamp set is too much fun to use!!
- The focal point is adhered to the cards with dimensionals.
- A few Rhinestone Basic Jewels are added as embellishments.
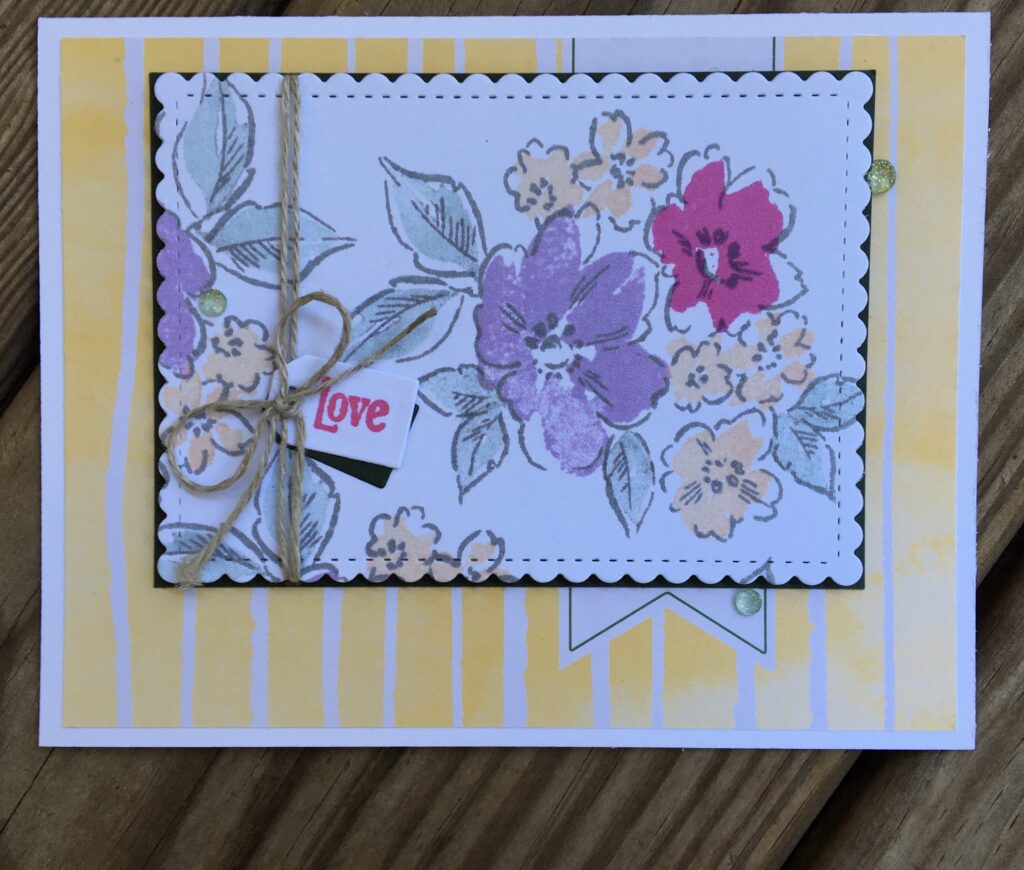
Card #4 – This card combines a beautiful M&M card with the “DSP”!
Here are the main products I used to make the fourth card –
- Card base – Standard A2 size in Basic White card stock
- The base layer on the card is from the Hand-Penned Memories & More Card Pack. [Thank goodness these cards are back in stock! They are absolutely gorgeous and so versatile in many projects. You really need to make sure you have some in your stock!!]
- The focal point is the “DSP” die cut with one of the Stitched So Sweetly dies.
- There is a piece of Evening Evergreen card stock cut to just a tiny bit larger than the die cut that acts as a very thin frame. [It also hides some of the wording on the M&M card!!] This is adhered directly to the base layer on the card.
- The “Love” sentiment is from the Quiet Meadow stamp set (another one of my absolute favorites right now!). It is stamped onto a scrap piece of Basic White card stock with the new Polished Pink ink. The sentiment is then die cut with the small banner die in the Meadow Dies set. A second small banner is die cut from Evening Evergreen card stock and layered off center underneath.
- Linen thread is used to wrap around the focal point and attach the sentiment. The focal point is adhered with dimensionals.
- A few Genial Gems add the final bling.
I really hope that you’ll create your own “DSP” and then make some cards from the paper. It really is a fun project!
Now, please continue on this month’s NC Blog Hop by going over to Tracie’s post. I know she has a fabulous project to share with us. And, be sure to visit everyone who is in the blog hop this month. You’ll see a list of the participants below.
Also below are the main products that I used to make the “4 in 1” project cards that I shared. If you click on any picture, you’ll go directly to my online store.
Until next time….
Happy stamping!
Laurie
June 2021 Blog Hoppers
Tina Lesson
Amy Kinler
Jo Anne Hewins
Toni Campana
Amanda Howard
Laurie Meier <— YOU ARE HERE
Tracie Evans Langley
Main Products Used to Make the “4 in 1” Project!
|
|
||
|
|
|
|
|
|
|
|
|
|
|
|
|
|

