Welcome to the NC Blog Hop for October! If you just came from Tracie’s post, you know that this month’s NC Blog Hop them is “Know When to Fold ‘Em”! I LOVE fun fold cards and was really excited when Tracie announced the theme for this month. And, Tracie did an awesome job with her project. Don’t you agree? Thanks so much for stopping by to see the fun fold that I am sharing this month.
Before I get into the project, I need to make sure that I give credit where it is due. The fun fold cards that I am sharing were directly inspired by the amazing card maker, Connie Stewart. Be sure to check out her original post.
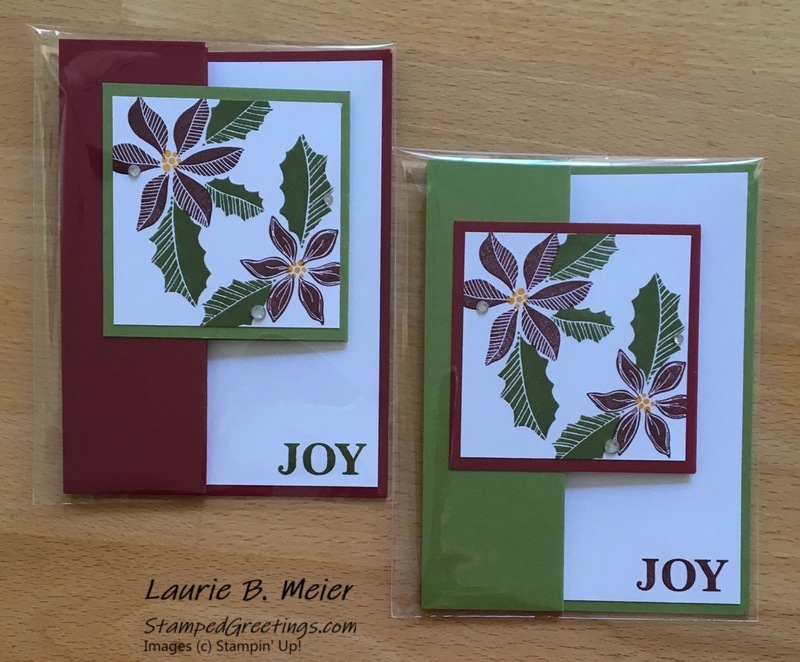
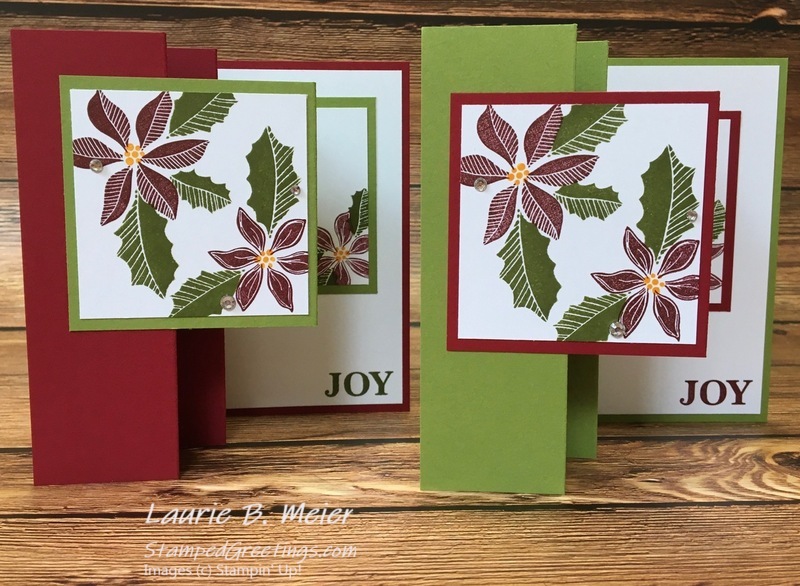
Below are a few pictures of the fun fold cards that I have made featuring the returning favorite Merriest Moments stamp set. This set was so popular that Stampin’ Up! brought it back again in this year’s holiday catalog. Check out how these fun fold cards open to show off beautiful designs inside. They also stand very easily on their own. And, as an added bonus, you can use three pieces of cardstock (two pieces of color cardstock and one piece of Basic White cardstock) to make two cards!
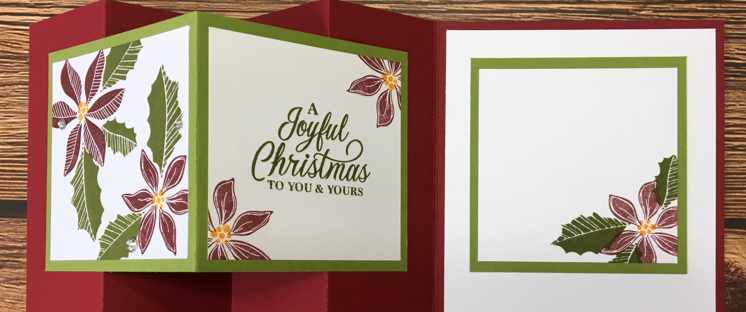
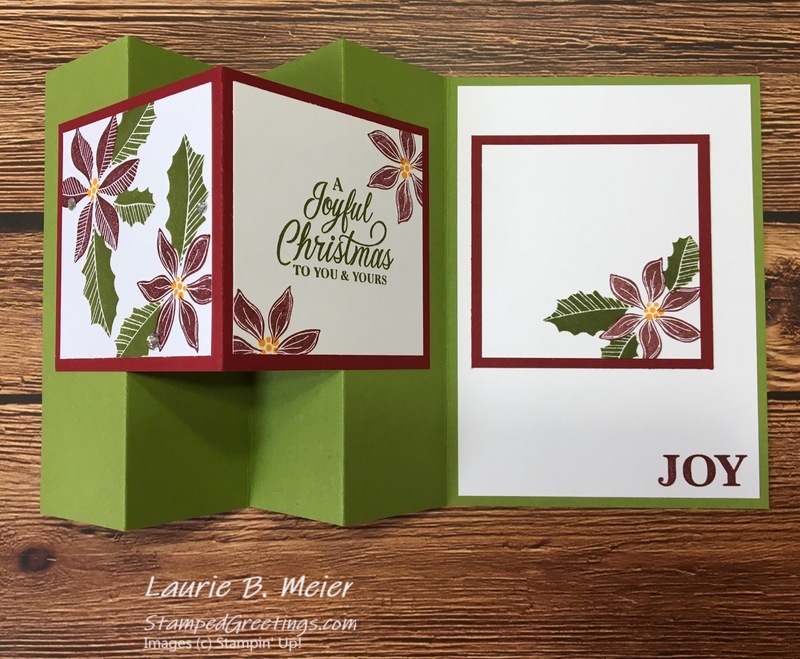
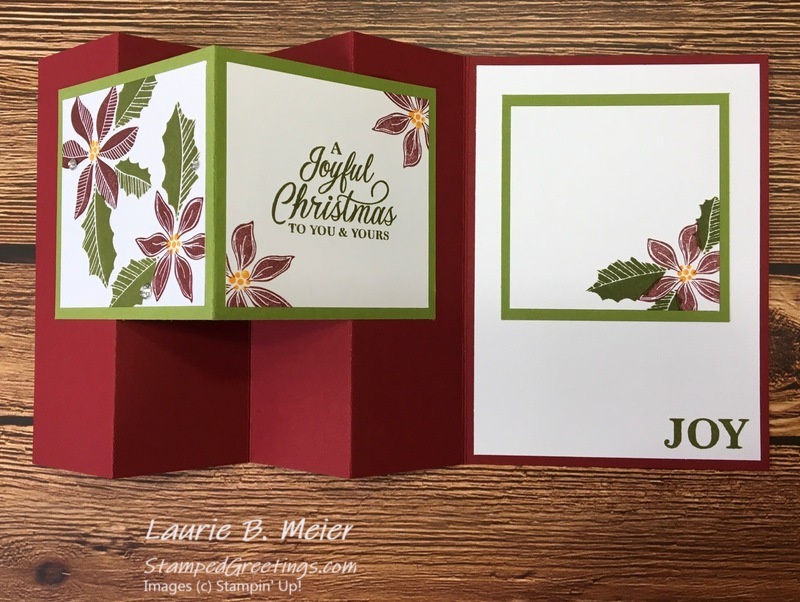
Here are a few pictures of the cards when they are extended to show the inside of the front accordion folded piece. I just love how these colors and stamps work together so well. These truly are simple (yet elegant) cards in my opinion. And, they are really easy to make.
Here are the basic steps that you can follow to make your cards. Please note that Connie Stewart has a great template (linked above) to cut your pieces. If you’re a visual person, you may want to look at her template. I have written the instructions (steps 1 and 2) out below.
- For each of the pieces of color cardstock, you will cut the following. (Note: I used Old Olive cardstock and Cherry Cobbler cardstock.) Start with a piece of each color that measures 8 1/2″ x 11″.
- On the 8 1/2″ side, cut your piece at 5 1/2″. This will give you a piece that is 5 1/2″ x 11″. This will be your card base. Score this piece on the 11″ side at 1 3/4″, 3 1/2″, 5 1/4″, and 7″. Accordion fold this piece as shown above.
- You’ll need two additional pieces from each color of cardstock.
- After you cut the card base, you’ll be left with a piece of color cardstock that measures 3″ x 11″. From this piece, cut at 6″ on the 11″ side to get a piece that measures 3″ x 6″. Score that piece at 3″ on the 6″ side. This is the piece that will be used on the accordion fold (poinsettias on the front and greeting on the inside) as shown above.
- The last piece of color cardstock from each color that you’ll need will be the piece that will go on the inside of the card. It comes from the remaining piece that you have after you cut the piece in the step above. You have a piece that is 3″ x 5″ remaining. Cut this piece to 3″ x 2″. You’ll have a little piece of leftover cardstock that will not be used.
- The Basic White (or other neutral color) cardstock will be cut into eight pieces for the cards. Start with a piece of Basic White cardstock that measures 8 1/2″ x 11″.
- On the 11″ side, cut your piece at 5 1/4″. This will give you a piece that is 5 1/4″ x 8 1/2″. On the 8 1/2″ side, cut at 3 3/4″. Take the remaining piece, and cut at 3 3/4″ again. You’ll have a very small piece of cardstock leftover and will have two pieces that measure 3 3/4″ x 5 1/4″. They will be used for the inside of your card. In the pictures, they are the pieces that have “JOY” stamped on the bottom right corner.
- You’ll need six additional pieces from the Basic White cardstock. Each of these six pieces will measure 2 3/4″ square.
- After you cut the pieces above, you’ll be left with a piece that measures 5 3/4″ x 8 1/2″. On the 5 3/4″ side, cut at 2 3/4″. Then take that piece, and cut three squares that measure 2 3/4″. You will have a little piece of leftover cardstock that will not be used.
- Take the last piece of Basic White that you have to create the final three 2 3/4″ square pieces. The piece that is left will initially measure 3″ x 8 1/2″. Start by cutting the 3″ side down to 2 3/4″. Then, cut three 2 3/4″ square pieces. You will have a little piece of leftover cardstock that will not be used.
- Now – Get out the stamps and ink that you want to use to decorate your card! I used the gorgeous Merriest Moments stamp set for all the images on my cards. The inks that I used are Cherry Cobbler (my absolute favorite red for the holidays), Old Olive, and Mango Melody (to give the middle of the poinsettias a pop!). Use the pictures above as an example of how you might want to stamp your cards. I chose to keep the front image pretty simple and to have the sentiment on the inside of the accordion fold. The beauty of a design like this is you can do what you want to make it your card.
- It’s time to put everything together!
- Start with the images that will go on your accordion fold. Get the two pieces of color cardstock that measure 3″ x 6″ and are scored at 3″. Adhere two of your stamped Basic White pieces, as pictured. Adhere the front panel first. Be sure to only put glue on the part of the color cardstock that will be attached. Fold the accordion flat to adhere the back piece.
- Adhere the 3 3/4″ x 5 1/4″ piece of Basic White cardstock to the inside of your card.
- Attach the remaining stamped piece of Basic White to the 3″ x 3″ piece of the color cardstock. Adhere this piece so that it is directly behind the folded piece on the accordion fold when the card is flat.
- Add bling to the front of your card. I used the beautiful and classic Rhinestone Basic Jewels to finish my card.
I know that you are going to find many ways to use this amazing design. And, I will definitely be making more Christmas cards like the ones that I shared above. I really like the simple, elegant feel.
Please make sure that you continue on the blog hop. Next up is the amazing Kristine Vincente. Below you can see all the folks who are participating this month.
Also, at the end of this post, you’ll see the main products that I used to create these cards. If you click on any picture, you’ll go directly to my online store.
Inky hugs,
Laurie
October 2022 Blog Hoppers
Tina Lesson
Jo Anne Hewins
Tracie Evans Langley
Laurie Meier <— YOU ARE HERE
Kristine Vicente
Tonya Bowers
Toni Campana
|
|
|
|
|
|
|
|
|
|
|
|
