Welcome to the September NC Demos Blog Hop! If you just hopped over from Jo Anne’s post, I’m sure you’ll agree with me that her project was awesome (as usual)! Thanks so much for stopping by to see the project that I am sharing this month.
The theme for this month’s blog hop is Time to Leaf Summer Behind 🙂 A perfect stamp set to use in homage to that theme is Soft Seedlings! And, a great way to add some fun is to make a fun fold card!
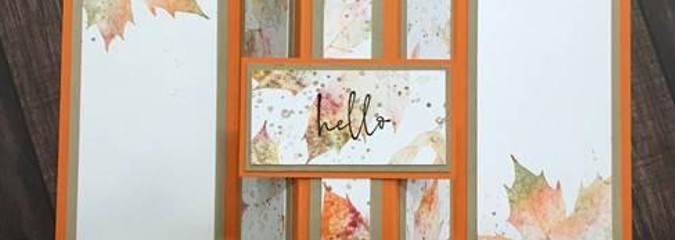
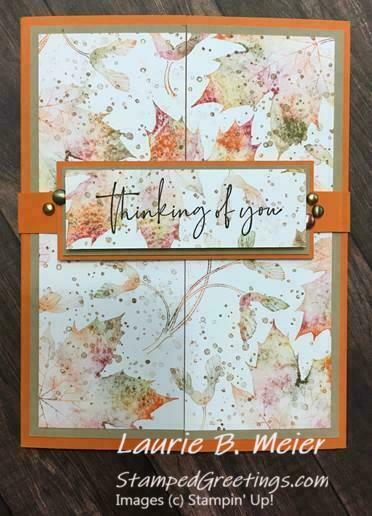
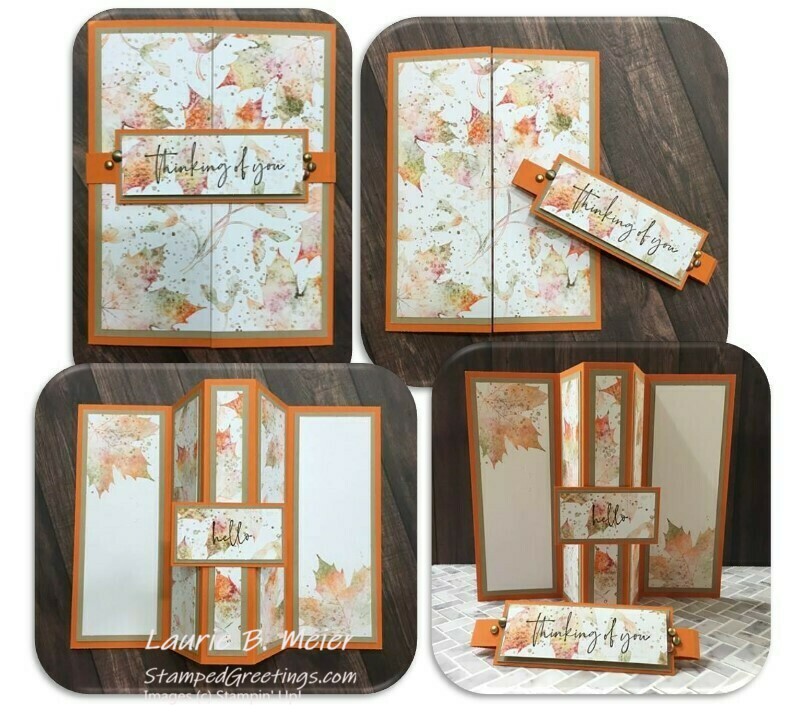
This post is the second of two posts that give instructions on making the card that is pictured above. The first post can be found here (includes a step-by-step video) and focuses on an amazing baby wipe technique that I used to created the gorgeous Soft Seedlings stamped focal pieces for this fun fold card. The pictures below show how the card would be opened by the recipient. It becomes a beautiful piece that stands on its own!
This post focuses on the fun fold technique that I used to create the card. Below is a video that goes through the process, supplies, and measurements that you’ll need. You don’t need the baby wipe piece to make the card. Grab a few pieces of DSP and plain cardstock instead!
A summary of the card stock measurements that I used are shown below –
Pumpkin Pie Cardstock –
- 8 1/2″ x 5 1/2″ – scored on the 8 1/2″ side at 2 1/8″, 3 3/4″, 4 3/4″, and 6 3/8″
- 8 1/2″ x 1/2″ – scored at 2 1/8″
- 3 1/4″ x 1 1/4″
- 2 1/4″ x 1 1/4″
Crumb Cake Cardstock –
- 4″ x 5 1/4″
- 1 7/8″ x 5 1/4″ (2 of these pieces)
- 1 3/8″ x 5 1/4″ (2 of these pieces)
- 3/4″ x 5 1/4″
- 3 1/8″ x 1 1/8″
- 2 1/8″ x 1 1/8″
Two panels to use for the focal point on the inside and outside of the card. I used two pieces that were created with the baby wipe technique. Check out this post to see details of how I made the panels. Both panels measure 3 3/4″ x 5″. You don’t need a baby wipe stamped piece to make your card. Use DSP or another stamped piece instead!
One panel will be cut in half on the 3 3/4″ side at 1 7/8″.
The other panel will be cut into four pieces on the 3 3/4″ side into the following widths. Start with the left most piece when you cut, and cut in order of the widths shown below. That will ensure that the image looks continuous on the inside of your card. The widths are:
- 1 1/8″
- 1/2″
- 1 1/8″
- 1″ – This piece will be used for the inside and outside sentiments.
The last pieces you will need are Basic White pieces (stamped if you would like) and cut to 1 5/8″ x 5″. You’ll need two of these. They will be the final layers for the area to add a message to the inside of your card.
Your paper trimmer may get a workout when you’re cutting the pieces for this card! But, I think you’ll agree that the effort is definitely worth it when you see the end result! I hope you try this fun fold, and I would really love to see what you make.
Please make sure that you continue on our blog hop by hopping over to Toni’s post. I know she has a wonderful project to share with us.
Below you’ll find a list of the participants in this month’s blog hop. Be sure that you check out everyone’s posts.
Also below are the products that I used to created the Soft Seedlings fun fold card. Simply click on the picture of any product, and you’ll go directly to my online store.
Inky hugs,
Laurie
NC Demos September Blog Hoppers:
Tina Lesson
Jo Anne Hewins
Laurie Meier <– You are here
Toni Campana
Tracie Evans Langley
Supplies I used to make the fun fold card:
|
|
||
|
|
|
|
|
|


