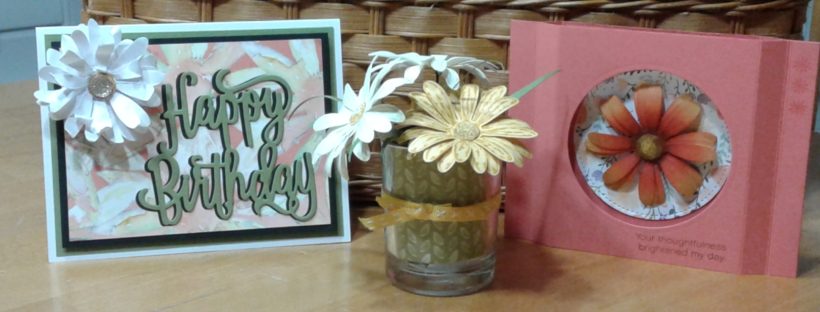
The three pictures in the banner photo are the projects that the group made at our recent card club. Each project features products from the Delightful Daisy suite (pages 126 and 127) of the SU! annual catalog. This suite is another that allows me to showcase my motto – One stamp set – Three designs – Endless possibilities!
Each of the three projects also highlights a different technique to make flowers using the incredibly popular Daisy Punch. Today’s post will focus on a fun, quick happy birthday card!
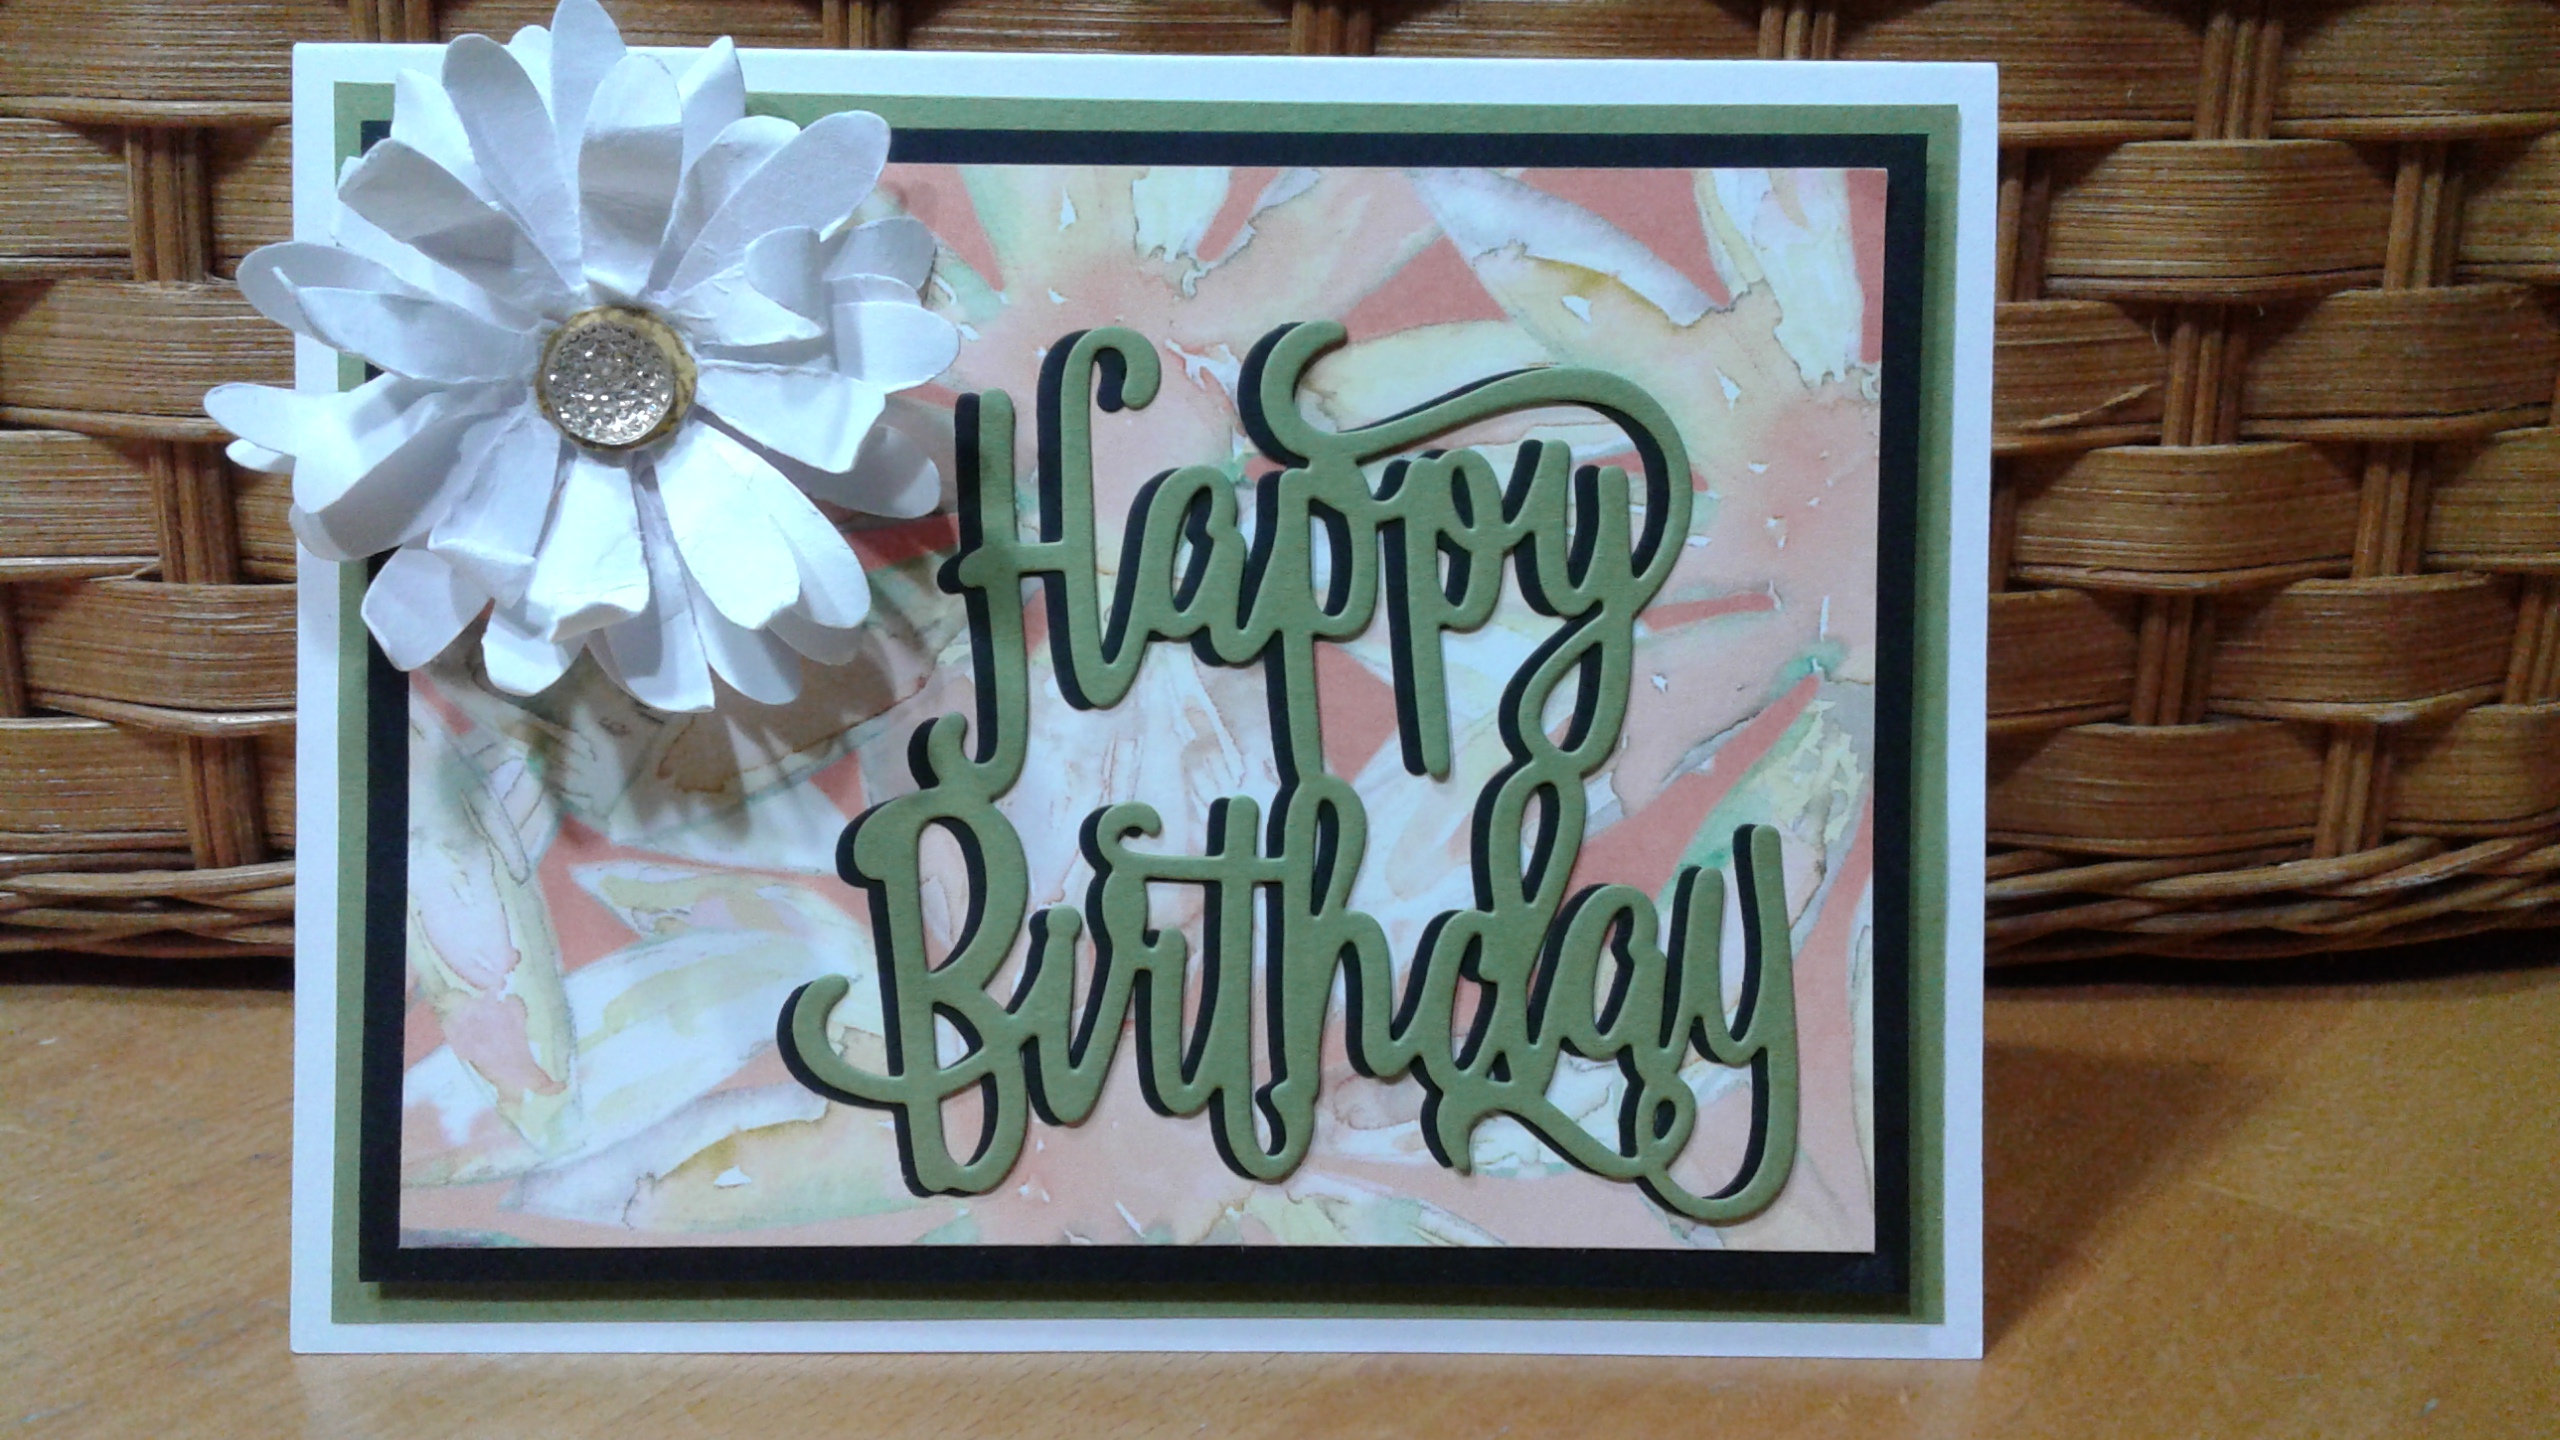
Take a look at the card below. It combines textures, colors, layers, and fun to add to your arsenal of I-just-remembered-that-I-need-to-send-a-birthday-card stash. Trust me – I have one of those stashes as well! Directions for the card are listed after the picture.
- The base of the card is a piece of Whisper White cardstock cut to 5 1/2″ x 8 1/2″ and scored at 4 1/4″ on the 8 1/2″ side.
- The next layer of color is a piece of Old Olive cardstock cut to 5 1/4″ x 4″. [Paper saving tip – I used this piece to die cut the Happy Birthday. Die cut from the center of your Old Olive piece.]
- The next layer of color is a piece of Basic Black cardstock cut to 5 x 3 3/4″. [You guessed it! I used this piece to die cut the second Happy Birthday. Again – die cut from the center of your Basic Black piece.]
- The die cut referenced in steps 3 and 4 above is the new Happy Birthday thinlits. Another thinlit that you will become one of the most used in your collection!
- The top layer of color is from the gorgeous Delightful Daisy Designer Series Paper (DSP). Simply stated – You need this paper! The colors are beautiful, and the designs are really amazing. Look at the DSP on this card. Isn’t it just gorgeous?
- Now – Let’s get to the daisy! I love the shabby chic look of the daisy and hope you agree. The trick to make this type of flower is pretty simple. It’s water! Yup, plain old water.
- Punch out three daisies from Whisper White cardstock using the Daisy Punch. Fill up a spray bottle with water. Put one daisy in the palm of your hand and spritz it with water. Don’t saturate the daisy, but get is wet enough that when you make a fist, the daisy wrinkles and closes. Do the same thing with the other two daisies. Set them aside to dry.
- When the daisies are dry, use your favorite glue to adhere the daisies together. Try to offset the petals to make the flower look more realistic. You’ll be able to shape the flower as you would like. Add a large gold Faceted Gem to the center of the finished daisy.
- Now, you’re ready to put the card together.
- Adhere the Old Olive cardstock piece to the Whisper White card base.
- Adhere the Delightful Daisy DSP piece to the Basic Black piece.
- Glue the two die cut Happy Birthday pieces together. Offset the pieces to allow a shadow from the Basic Black die cut.
- Before you adhere your flower and die cuts to the DSP, place the pieces on the card to make sure you know where they will be glued.
- Finish the card by using dimensionals to adhere the Basic Black piece to the Old Olive piece.
You will find that this layout can be used for many birthday cards. Change the DSP, the colors, the flower to make it more personal for the person who will receive the card. This design will be one that you’re going to want in your back pocket. By the way – Did you notice there is absolutely no stamping involved in this card?
Below are pictures of the main items that I used to make this card. If you click on any picture, you’ll go to my on-line store. My next post will feature the Calypso Coral shadowbox card pictured in the banner photo. You won’t want to miss it!
Happy stamping!
Laurie
|
|
|
|
|
|
|
|


