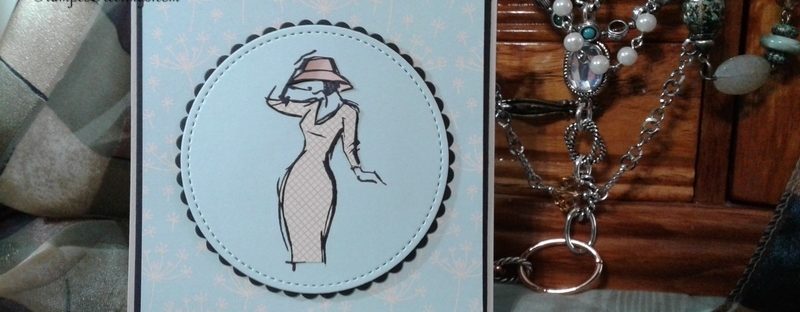
When I first saw the Beautiful You stamp set in the Occasions catalog, I admit that I didn’t pay it much attention. But, after I saw so many gorgeous cards that everyone was making with the set, I ordered the Beautiful You stamp set. If you don’t have it yet, you really should consider adding it to your collection. It has helped me with the motto – One stamp set – Three designs – Endless possibilities.
I recently shared a sneak peek of the cards that I put together for a recent card club. If you didn’t see that sneak peak, click here. Today, I would like to share the sassy paper piecing card using the Beautiful You set. In my next two posts, I will share the other two cards that we made at our card club. Detailed instructions will be provided for each card.
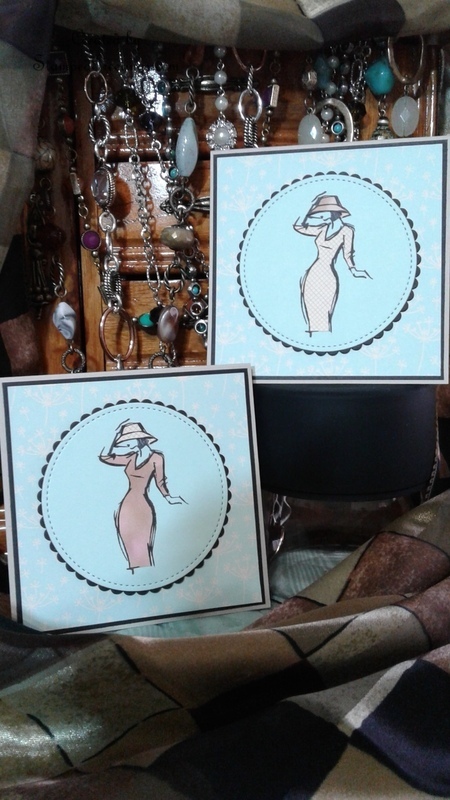
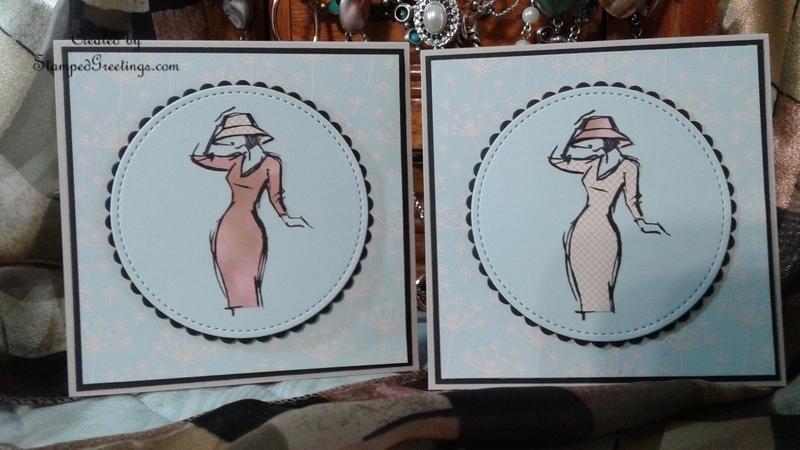
Since the stamped image is a little sassy and shows a lot of confidence, I decided to add a little clothing accessory bling to the photos. Here is the first picture that showcases both cards.
Next, take a look at each individual card. You’ll notice that the dress in one card is the same pattern as the hat in the other. That will be explained further in the directions.
Last, below is a picture of both cards together with a little jewelry and scarf bling in the background.
I hope you’ll CASE this design. The directions for the card are below:
- Use a piece of 12″ x 12″ Sahara Sand cardstock from the Falling in Love Cardstock Pack to make the base of the card. Cut the base to 8″ x 4″, and score at 4″ on the 8″ side. I like making 4″ x 4″ cards for a fun change to the standard A2 card size (4 1/4″ x 5 1/2″).
- Cut a piece of Basic Black cardstock to 3 7/8″ x 3 7/8″. This is going to be the frame behind the patterned Designer Series Paper (DSP).
- Use the largest scalloped circle die in the Layering Circles Framelits dies set, and die cut the scalloped circle from the center of the square piece of black cardstock that you just cut. This is an awesome trick to use. You can conserve paper by cutting shapes from background pieces. No one will ever know there is a scalloped circle cut from the black framed background!
- Cut a piece of the Falling In Love Designer Series Paper to 3 3/4″ x 3 3/4″. I used the gorgeous Soft Sky piece with Very Vanilla dandelions in the pattern.
- Stamp the pictured image from the Beautiful You stamp set with black Archival ink onto a piece of Soft Sky cardstock. Soft Sky is another color available in the Falling In Love Cardstock Pack.
- Die cut the stamped image using the largest circle in the Stitched Shapes Thinlits dies.
- Adhere the scalloped circle black cardstock piece to the stitched circle stamped piece.
- The hat and dress are made with the paper piecing technique. Choose a two patterns from the Falling In Love DSP for the dress and hat. Cut the pieces to about 2″ x 3″. Stamp the pictured image on both pieces using black Archival ink. Fussy cut the dress and hat from both pieces. Decide which dress goes with which hat. Glue the dress and hat pieces over the stamped image. Paper piecing is a great way to use your scraps of DSP!
- Finish the card by adhering the card layers together. Use glue or dimensionals depending on the layered effect you would like.
- [Not pictured] On the bottom right corner of the card, “Life looks beautiful on you” is stamped with the black Archival ink. It is the final sassy touch to the card.
Now, that you have figured out that you really need the Beautiful You stamp set in your collection, you can click on the image of the set below and go directly to my on-line store. Also shown below are the other featured items that I used to make the card.
Happy stamping!
Laurie
Product List
|
|
|
|
|
|
|
|
|
|
