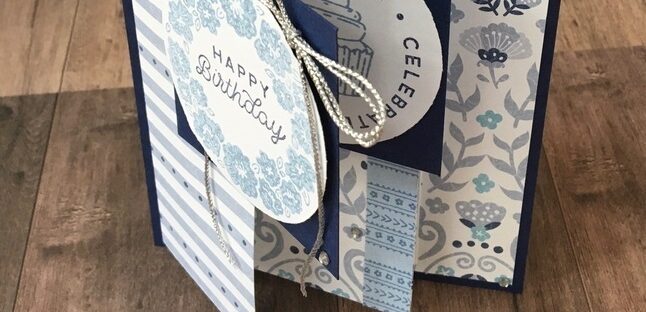
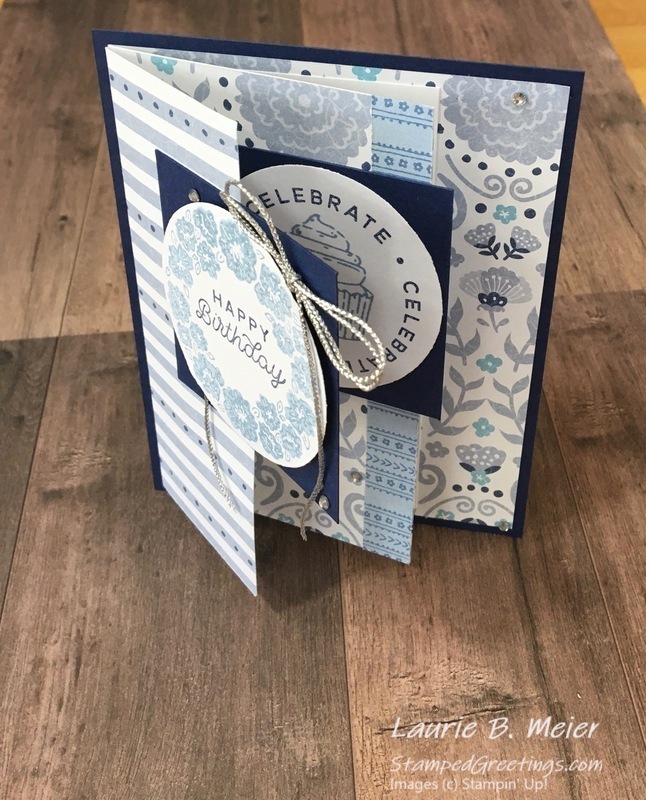
Lately, I’ve been focused on using my stash of Designer Series Paper (DSP). I have quite a few pieces of gorgeous paper that I just haven’t had the desire to cut. Perhaps, you have the same issue?!? If so, check out this great fun fold that will show off your DSP and will be fun to give to your family and friends.
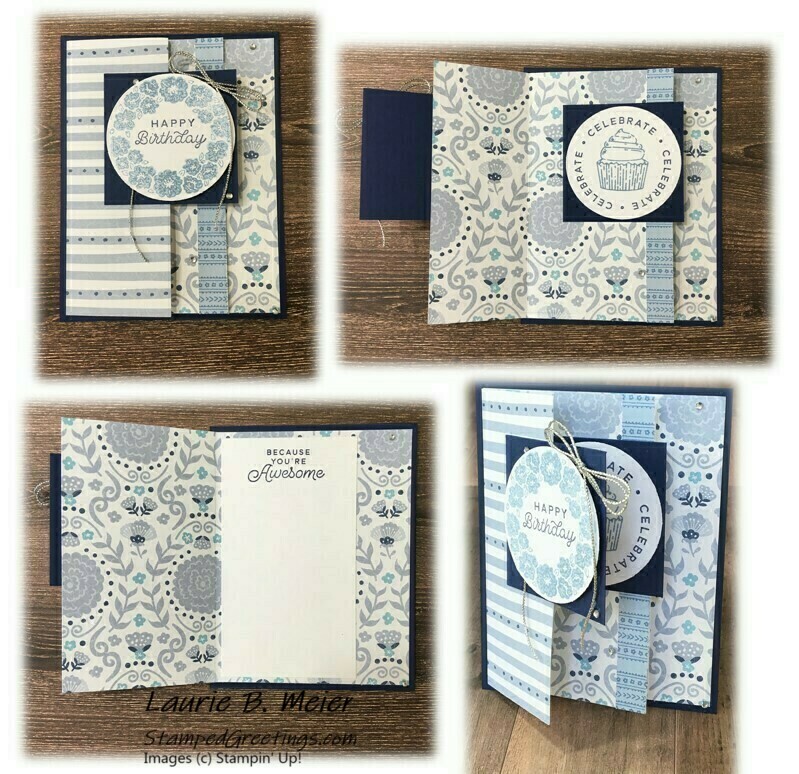
Here is a great way to see the multiple parts of this card –
 Just too much fun! Don’t you agree?
I would love to show you the basic steps that you’ll need to make this card. Check out the video below. (If you prefer written directions, you’ll find them further down in this post).
These are the basic pieces of paper that you’ll need to make the card that I featured –
- Night of Navy Cardstock: 5 ½” x 4 ¼”, 2 ½” x 2 ½” (2 pieces)
- Basic White Cardstock: 5” x 2 ¾”, 6” x 3” scrap piece for sentiments
- Countryside Inn DSP: 5 ¼” x 12” (design is landscape), 6” x ½” piece for trim
Instructions to make the card –
- Score the 5 ¼” x 12” DSP piece at 2”, 5”, and 8”.
- Fold the score lines (as if you are looking at the DSP), as follows: 2” score line valley fold, 5” score line mountain fold, and 8” score line valley fold.
- Turn your DSP over, and adhere the area between the 2” score line and the 8” score line together. This will give you a “page” in between the front 2” flap and the back of the card.
- Adhere the back of this piece to the Night of Navy 5 ½” x 4 ¼” piece. Center the DSP to allow a 1/8” border around the DSP.
- On the 6” x 3” scrap piece of Basic White cardstock, use stamps from the Circle Sayings and Clear Blocks C and D to create your sentiments. The example has two sentiments – one with “Happy birthday) inside a circle of flowers and one with a cupcake surrounded by multiple “celebrate” sentiments. Each sentiment has part stamped with Boho Blue ink and part stamped with Night of Navy ink.
- Punch out these sentiments with the 2 3/8” Circle Punch, part of the Circle Sayings Bundle.
- Adhere one of the 2 ½” square pieces of Night of Navy cardstock to the 2” flap (first layer of the card). Use the pictures as a guide for placing this piece. Be sure to add multipurpose liquid glue only to the area needed to adhere this piece to the flap!
- Adhere the 6” x ½” piece of Countryside Inn DSP to the right edge of the center “page” of the card. Trim off the excess with your snips.
- Adhere the second 2 ½” square pieces of Night of Navy cardstock to the center “page” of your card, as pictured. You want to align this piece so that when the card is closed, it is directly behind the cardstock piece on the flap. Again, be sure to add multipurpose liquid glue only to the area needed to adhere this piece to the “page”. Tip: Add your adhesive to the back of your cardstock. Then, hold this piece flush with the piece that is already adhered on the flap (the glued side will be exposed). Fold the “page” toward the flap to adhere the cardstock to the “page”.
- Adhere the circle punched sentiments on the square pieces of Night of Navy cardstock. The circle sentiment on the front flap is adhered with Stampin’ Dimensionals. The circle on the “page” is adhered with multipurpose liquid glue.
- On the 5” x 2 ¾” piece of Basic White cardstock, use the “because you’re awesome” stamp, your Clear Block D, and Night of Navy ink to stamp the sentiment for the inside of your card. Adhere this piece, as pictured, so that it is not seen when the card is closed.
- Finish your card by adding a double bow made from the silver Simply Elegant Trim to the front flap, under the circle punched sentiment. Add Rhinestone Basic Jewels with your Take Your Pick Tool.
I hope you’ll try this amazing fun fold. It is pretty quick and incredibly versatile. The main products that I used to create my card are shown below. Click on any picture, and you’ll go to my online store.
Inky hugs,
Laurie
|
|
|
|
|
|
||
|
|
|
|
|
|
|
|
|
|
|
|
|
|
|
|
|
|


