Welcome to the first Stamp ‘N Hop blog hop! I am honored to be part of a wonderful group of talented stampers who are sharing our favorite products from the Occasions catalog. If you’ve just come from Mo Rootes‘ post, I’m sure you found her project inspiring! I really like Mo’s stamping style and will definitely be CASEing her project. Thanks so much for continuing your blog hop by stopping by to see my post!
I have been an awe by the amazing cards that I have seen created with the Waterfront stamp set. Honestly, watercoloring has always intimidated me a little. But, with the Waterfront stamp set, creating a watercolored project is quite a lot of fun.
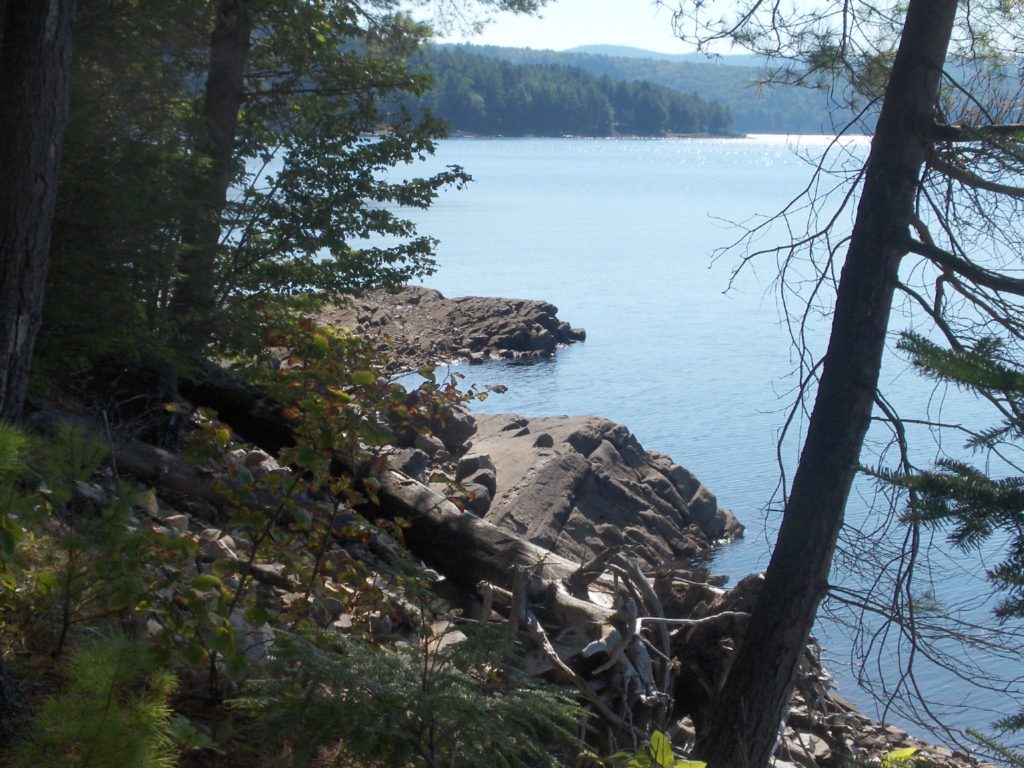
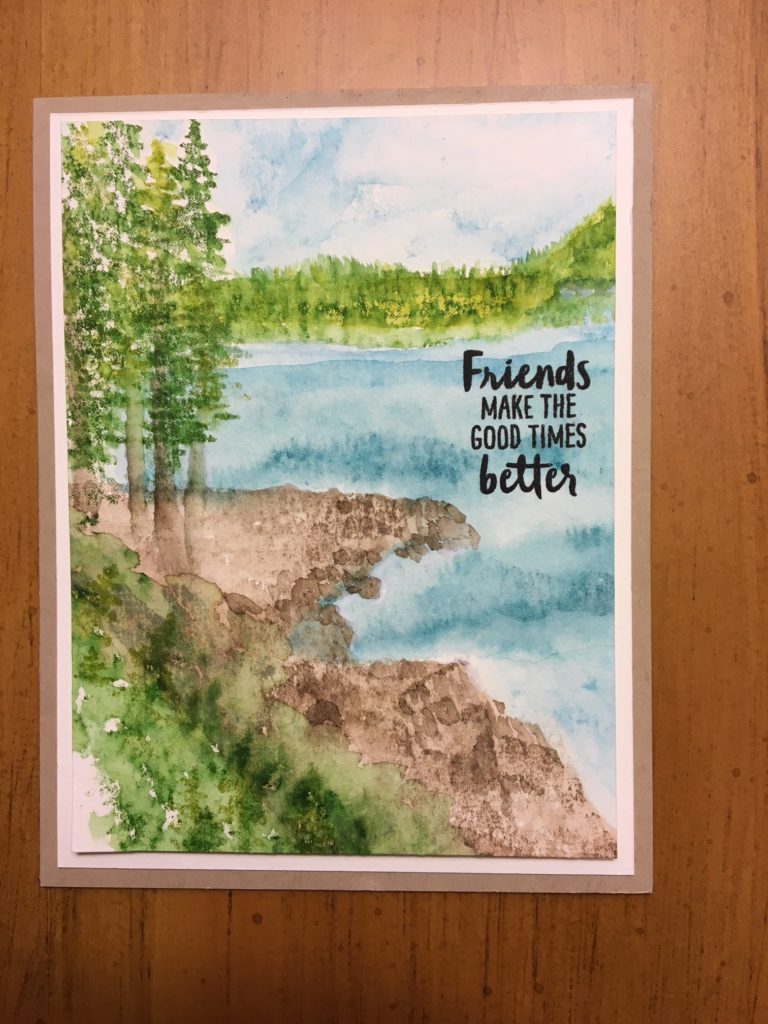
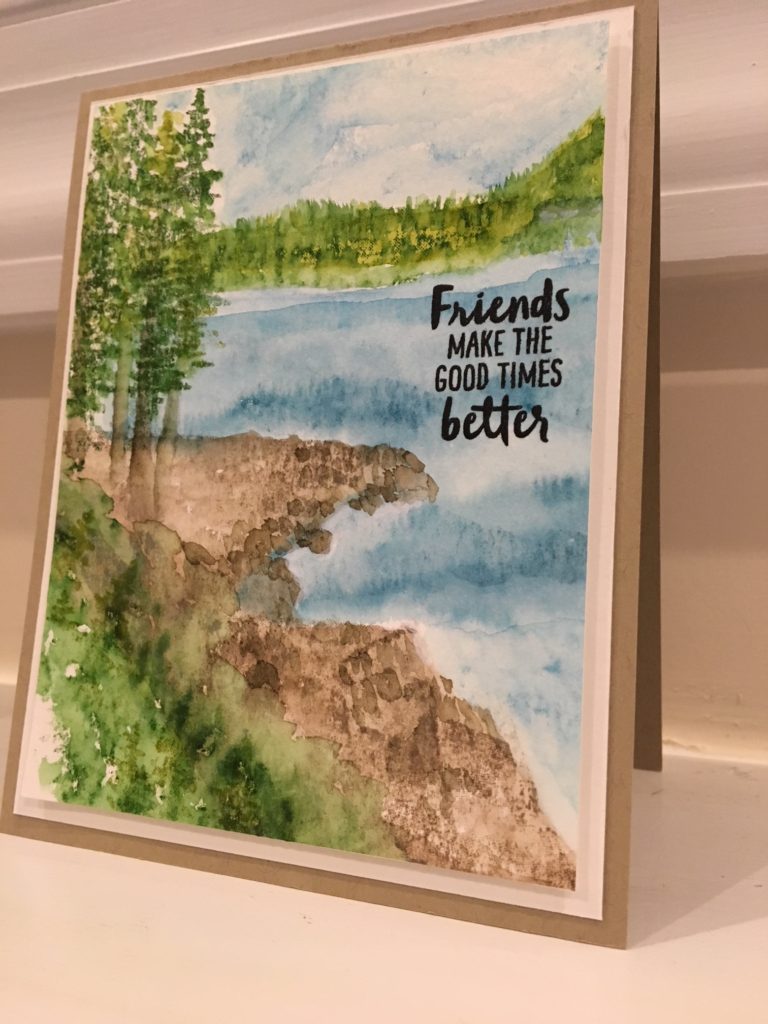
Our family has a summer camp at a lake in Upstate New York. It is a place to relax, rejuvenate, and reconnect with family and friends. My blood pressure literally falls when we get to our camp, unpack, and then sit outside to view the lake. The view from our beach was the inspiration for my card. Below is a real picture of the view, and beside it is the finished card.
- The card base is a piece of Crumb Cake cardstock cut to 4 1/4″ x 11″. It is then scored at 5 1/2″ on the 11″ side to form a top-folding card.
- The frame is a piece of Watercolor Paper cut to 4″ x 5 1/4″.
- The final watercolored card front is cut to 3 3/4″ x 5″.
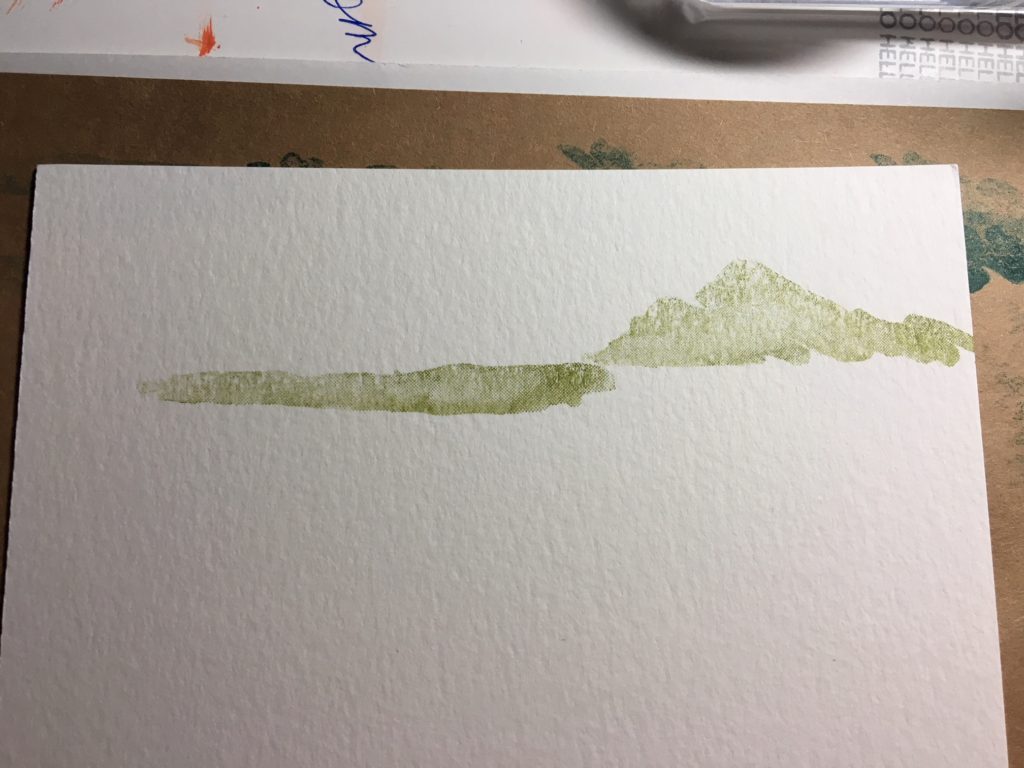
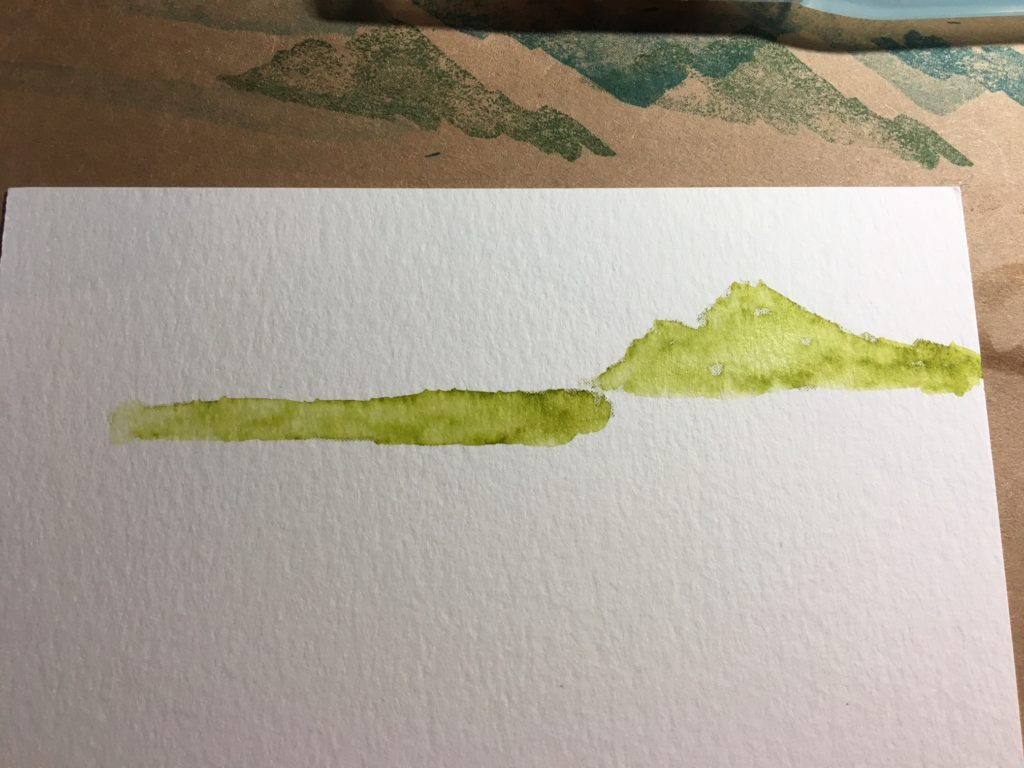
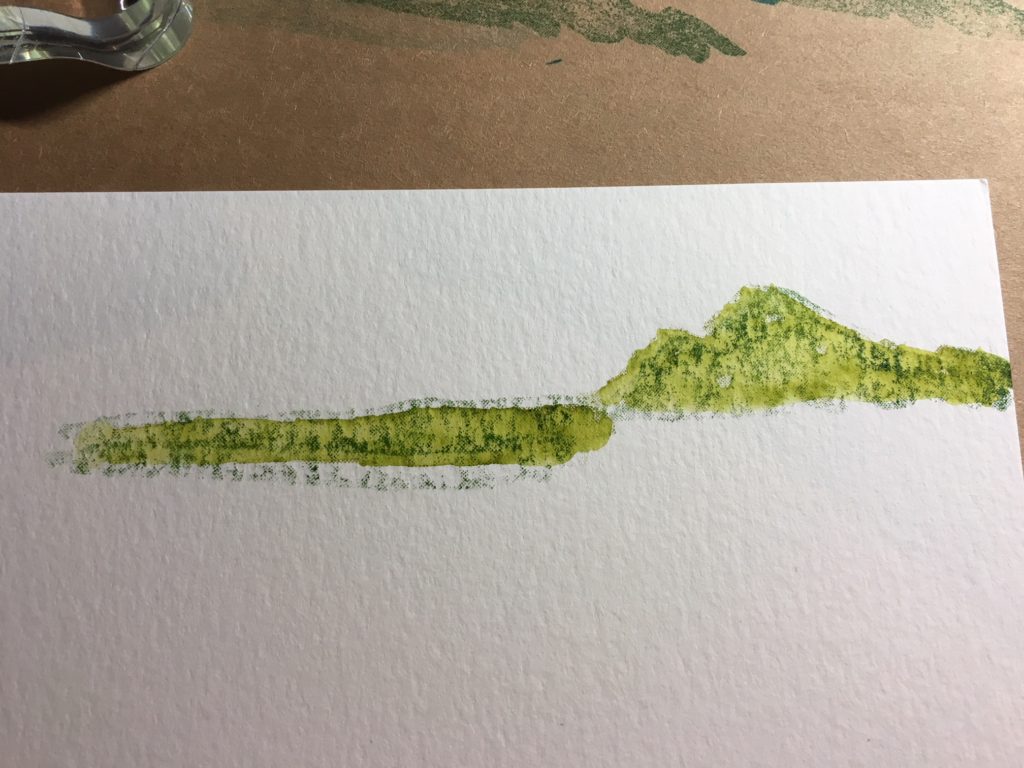
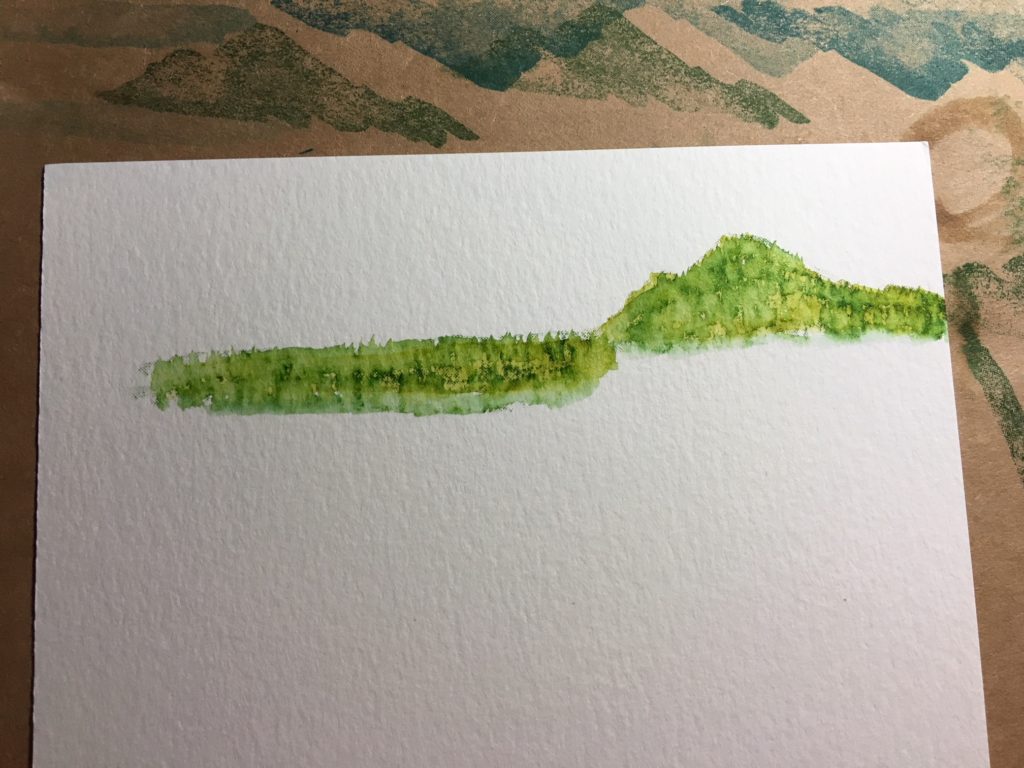
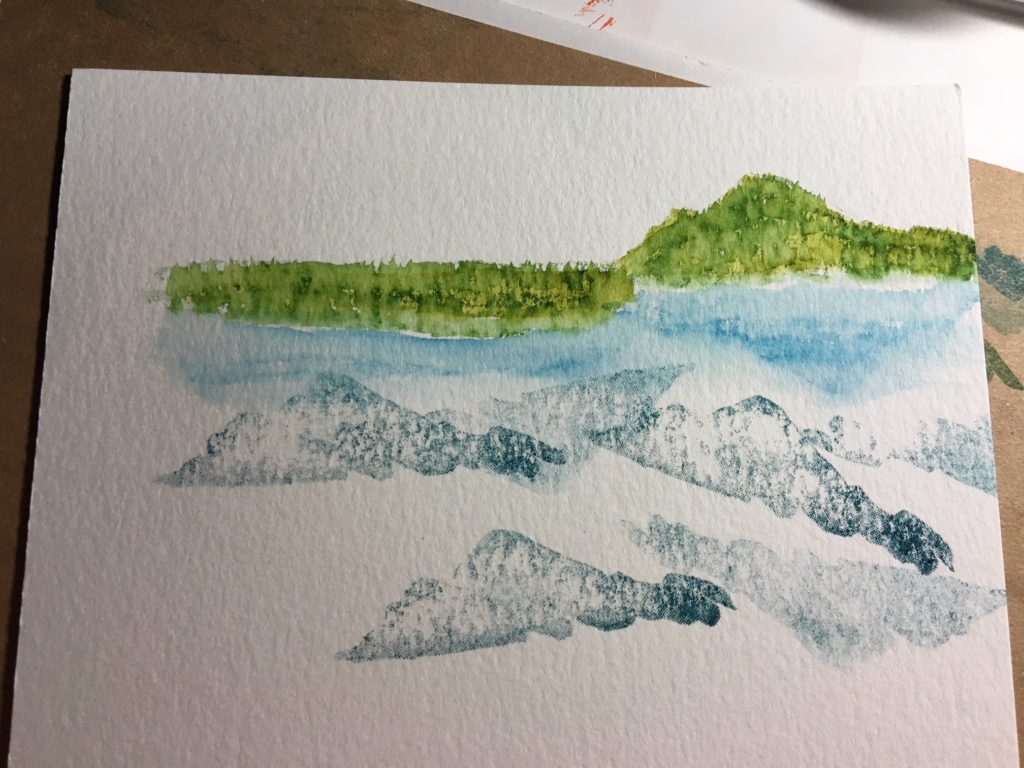
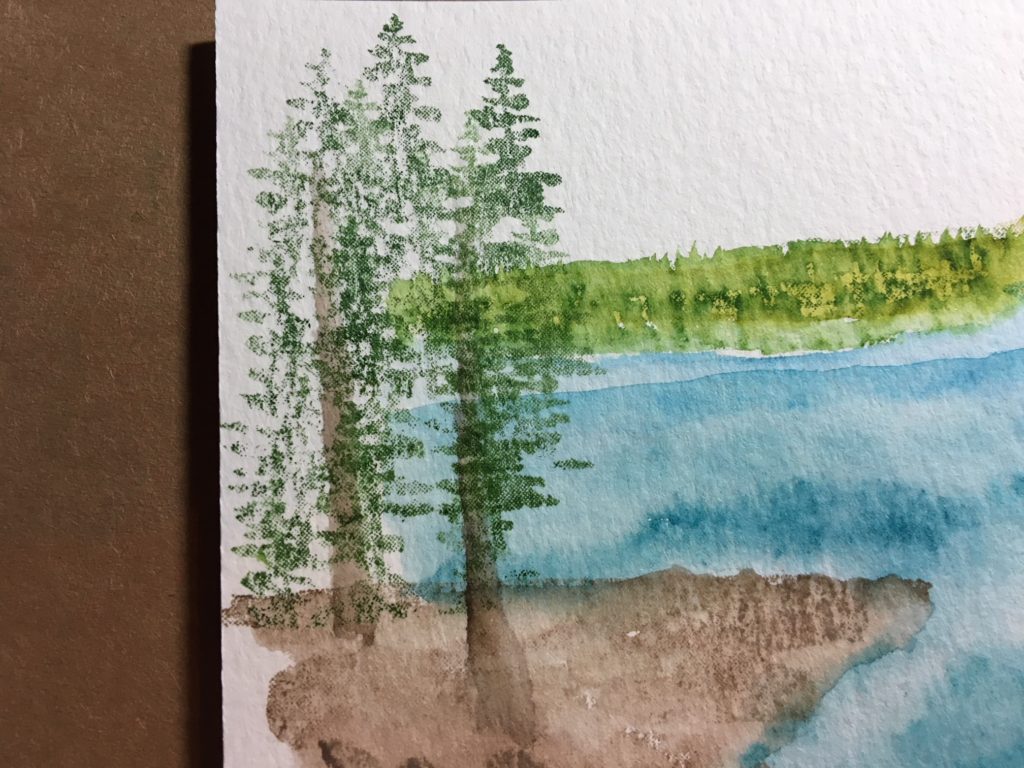
- I started with Old Olive ink and two stamps from the set. After stamping the images, I used my Aqua Painter (very light on the water) to spread the color. To get another layer of a different green, I used the same stamps and Garden Green ink to add just a touch of a darker color. When I used the Aqua Painter to blend the darker green, I used more of a pouncing motion to blend the color. The result looks like different color trees for the background.
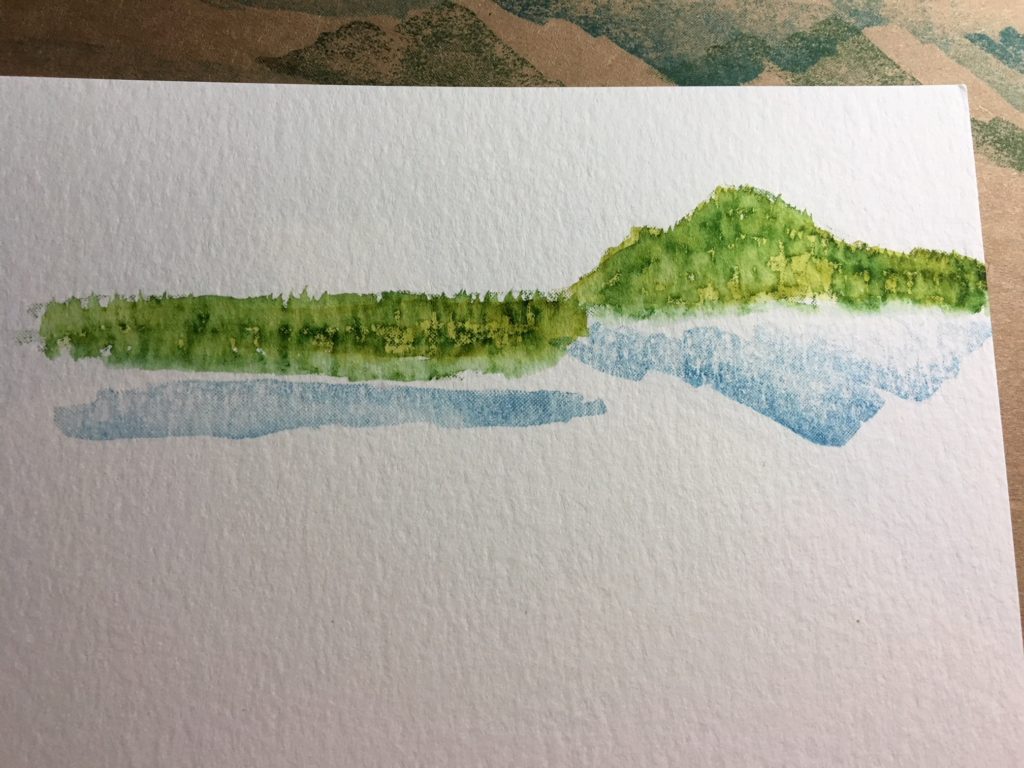
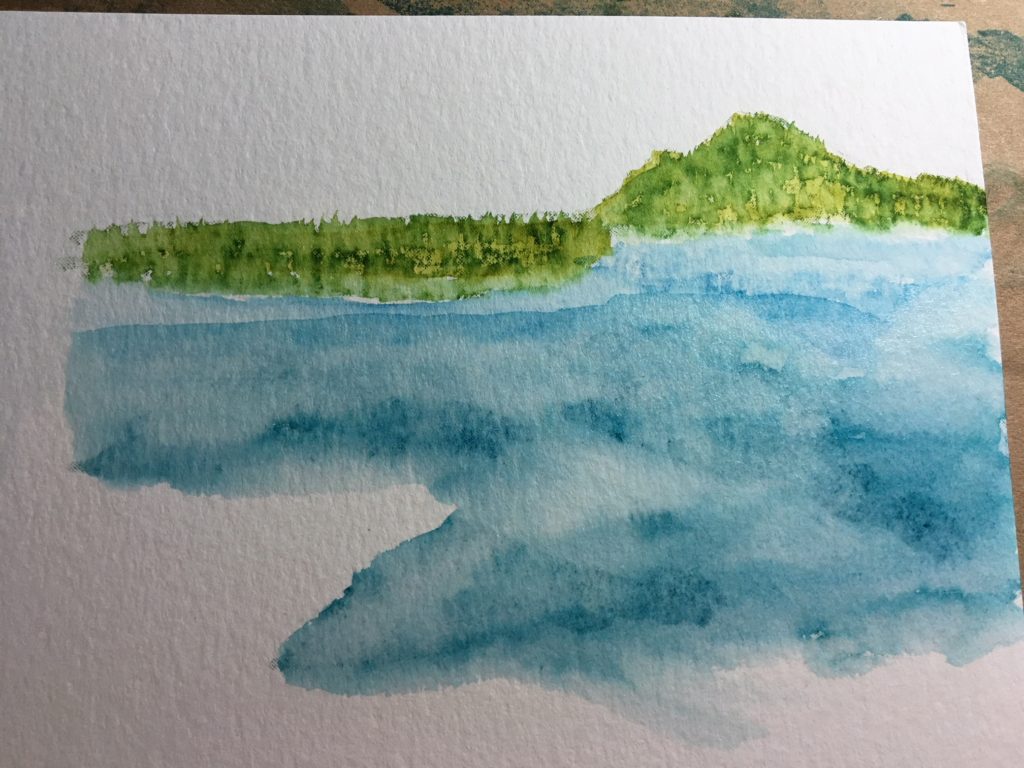
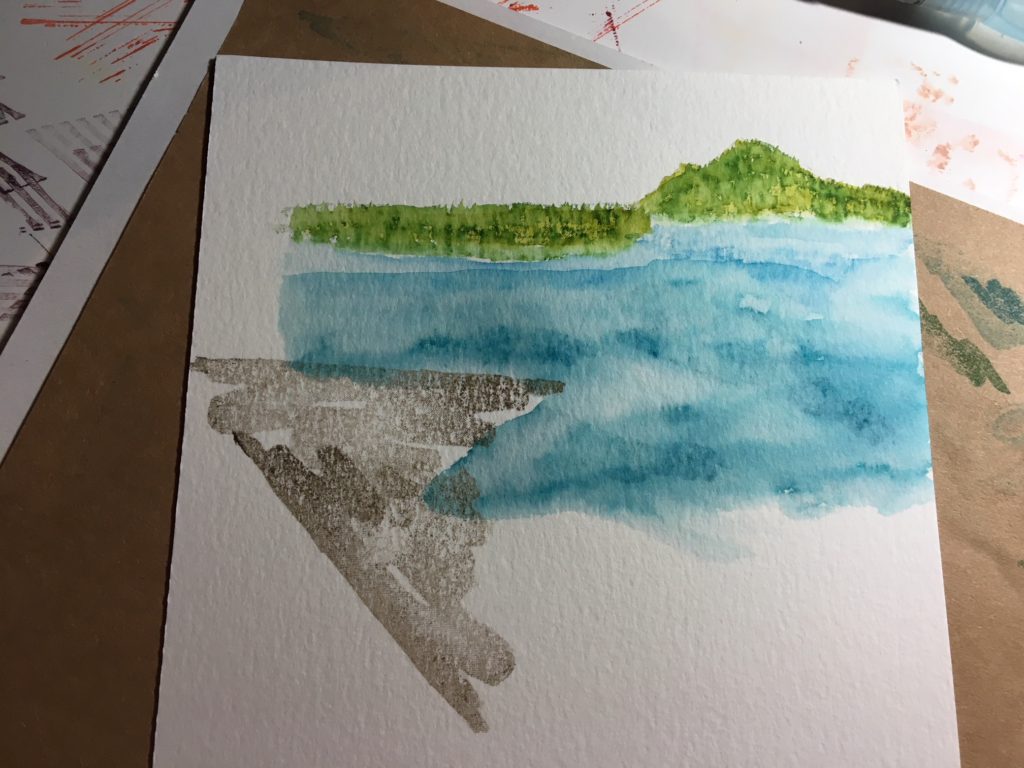
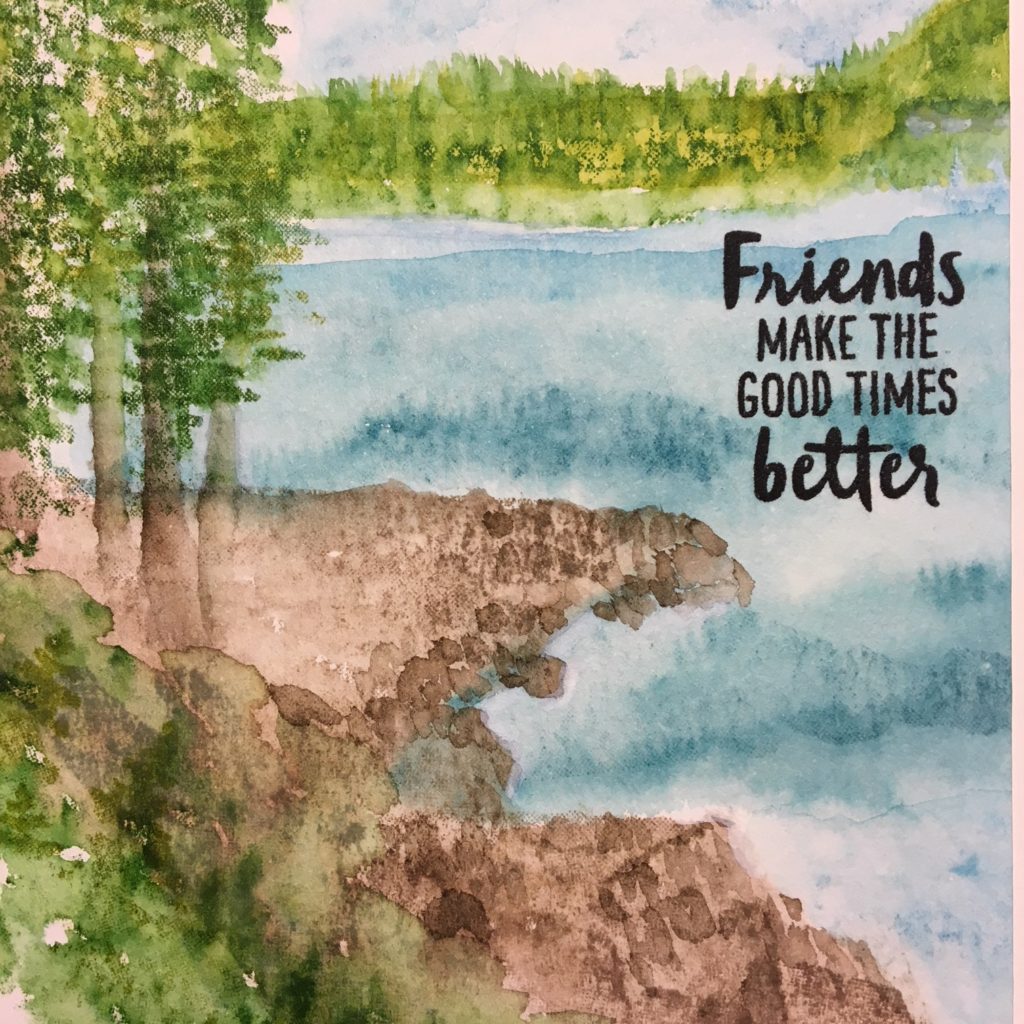
- To add the water, I decided to use two shades of blue. The first is Marina Mist. The second is Island Indigo. After each color, I blended with the Aqua Painter. You’ll notice that an area was left for the rocks on the beach.
- The rocks were added with Crumb Cake ink and blended. To add more depth to the rocks, additional layers of Crumb Cake ink and Early Espresso ink were added to the base.
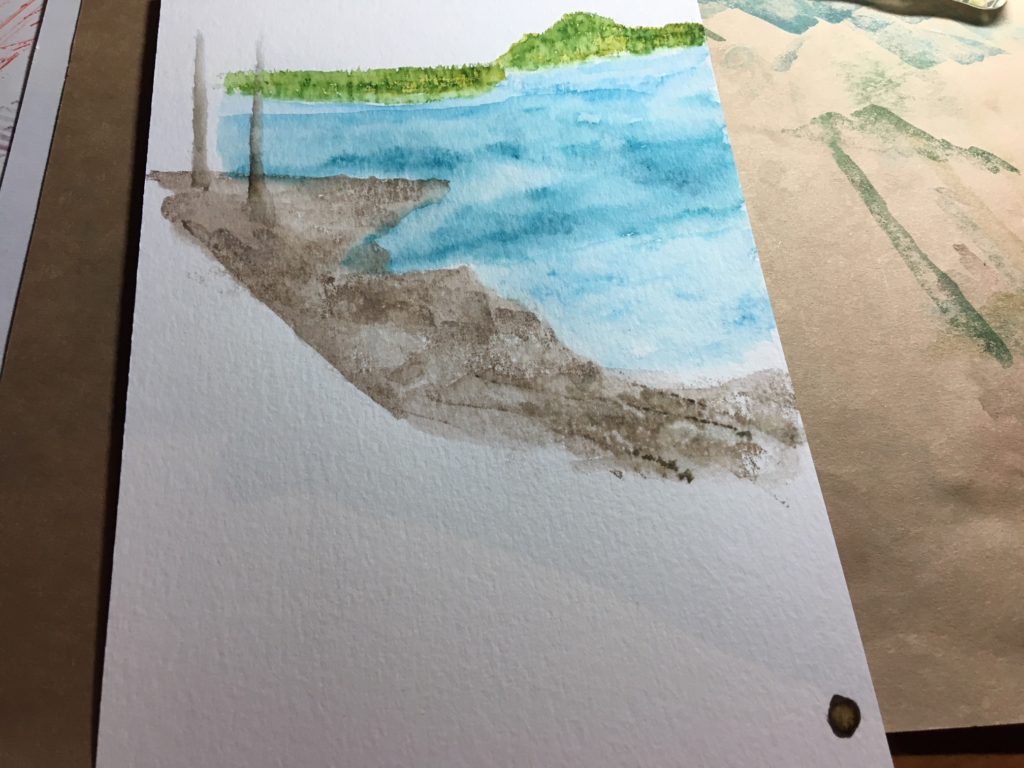
- The trees were fun to attempt! Since there isn’t a large tree trunk stamp in the set, I created the trunk with Early Espresso ink (you’ll see a “blob” of the ink on the bottom right corner of the watercolor paper) and the Aqua Painter. The tree branches were stamped by only inking the top of the tree stamp. Both Garden Green and Old Olive inks are stamped in the trees. To create the grassy area below the trees, I used the tree stamp and only inked the very top of the stamp. After stamping the “grass”, I used the Aqua Painter to blend the colors.
- To give the piece a little more of a realistic touch, I went back into the beach area to add slightly defined rocks. They were added with Early Espresso ink and the Aqua Painter. Also more tree tops on the hills were added in both greens – Garden Green and Old Olive.
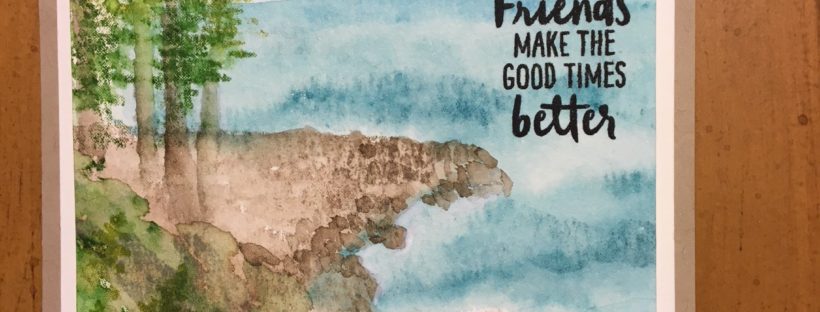
- The most difficult part of making this card was deciding how to cut the picture down to 3 3/4″ x 5″ to fit in front of the frame piece. As you can see from the final card, I decided to focus more on the trees and rocks in the foreground. The sentiment is also from the Waterfront stamp set and was added with Memento Tuxedo Black ink.
I hope you have (or soon will have) the Waterfront stamp set in your collection! Take some time to let the inner watercolor artist in you free! You will be amazed at the results, and you’ll have fun while you create.
Be sure to continue the Stamp ‘N Hop blog hop by going to Georgia Gaydos‘ post. She has an amazing project to share with you! A list of all participants for this month is shown below. Also below are the main products that I used to create my watercolor card. If you click on any picture, you’ll go to my on-line store.
Happy stamping!
Laurie
|
|
|
|
|
|
|
|
|
|
February Stamp ‘N Hop Artists:



What a gorgeous card Laurie, your inspiration picture works so well with the fab Waterfront stamp set x
Mo – Thank you so much! I enjoyed working with the set and the inspiration from the lake.
Love the scene you made and the tutorial is so easy to follow. Do you mind if I try to make a card like this.
Debbie – Thanks so much for your kind feedback. PLEASE CASE the card!! I would love to see what you do!
so pretty
Thank you so much, Terry!
OMG, your project is amazing and I love, love, love how you broke down the steps of what you did! I’m inspired to go play with the Waterfront set which I love even more now, seeing how you did what you did. Thank you!!!
Melissa – You are too kind! I’m going to keep “painting” with this set. It really is so much fun and easy to create “watercolor” pieces!
I love this stamp set, and appreciate that you shared the step by step details for your card! Super cute!
Shannon – Thank you! The step by step is a great reference for me, too, for future cards!! 🙂
Love this Laurie! Waterfront is one of my most favorite stamp sets ever!! So versatile! 😊
Kat – Thanks so much! I confess that I’m addicted to this stamp set 🙂
Wow! You are quite the artist! I thought it was a painting and not a stamped image!
Tracey – Thank you very much! It was a lot of fun to create!
I actually forgot these are stamps when I looked at your step by step to building up the image. Beautiful work, Thank you for sharing this
Karen – I’m flattered… but, the credit goes to the stamp set! I really enjoyed pretending to paint. Too much fun 🙂
Lovely card, it “feels” as peaceful as the original place.
Thank you so much, Ilka!! I’m glad the goal of serenity worked!
wow! Your card next to the photo blew me away! I guess you are no longer intimidated by the watercolouring anymore? Btw, your camp up there must be so beautiful! My blood pressure went down a little just seeing the shot! Thank you for sharing.
Thanks, Eva! The Waterfront stamp set definitely helped get me through the “painting” process 🙂 So glad that your blood pressure went down!!
Wow!! This is gorgeous!! You’ve truly created a piece of art!
Thank you so much, Kayla! The card was a lot of fun to make. Thank you for all the work you have done pulling this blog hop together. I’m proud to be one of the “hoppers”!!
WOW WOW WOW!!! Man this card looks just like the picture. Absolutely stunning. Thanks so much for sharing.
Christina – Thanks! I was surprised at how versatile the stamp set is. It was fun to “think outside the box” to create different shades and shapes. I think I know have a new stamp set 🙂
Wow – very realistic rendition of such a scene, one of tbe best I have seen!
Margaret – Your words are far too flattering. I have seen absolutely amazing cards made with this set. I’m in awe of the talents of so many stampers and their ability to truly look far beyond the stamped images to create masterpieces.
Fantastic card, Laurie! I love this set, too and am going to have to give your idea of using the Aqua Painters a try!
Thank you, Tracie!! The aqua painters really make me feel like an artist 🙂
Awesome card Laurie! You did a great job recreating that photograph!
Lisa – Thanks so much! That is my favorite spot on our beach. It was fun to try to replicate with ink!
Great card! I love how you used the set.
Thank you, Robbie! I appreciate your kind words.
What an amazing piece of art! WOW! You are so talented, it makes me want this set! TFS!
Melissa – You are far to kind. You’ll have a fun time creating with these stamps. The set makes “painting” easy!
WOW, I love your card, i just want to fall into your card… and sit and watch the water flow, thank you for sharing Laura xx
Laura – Thank you so much for your flattering words. The photo was taken from the exact spot that I enjoy sitting, watching, and listening to the water 🙂
Love this! Makes me want to go back to my early childhood vacations in Vermont on Lake Champlain. Your card is great! Love this Stamp set so much!!!
Joanne – Thanks so much! Yes, this stamp set is pretty amazing. I used it in a Stamp Club yesterday. Everyone enjoyed it!
This is really lovely, just like the picture & I really like your step by step instructions xx
Jessie – Thanks very much! Glad you liked the card. Thank you for your kind words.
Wow Laurie, what an amazing recreation of your photo. Thanks for showing how you created your image. I don’t have this set, but I think I need it now.
Kirsten – Thanks so much for your kind words. The stamp set was so much fun to use to “paint”. See you on the blog hop next month!