Welcome to the April NC Demos Blog Hop! This month, we are highlighting amazing products that are available as Online Exclusives. There are so many options of Online Exclusive products — If you haven’t checked them out lately, you really should! You may have hopped over from Frances’ post. Wasn’t her project amazing, as usual?!?
Thanks so much for stopping by to see what I have created to share this month. To be honest, it wasn’t hard for me to figure out what I was going to use to make my fun fold card for this month’s blog hop. I love everything about the A Little Latte Suite! And, I’m sure that you’re going to fall in love with it as well!
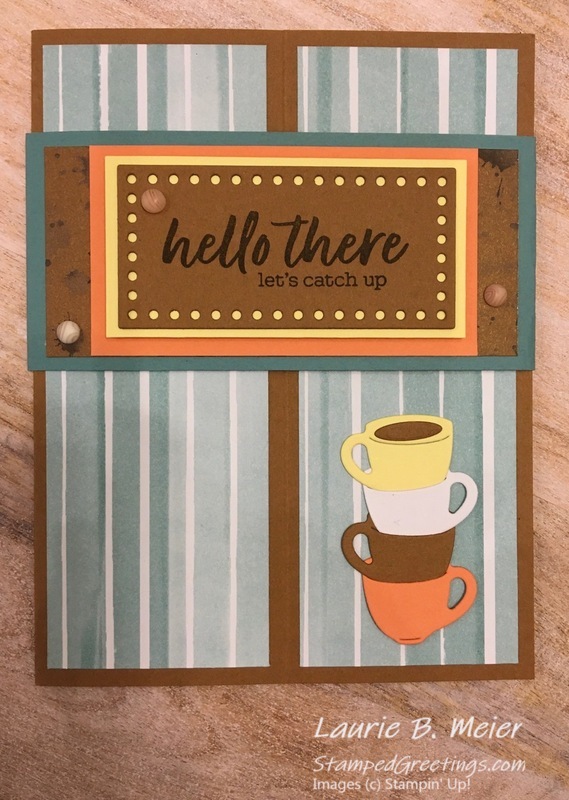
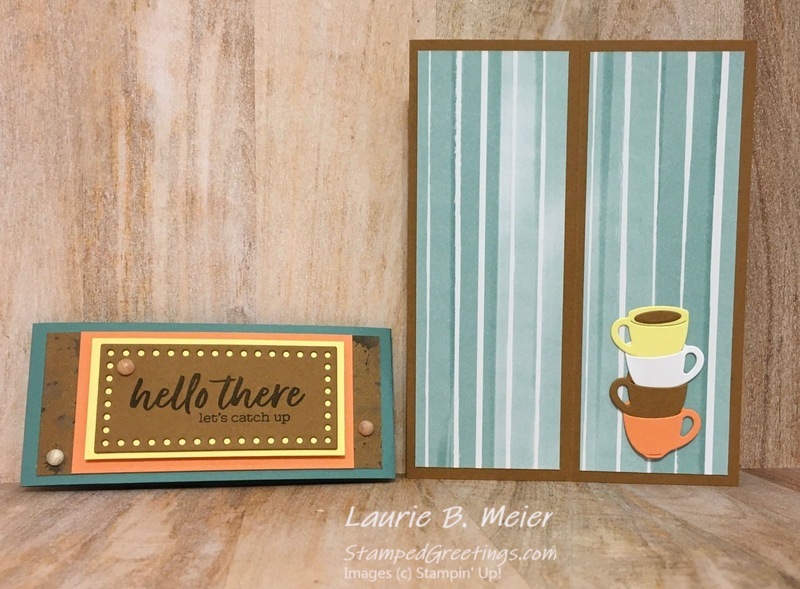
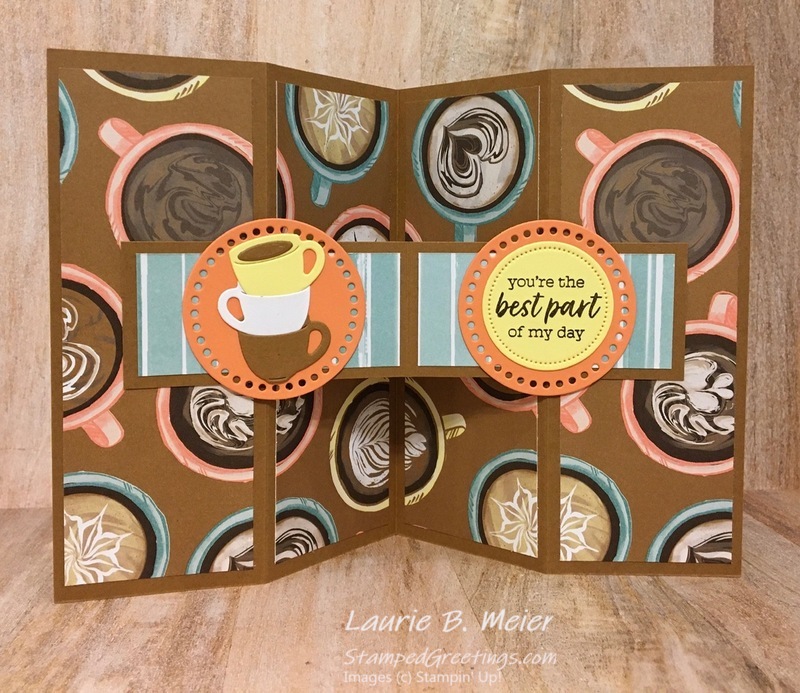
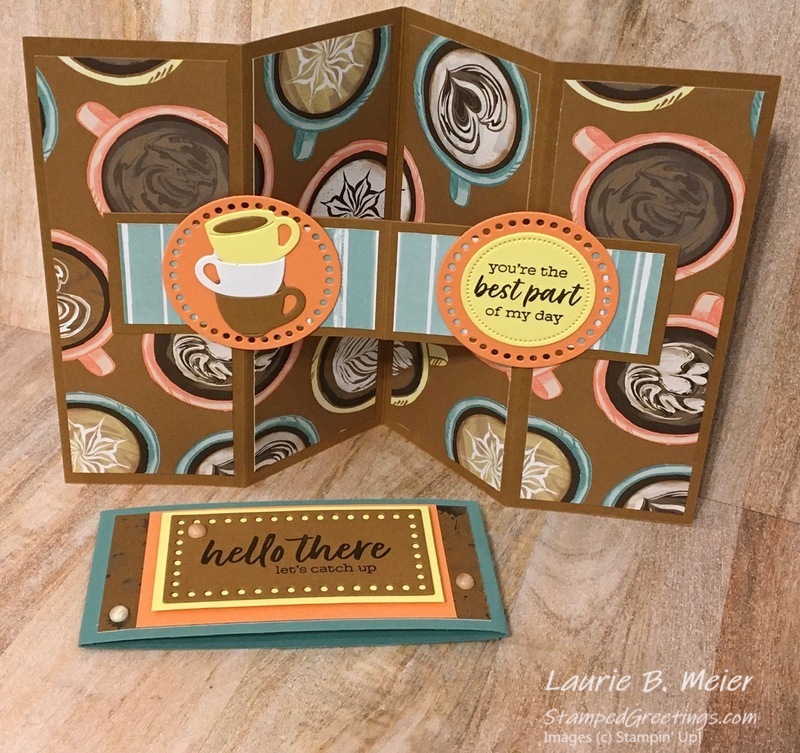
If you check out the pictures below, you’ll see how my fun fold card works – The first two pictures show what the front of the card looks like with and without the belly band.
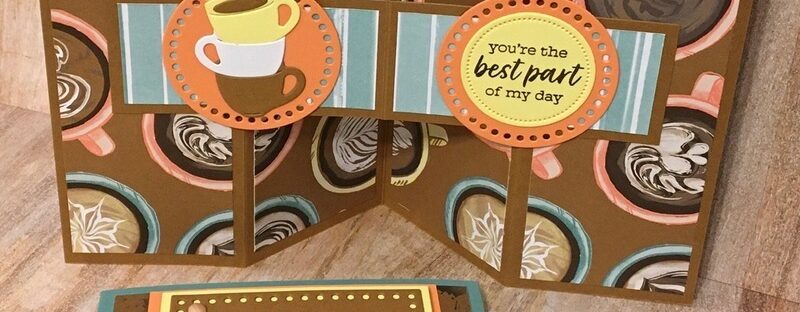
The next picture show the inside of the pop out fun fold! It definitely highlights the amazing A Little Latte Designer Series Paper (DSP).
The last picture shows an overview of the pop out card and the belly band. It’s such a fun card to make and very straight forward.
Below is a link to a video that shows the steps to make the card. Also, after the video link, you’ll see the basic steps and measurements detailed.
Here are the basic steps and measurements –
- The card base is 8 1/2″ x 5 1/2″, scored at 2 1/8″, 4 1/4″, and 6 3/8″. The card base is folded into a mountain fold, valley fold, and mountain fold as you go from the 2 1/8″ score line to the 6 3/8″ score line.
- Add two pieces of your choice of DSP to the front of your card. Each piece of DSP measures 1 7/8″ x 5 1/4″.
- Add four pieces of your choice of DSP to the inside of your card. Each piece of DSP measures 1 7/8″ x 5 1/4″. You may want to consider using DSP that has a continuous pattern.
- Create the band that you’ll adhere to the inside of your card from a piece of card stock that measures 1 1/2″ x 6″. Score the piece at 3″. Adhere this piece so that when you fold your card, the band fold back (into the card) at the middle.
- Decorate the band as you would like. I recommend that you don’t add a lot of layering to the band.
- Create your belly band with a piece of card stock that measures 2″ x 11″. Score your belly band at 4 1/4″, the width of your card. This will help the belly band fit better as you gently wrap it around and adhere the ends together.
- Decorate your belly band as you would like.
- You can also add design and embellishments to the front of your card and the belly band.
I really hope you try this design. It would be awesome to see what you create.
Be sure to head over to Tracie’s post to see what she has created featuring Online Exclusive products. I know her project is going to be great! Also, be sure to check out everyone’s post. You can find a list of this month’s blog hoppers below.
Also, below you’ll see the main products that I used to create my fun fold card. If you click on any picture, you’ll go directly to my online store.
Inky hugs,
Laurie
April Blog Hoppers
Tina Lesson
Jo Anne Hewins
Toni Campana
Frances Wagner
Laurie Meier <— YOU ARE HERE
Tracie Evans Langley
Main Products in My Fun Fold Card
|
|
||
|
|
|
|
|
|
||
|
|
|
|
|
|
|
|
|
|
|
