Welcome to the March NC Demos Blog Hop! If you just came from Tracie’s post, you know that we are featuring at least one retiring and at least one returning product in the projects that we’re sharing this month. Wasn’t Tracie’s project awesome?
We will be welcoming a new annual Stampin’ Up! catalog on May 1st, and that means that some of the products in our current catalogs will be retiring. While it’s sad to say goodbye to these items, it is equally (if not more!) exciting to welcome new products! There are also several current products that will be returning in the new catalog.
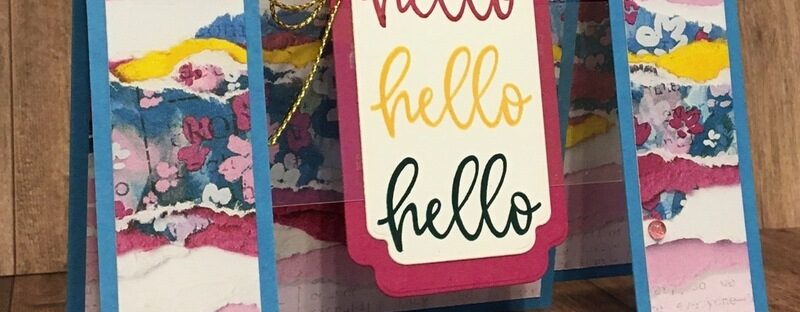
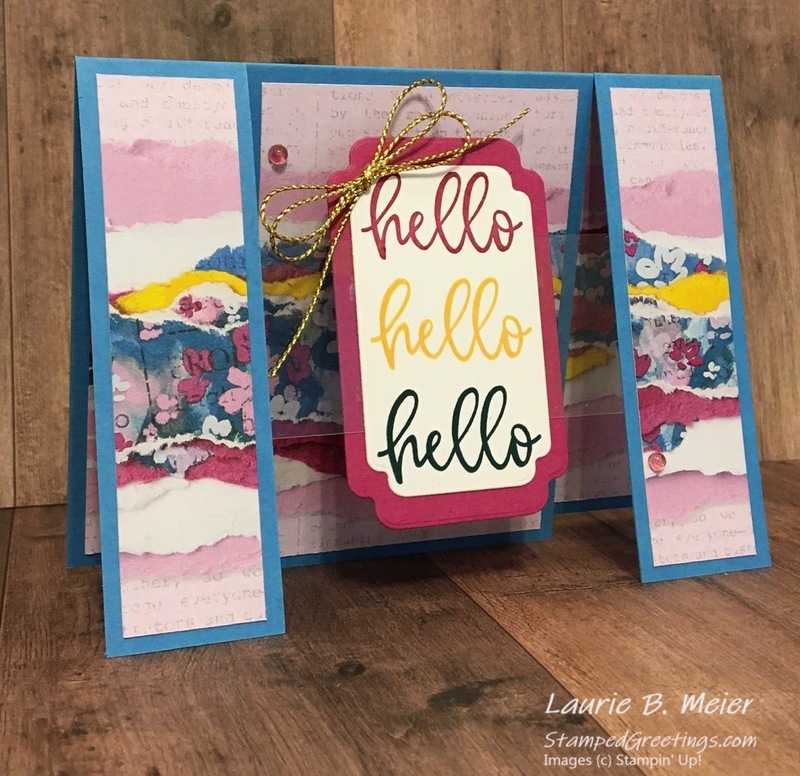
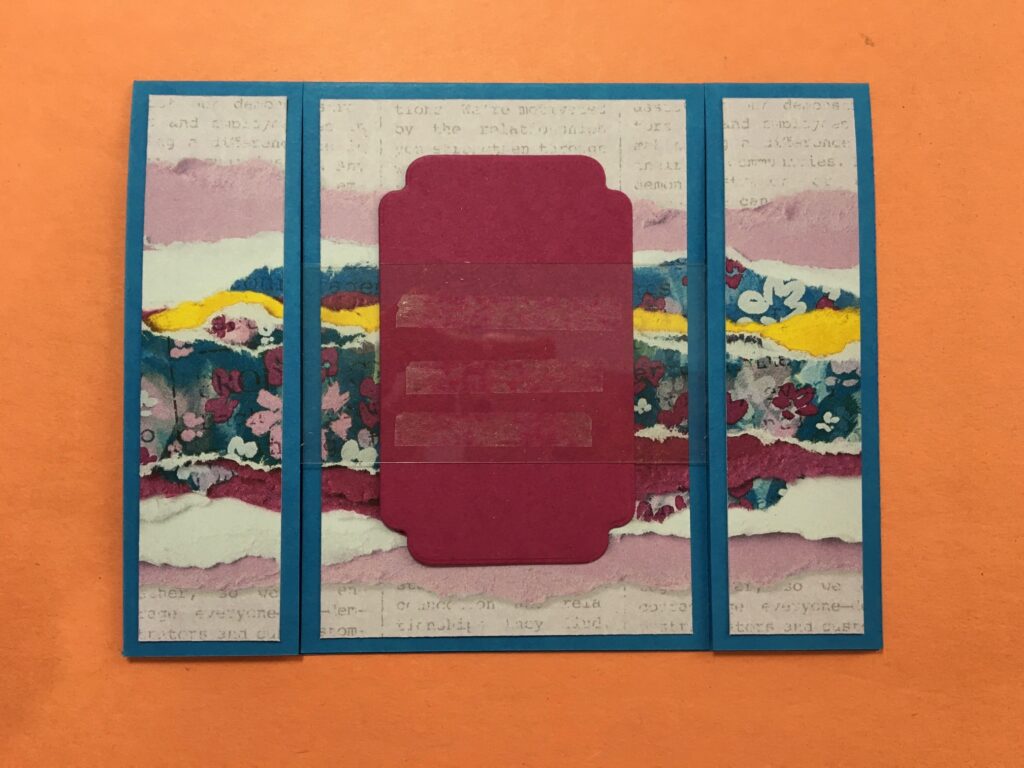
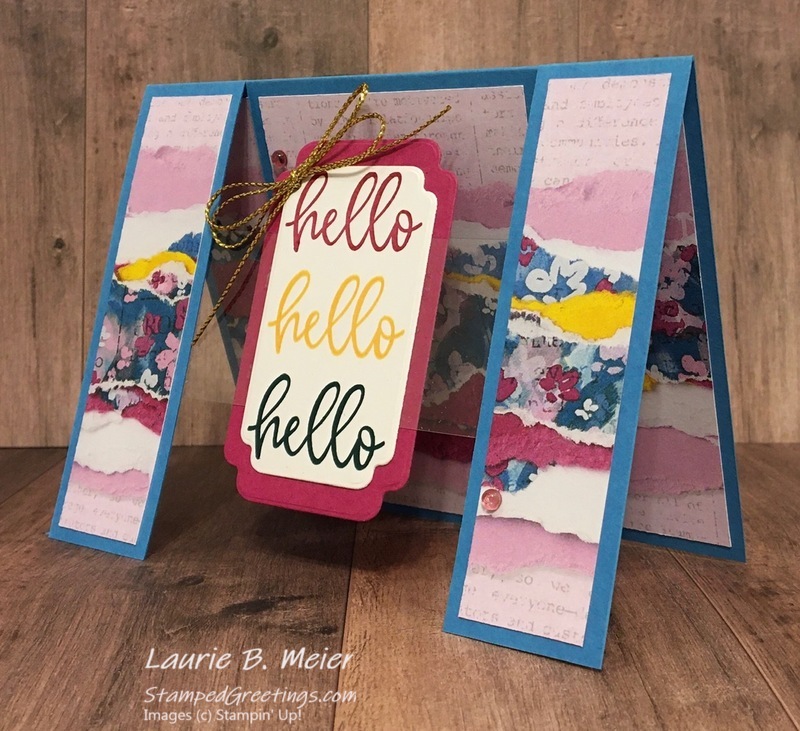
Thank you so much for stopping by to see the card that I am sharing this month. It is a fun fold card that has a floating element and a hidden mini card inside! Take a look at the picture below.
One of the stamp sets that is retiring is the amazing Biggest Wish stamp set. This is one of my absolute favorites right now. It was a quick decision to make sure that I used the stamp set in my project. I also absolutely love the gorgeous and unique Masterfully Made Designer Series Paper (DSP). The paper features bright colors and very interesting photos of torn paper. Since this DSP is retiring, I needed to figure out how to include it in my project as well.
For the products that are returning, I chose to use the very versatile Something Fancy dies. They have very useful nested shaped dies that come in handy for many projects. The Azure Afternoon color is returning and is the color of the card stock for the base of the card. It’s also one of the colors in the DSP.
I got my inspiration for the card from Connie Stewart, a truly gifted artist. Check out her original post here. It’s a great design to have in your back pocket when you want to give a card that really impresses with a unique element. And, the great thing is that it’s really straight forward to make!
Here are the directions (with pictures) to show you how to make this type of card –
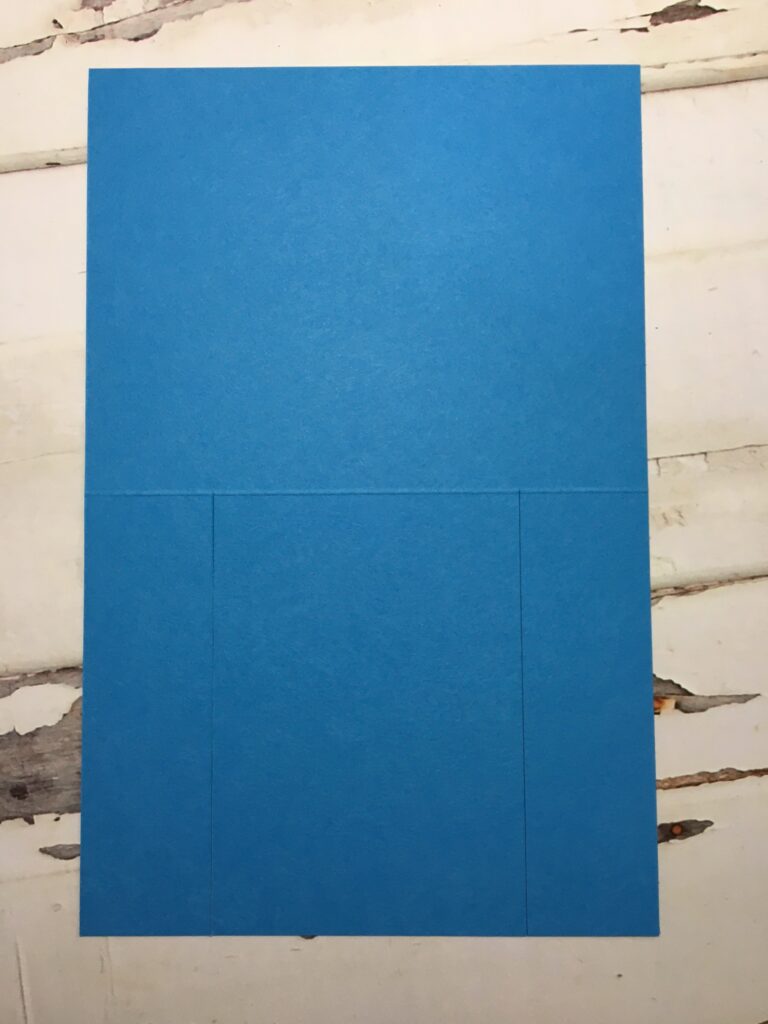
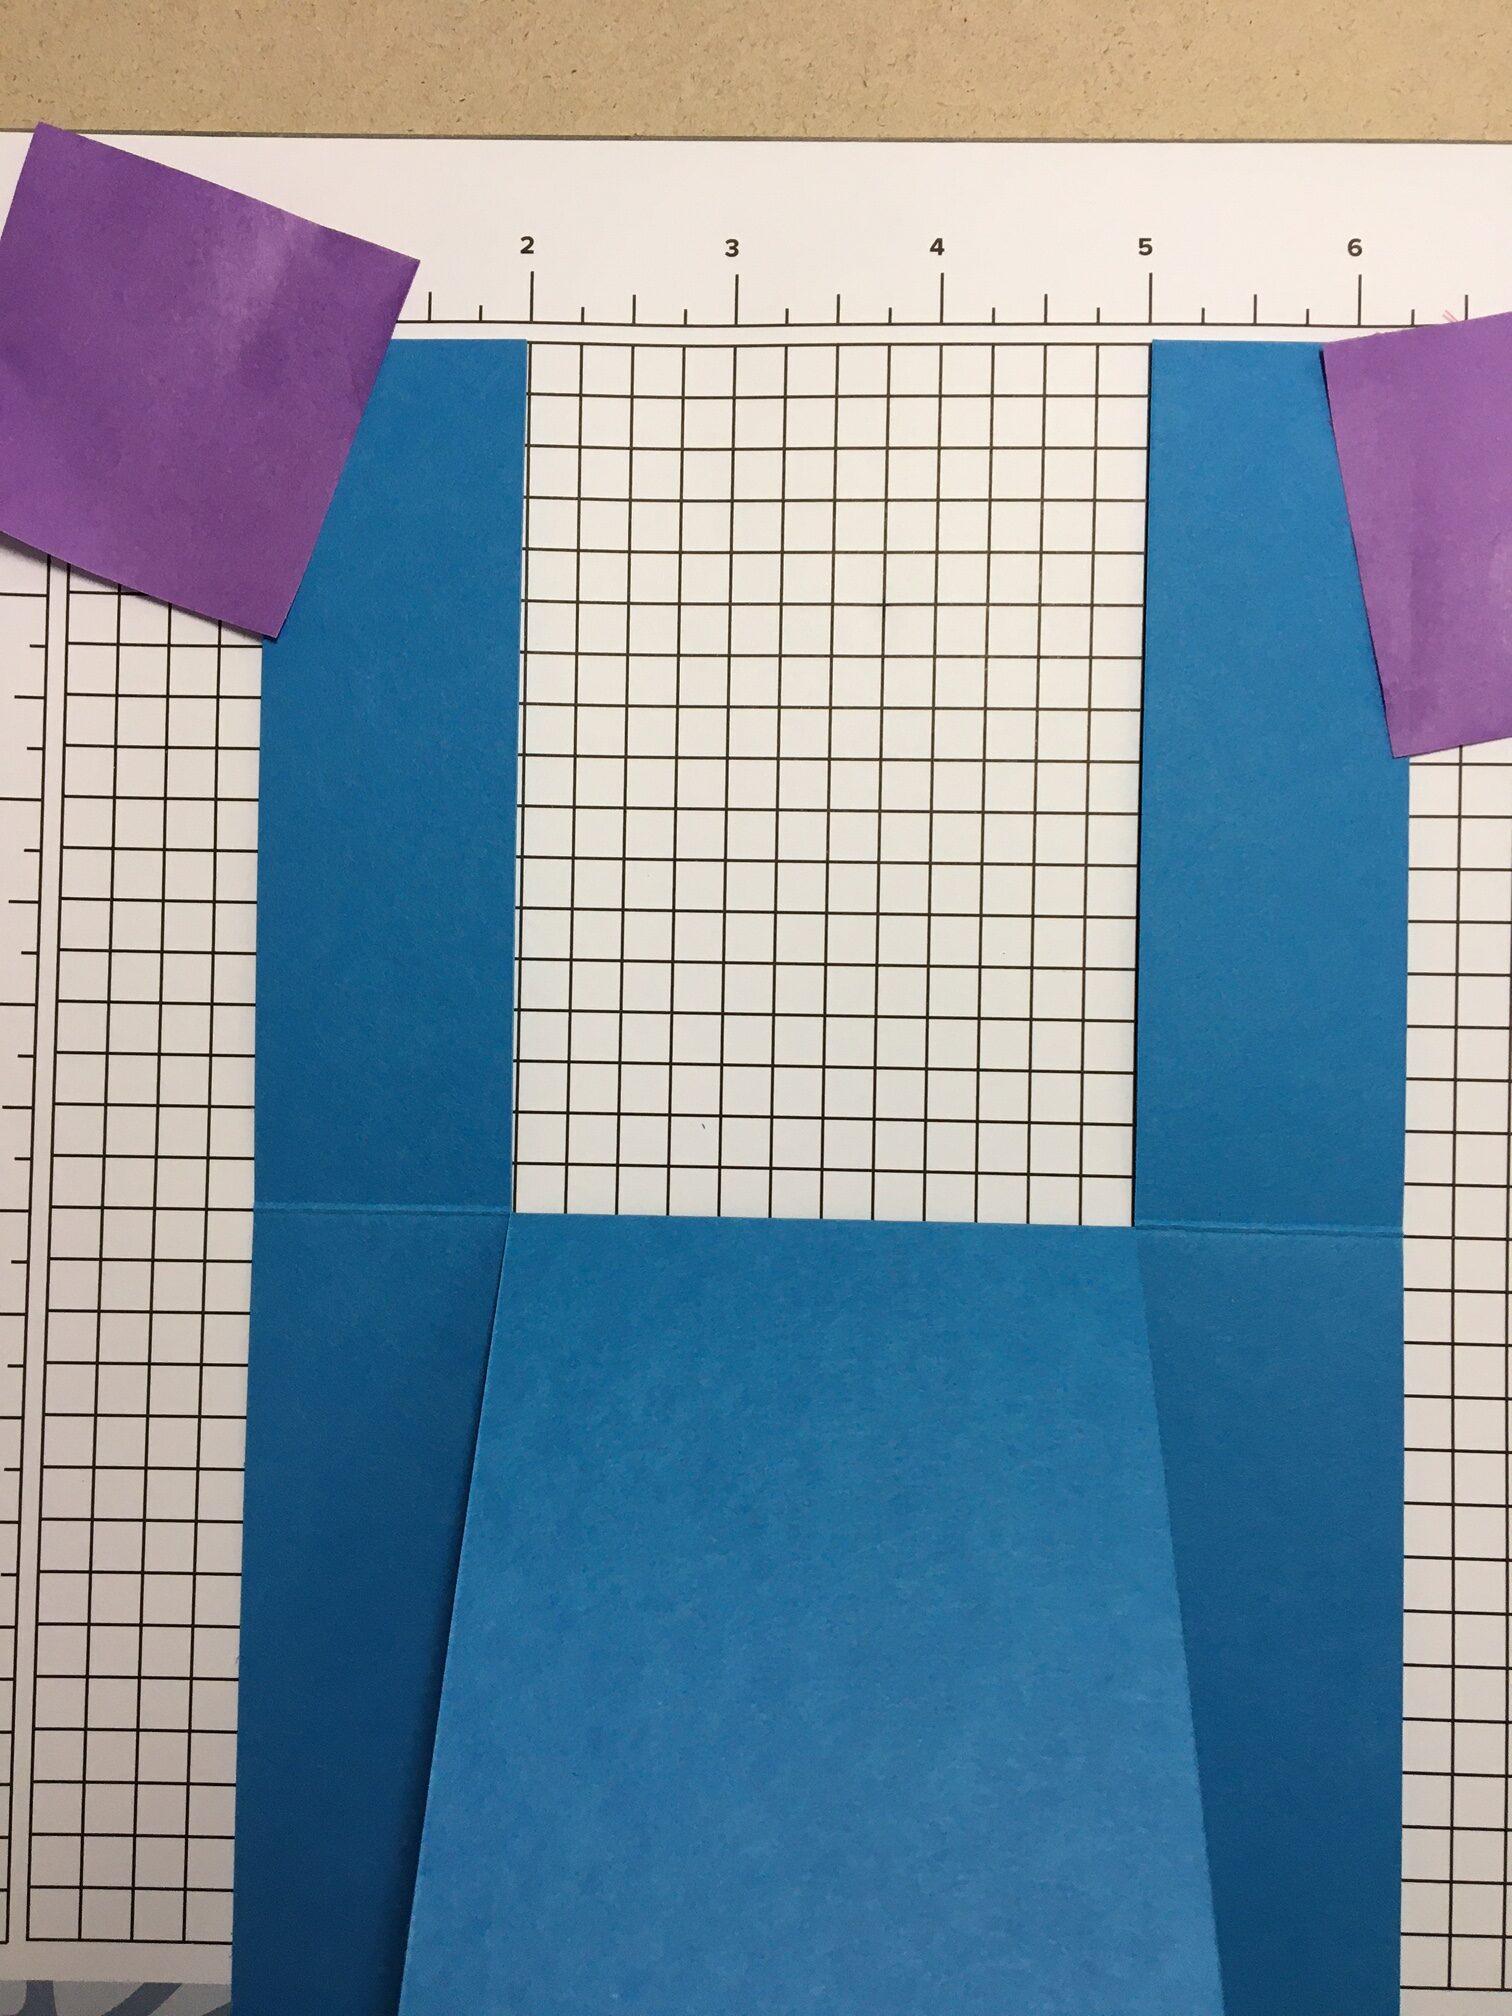
- Start with a standard size A2 card base cut to 8 1/2″ x 5 1/2″, scored at 4 1/4″ on the 8 1/2″ side. On one of the 5 1/2″ sides, cut 1 1/4″ in from both sides from the edge up to the score line. Burnish the score line. See the picture below.
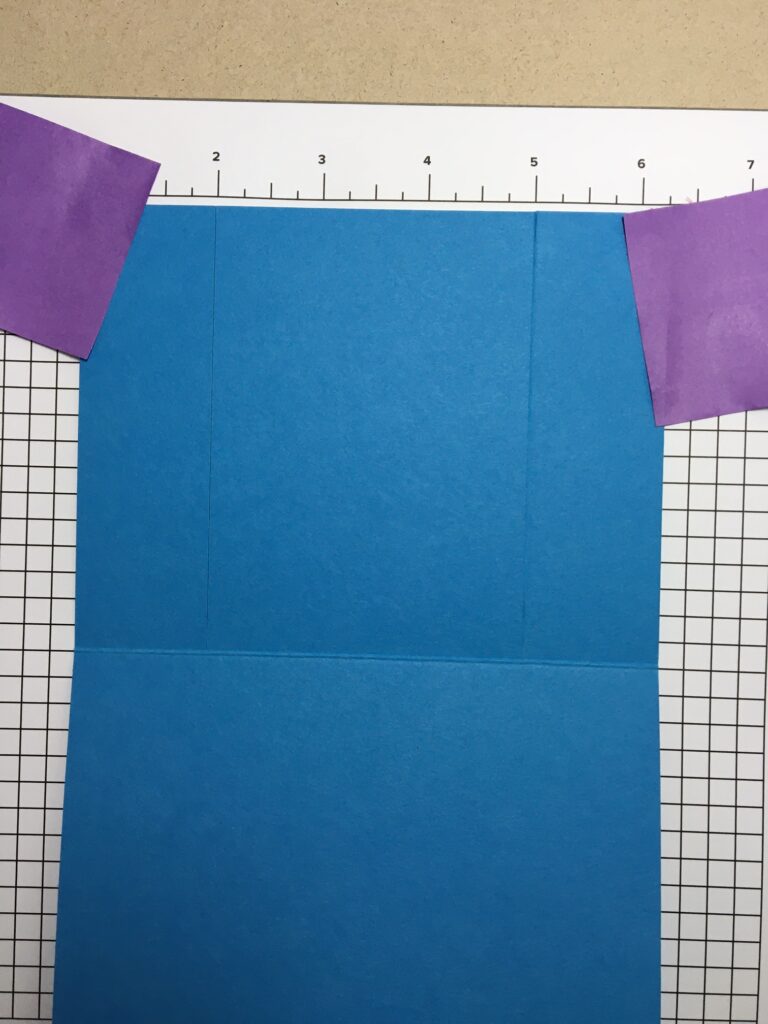
- Put the card base onto a piece of grid paper or any surface that has a ruler. It’s important to make sure the 1 1/4″ side pieces are straight. Tack the card base down with a few Post-It notes or washi tape, as pictured below.
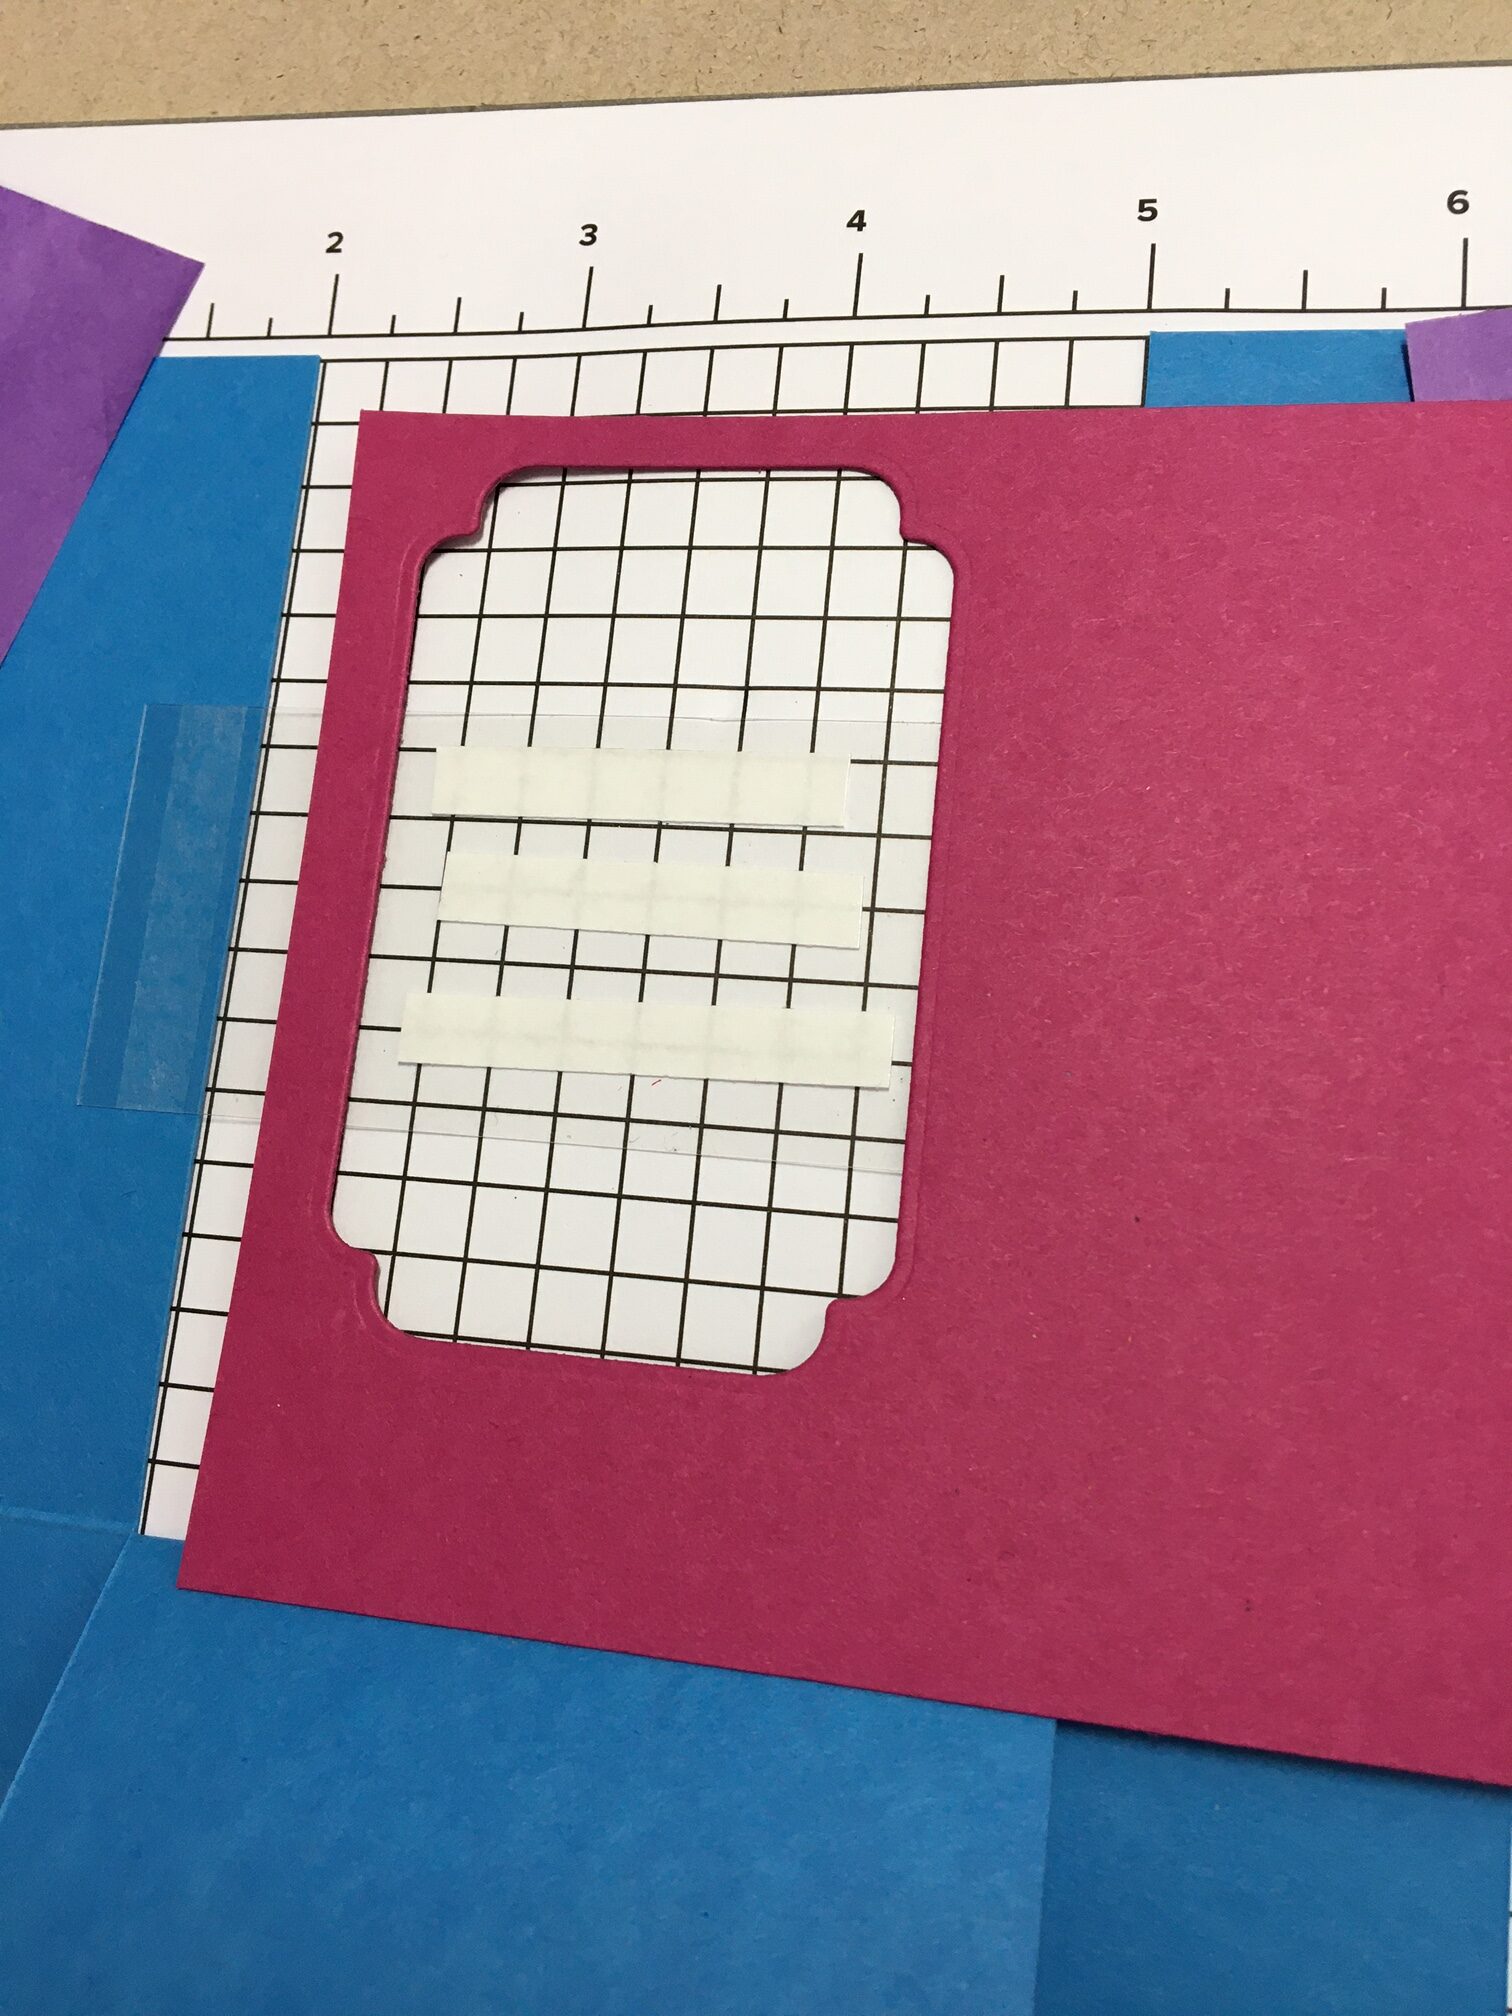
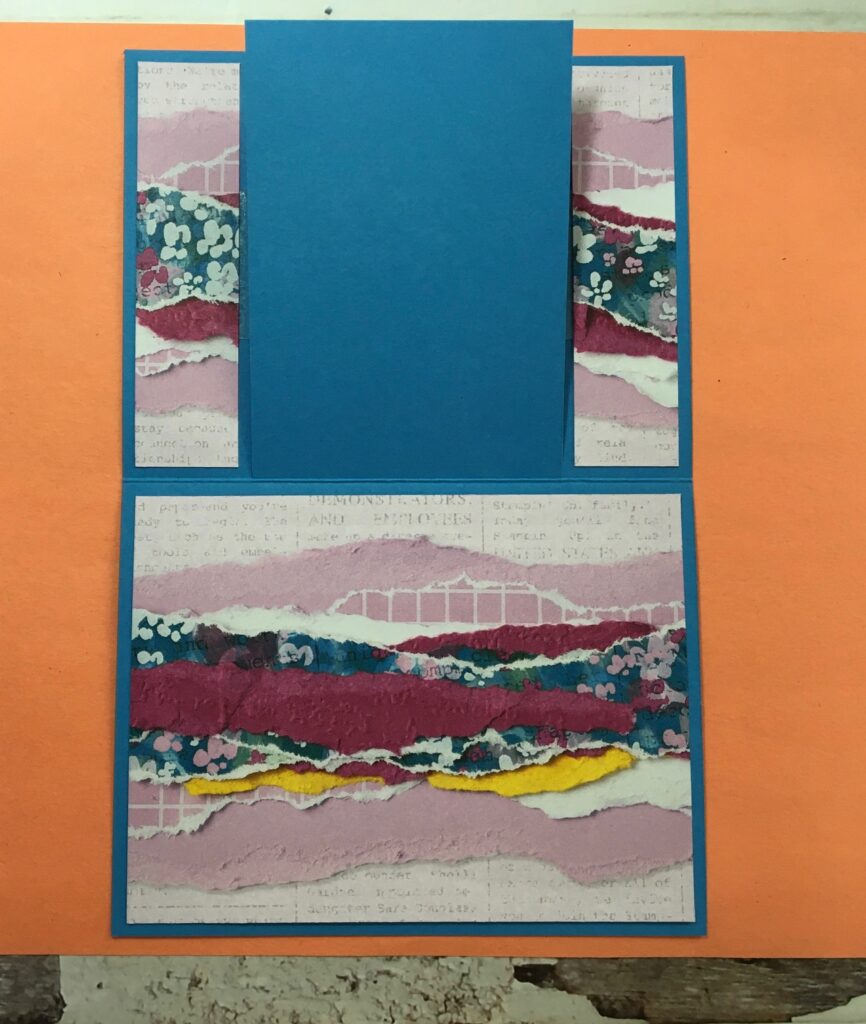
- Bend back the larger middle piece of the card base. Reference the picture on the left below. Cut a piece of Window Sheet to 3 7/8″ x 1 1/2″. Add Tear ‘n Tape to each side of the Window Sheet as pictured on the right below. Peel off the wax paper from the Tear ‘n Tape, and adhere the Window Sheet.
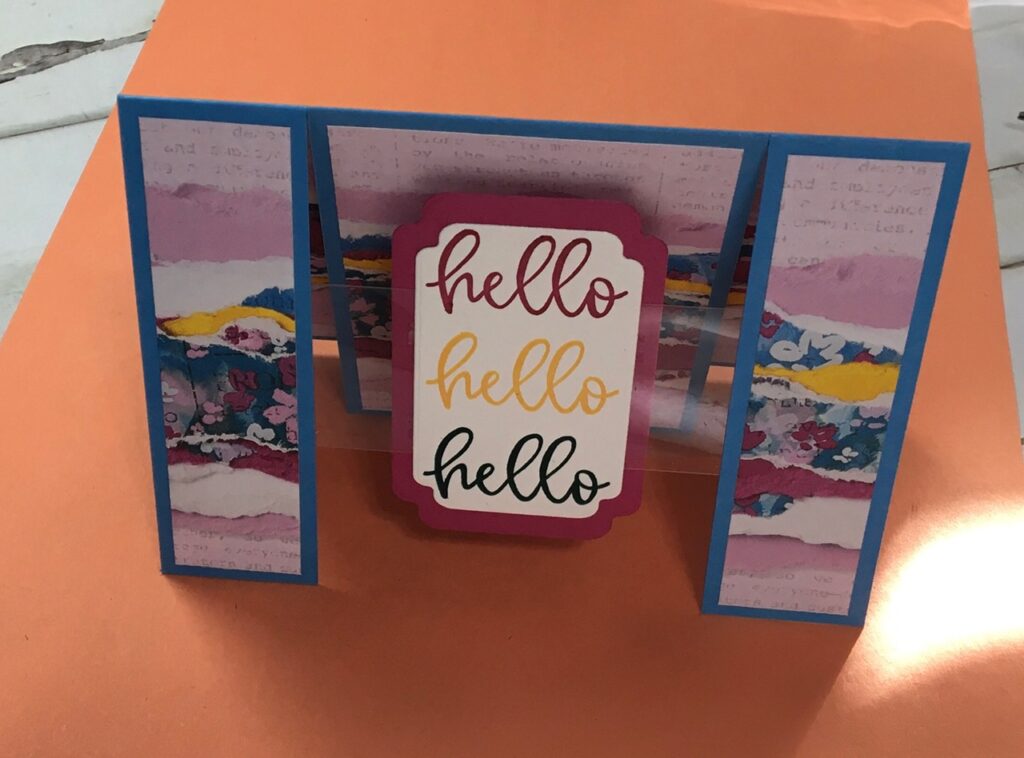
- Figure out which die shape and size you would like to use as the floating element. I chose the largest rectangle-ish shape from the Something Fancy Dies. The card stock color is Berry Burst since it is one that is in the DSP. Cut out your die piece. Then use the negative (hole that the die cut creates) to determine where you need to add some Tear ‘n Tape onto the Window Sheet to hold your die cut. Don’t make the Tear ‘n Tape too wide or too high since you’ll add another die cut to the front of the Window Sheet. You don’t want to see the Tear ‘n Tape behind the smaller die cut that you’ll add. Take a look at the pictures below and notice that this die cut is attached to the back of the Window Sheet when you look at what will be the front of your card.
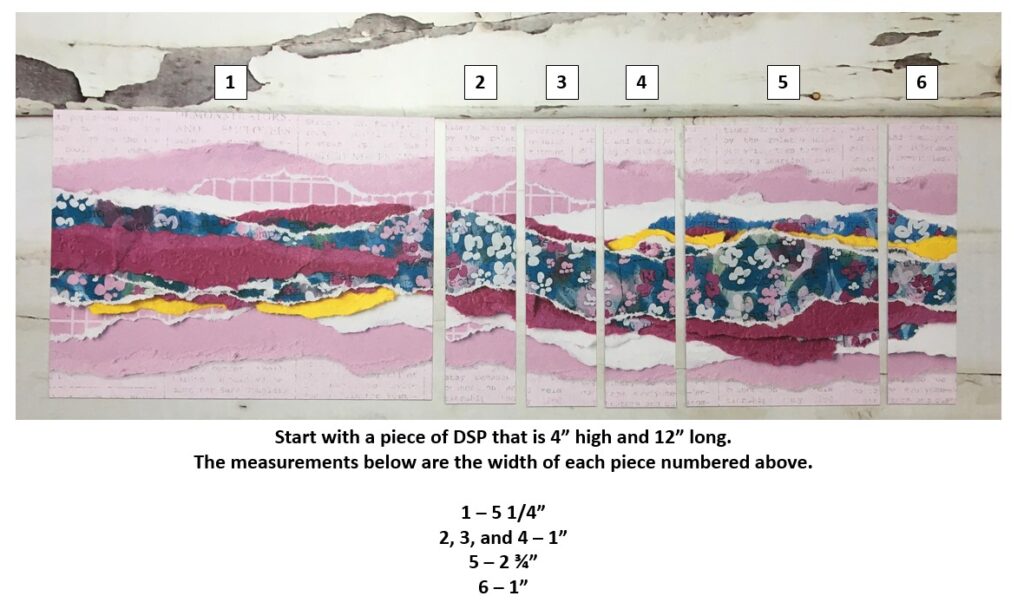
- Now, it’s time to add some DSP to decorate your card! Start with a piece of DSP that is 4″ high and 12″ wide. You will use every part of this piece! Pay attention to the direction of the design on the paper, if there is one. Below, you’ll see the six pieces that are cut from the original piece. As I go through the steps below, I’ll reference the number of the piece that goes on each part of the card. At the bottom of the picture below, the width of each of the six pieces is referenced.
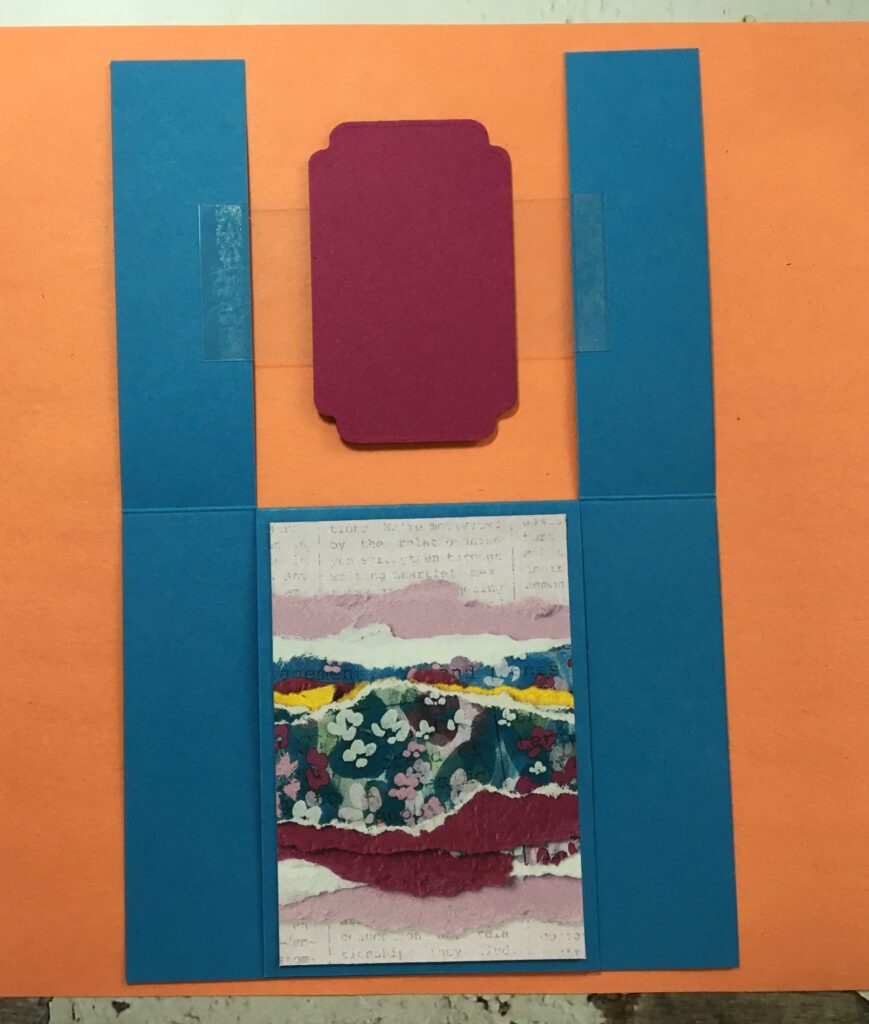
- Start with the pieces that are numbered 4, 5, and 6. #4 will go on the large panel that is under the adhered Window Sheet. #5 and #6 will go on the front of the 1 1/4″ side strips. The design will appear to go from left to right on the front of your card. Look at the pictures below to see where these pieces are adhered.
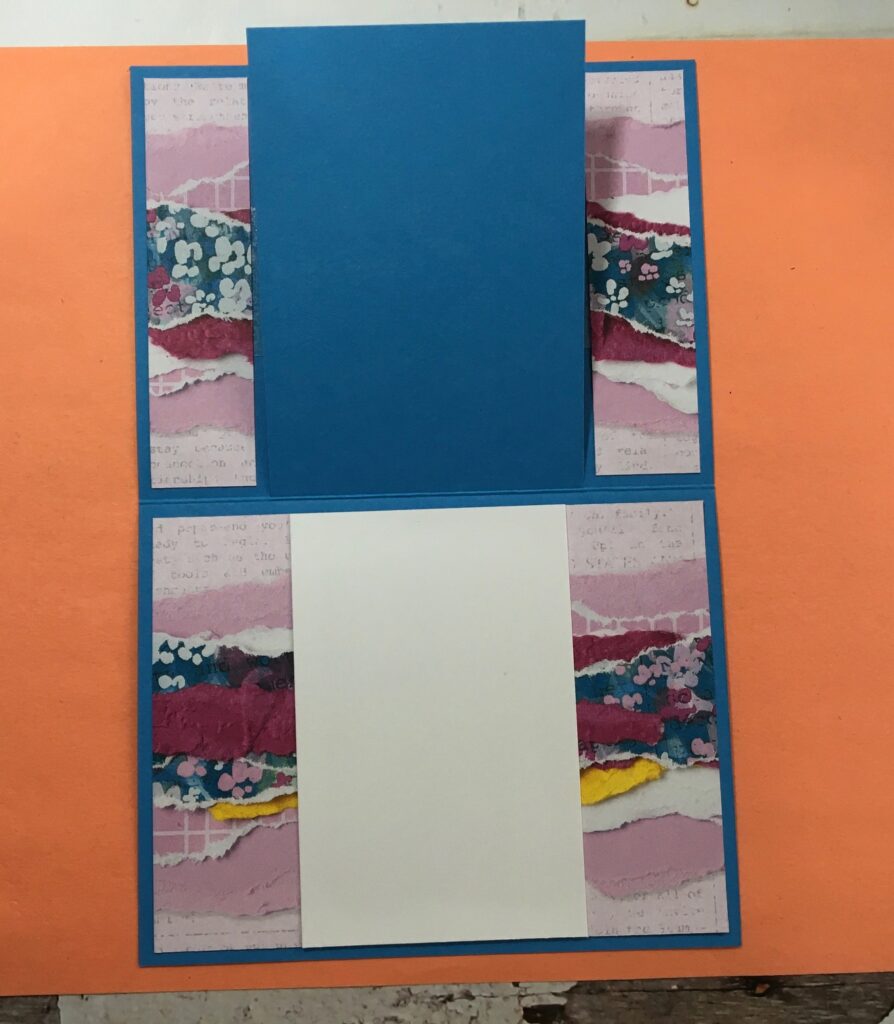
- Pieces that are numbered 1, 2, and 3 are then added. #1 will be adhered to the back inside of the card. #2 and #3 will be adhered to the back of the 1 1/4″ side strips. These pieces will slightly cover the Window Sheet. See the pictures below for reference.
- To create the mini card inside the card, add a piece of Basic White card stock (2 3/4″ x 4″) in the middle of the DSP on the back inside of the card. This will be the perfect place to write your message. See the picture below.
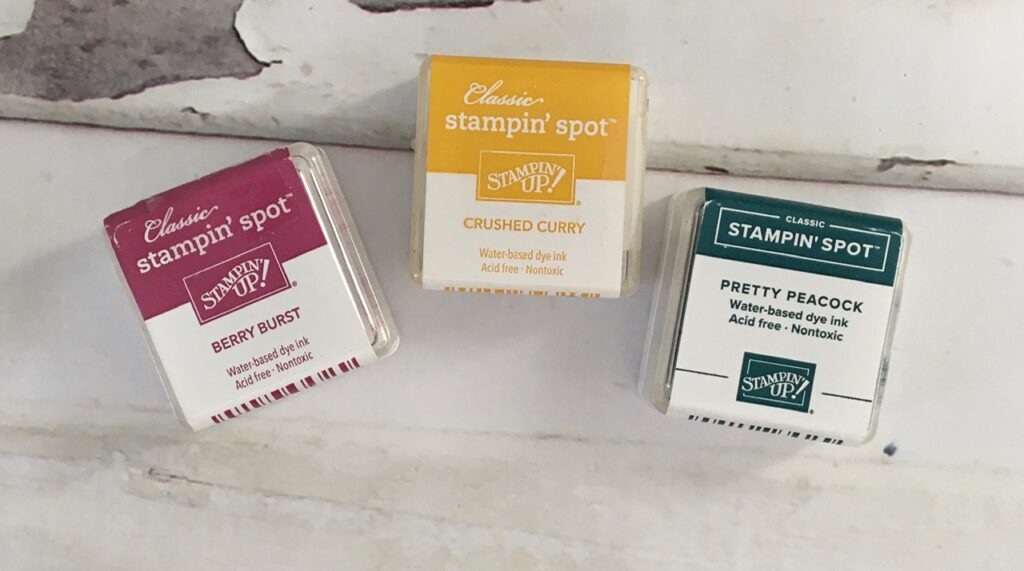
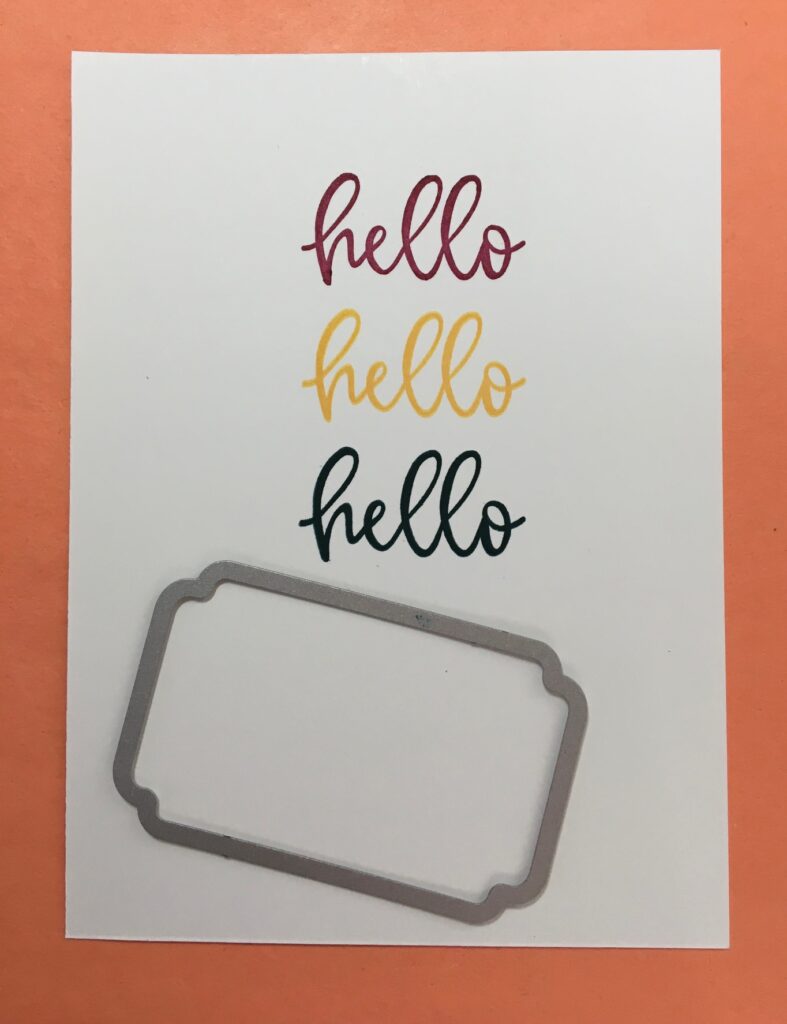
- Choose the sentiment and ink color(s) that you want to use for the die cut that will be floating on the front of your card. I chose the scripted “hello” stamp from the Biggest Wish stamp set. The sentiment was stamped onto Basic White card stock in three colors – Berry Burst, Crushed Curry, and Pretty Peacock – which are all colors that are in the DSP. Die cut the sentiment with a smaller die than you used for the initial die cut piece.
- Use a few pieces of Tear ‘n Tape to adhere your die cut sentiment to the front of the Window Sheet, centered on the initial die cut. The layered die cuts will appear to be floating.
- Finish your card with your choice of embellishments. I used glue dots to add a double bow from Simply Elegant Trim to the sentiment piece. The final touch was the addition of a few Tinsel Gems to make sure the pink pops on the card.
I hope you give this design a try. It’s fun to make and really has a WOW effect. Please be sure to hop on over to Jo Anne’s post. I know she has a great project to share with all of us. You can also see a list of this month’s blog hoppers below. Make sure you visit everyone’s blog to see the amazing projects.
The main products that I used to make my card are shown below. Simply click on any picture, and you’ll go directly to my online store.
Inky hugs,
Laurie
This Month’s NC Demos Blog Hoppers
Jo Anne Hewins
Tina Lesson
Toni Campana
Tracie Evans Langley
Laurie Meier <— YOU ARE HERE
Main Products Used to Make My Card
|
|
||
|
|
|
|
|
|
|
|
|
|
|
|
|
|
|
|
|
|
