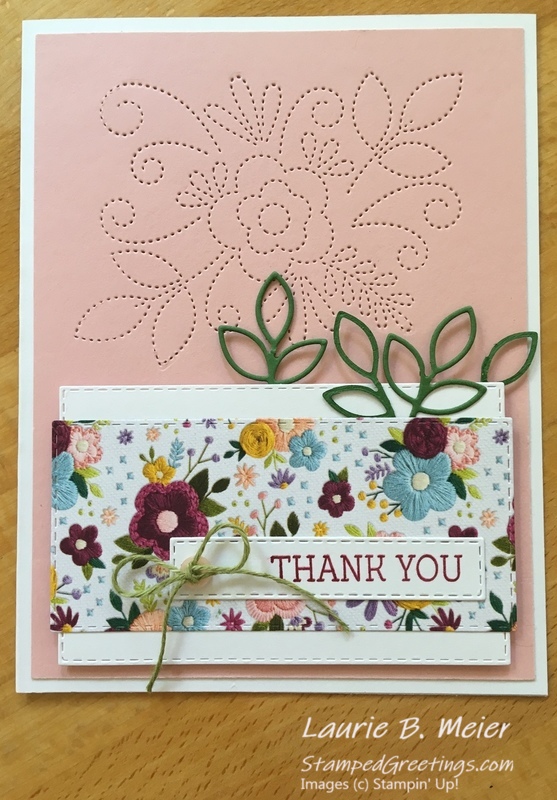
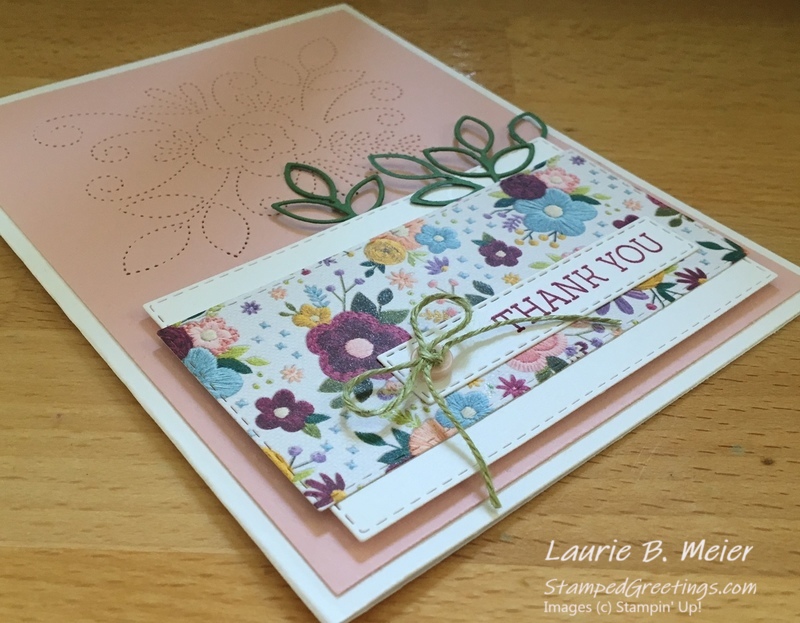
If you think that all bundles are simply great stamps and amazing dies combined for a discount, you should really take a closer look at the Needlepoint Nook Suite. I have to admit that sometimes I discount the uniqueness of different bundles. But, I am really glad that I have the Needle & Thread bundle in my collection. Take a look at the picture below –
Now, if I were to tell you that the products in this suite are being retired (and they are), it should take you literally only seconds to be convinced that you need to order them. Fear not! At the end of this post, you’ll be able to do just that.
Let me take you through the steps that you’ll need to create this card:
- Start with a card base made from Whisper White card stock, cut to 5 1/2″ x 8 1/2″ and scored at 4 1/4″ on the 8 1/2″ side.
- The frame for the card is a piece of Blushing Bride card stock cut to 4″ x 5 1/4″.
- Take a look at the wonderful design at the top of the Blushing Bride piece with one of the dies from the Needlepoint Elements Framelits Dies. The detail in this die is really amazing. You will find a LOT of uses for this design.
- Adhere the finished Blushing Bride piece directly to your card base. I used Multipurpose Liquid Glue – one of my favorites.
- The focal point for the card is based around two rectangle die pieces. They are both cut by using dies from the Rectangle Stitched Framelits Dies collection. These are my new go-to dies for many projects. I absolutely love them!
- The bottom rectangle is cut from Whisper White card stock, and the top rectangle is cut from a piece of the Needlepoint Nook Designer Series Paper (DSP). It was very difficult to choose the pattern that I wanted to use from the DSP collection since all the patterns are gorgeous.
- You will have many options for the sizes of the rectangles that you choose to die cut. I thought it would be interesting to have the top rectangle to be narrower high-wise and longer length-wise than the bottom rectangle.
- The Needlepoint Elements Framelits Dies collection is full of fun shapes and textured dies. Use the three leaf die to add die cut leaves to your card. I used Garden Green card stock to cut the leaves. Tip: Make the leaves look different and add them to different layers of the front piece. You’ll notice that I have one piece that has only two leaves and another that only has one leaf.
- Before you adhere any of the focal point pieces. Stamp “THANK YOU” with Berry Burst ink onto your die cut Whisper White rectangle. Use a the smallest rectangle die from the Needlepoint Elements Framelits Dies collection to die cut the “THANK YOU” piece. Notice that I die cut this piece to have the words offset to the right. No one will ever know that you die cut from the large Whisper White rectangle. This is a great tip to conserve paper.
- Now you’re ready to put the focal point together. Adhere the DSP rectangle directly to the Whisper White rectangle. Use Dimensionals to adhere the Whisper White rectangle to your the Blushing Bride piece. Adhere the “THANK YOU” piece to the DSP rectangle.
- To finish your card, tie an Old Olive Linen Thread bow onto a Needlepoint Nook Mini Button. Use a Glue Dot to add the finished button to your “THANK YOU” piece.
This design has SO MANY possibilities. There are great, additional sentiment stamps that are included in the Needle & Thread stamp set. They can easily be used in place of “THANK YOU”.
Below are the main products that I used to make this card. If you click on any picture, you’ll go directly to my on-line store. DON’T DELAY ordering. Since these products are retiring, (with the exception of the stamps) they are only available while supplies last. The stamps will be available until May 24.
Happy stamping!
Laurie
|
|
|
|
|
|
|


