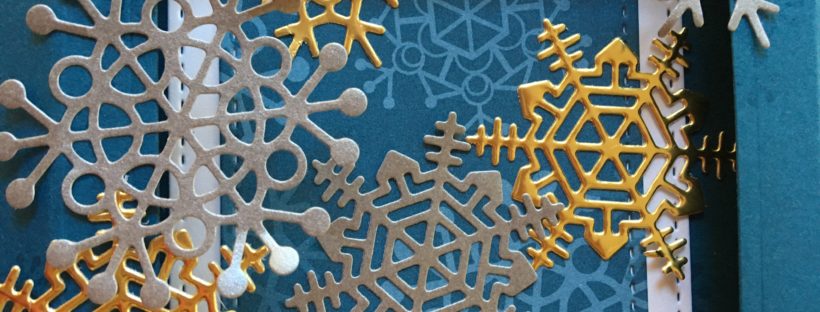
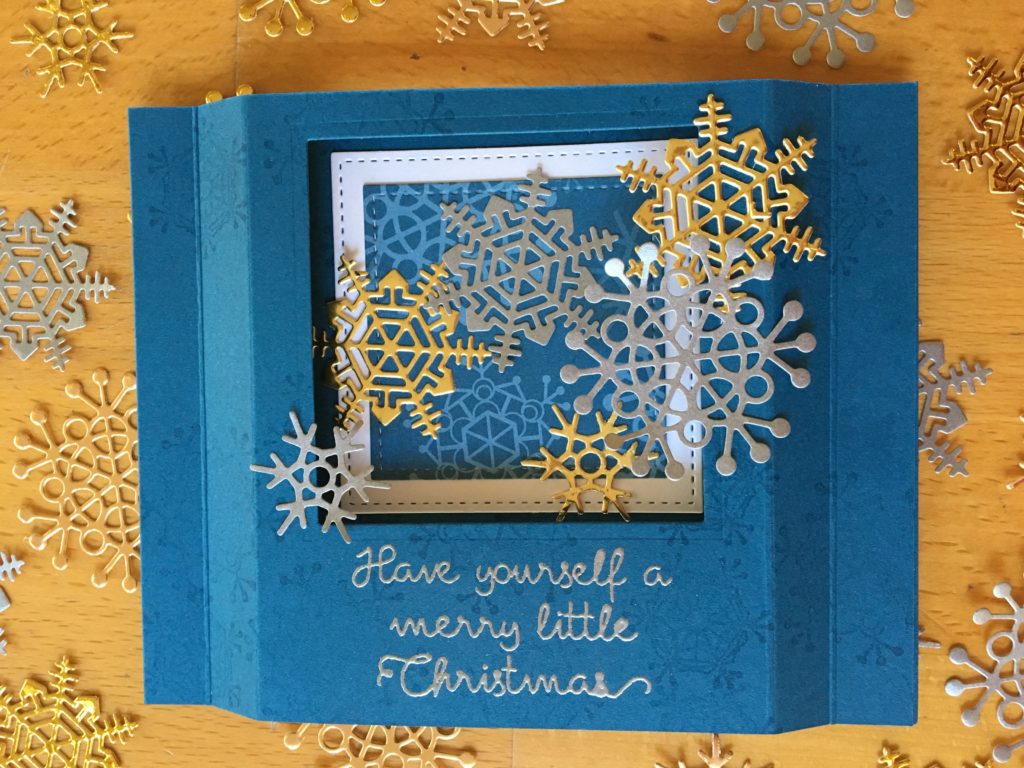
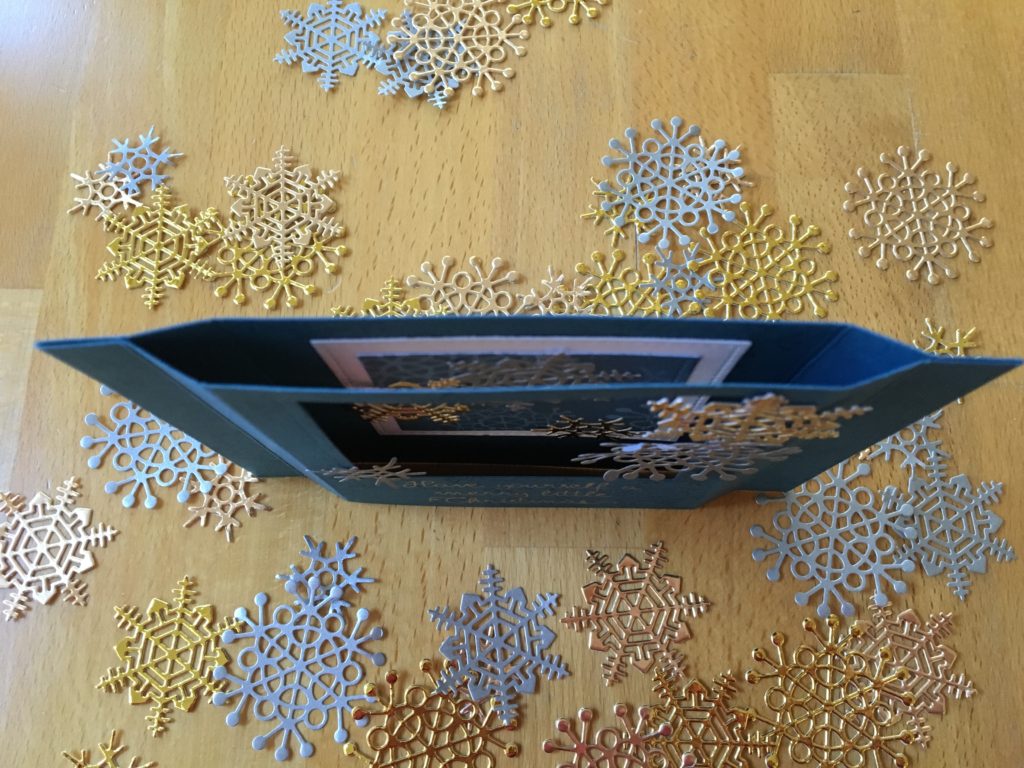
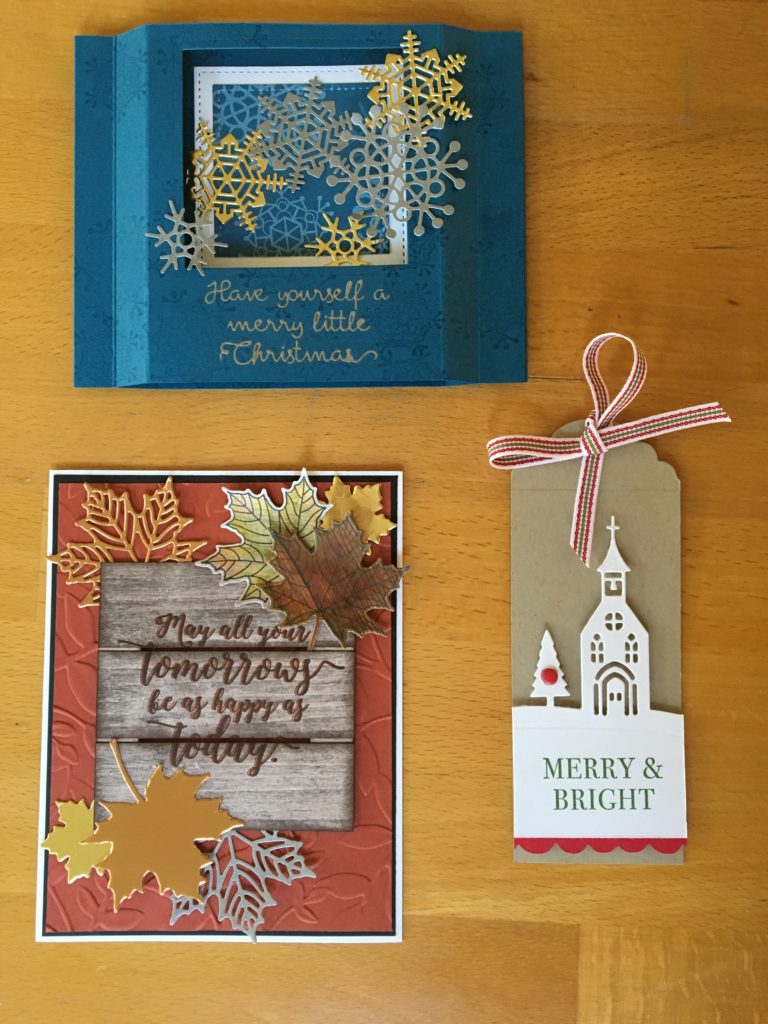
The Colorful Seasons Bundle is a wonderful pair of coordinating stamps and dies that work together incredibly well for all seasons throughout the year. Pictured below is a shadow box Christmas card that showcases the bundle and mixed metal colored snowflakes. The Dapper Denim cardstock is the perfect background for this special card.
Here are the main steps and products used to make the card.
- Start with a piece of Dapper Denim cardstock cut to 4 1/4″ x 11″. You can make two shadow box cards from one standard size of 8 1/2″ x 11″ cardstock.
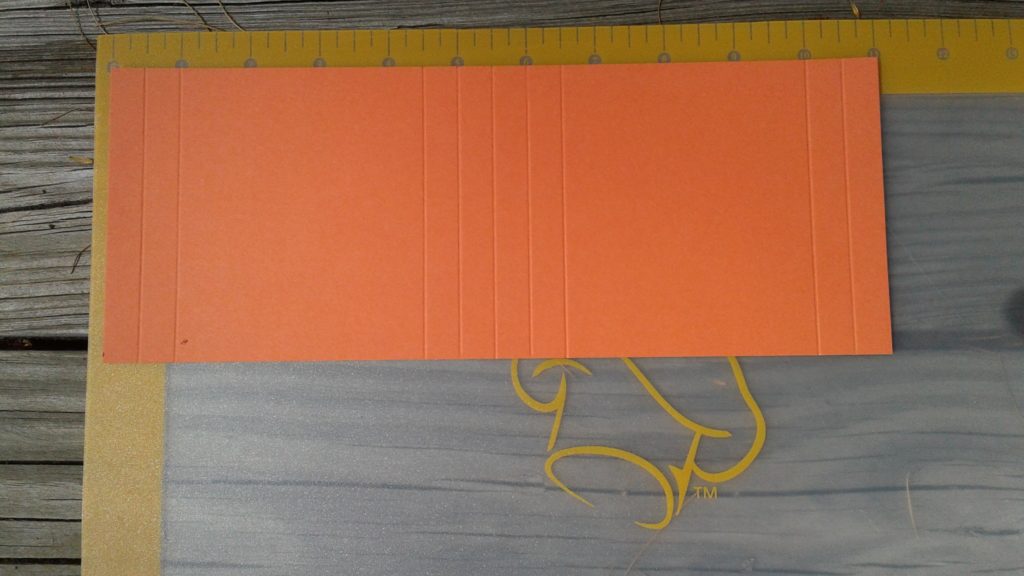
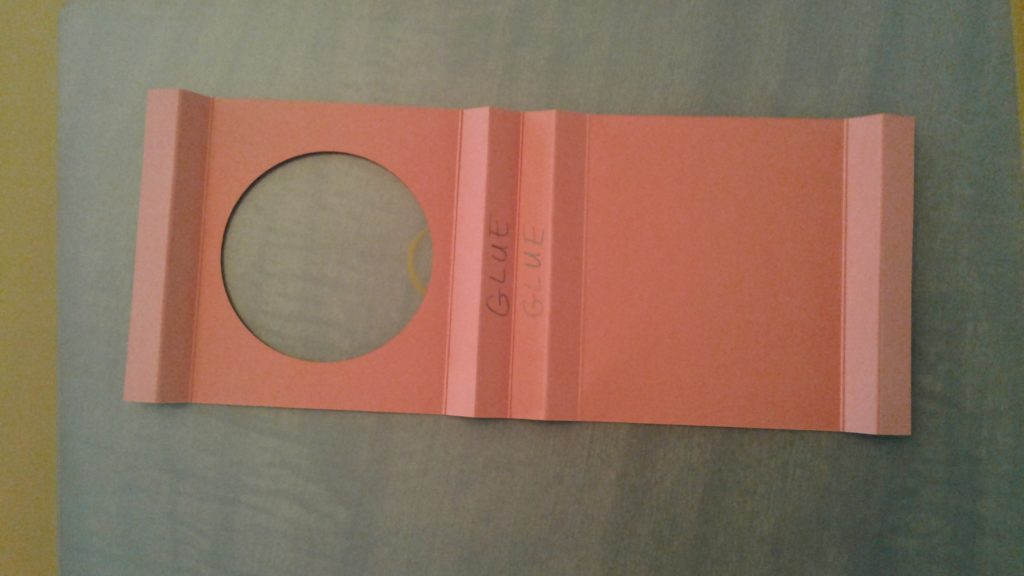
- On the 11″ side, score the cardstock at at 1/2″, 1″, 4 1/2″, 5″, 5 1/2″, 6″, 6 1/2″, 10″, and 10 1/2″. A picture may be more helpful. [Please note: This picture is from a prior post and shows Calypso Coral cardstock!]
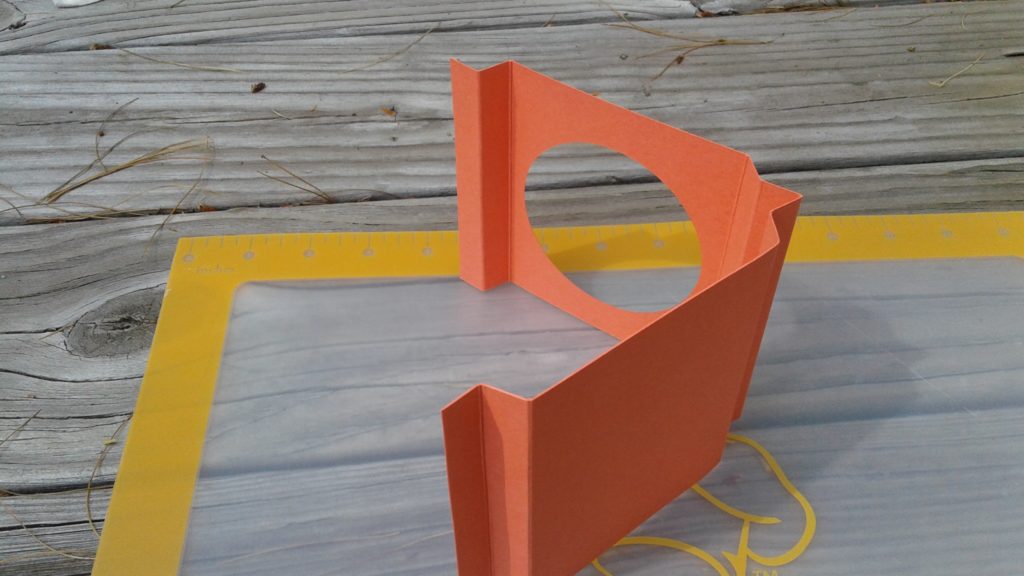
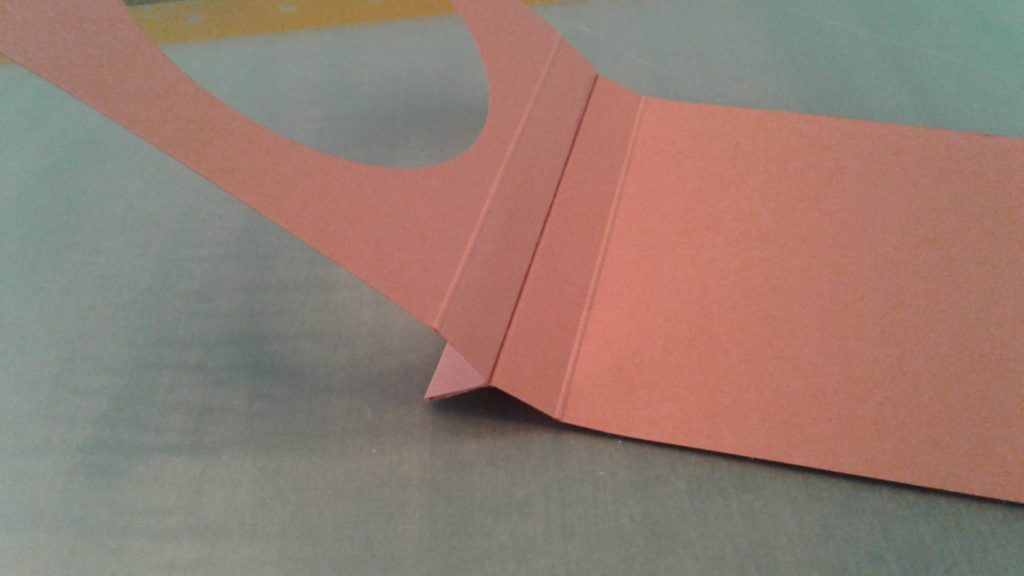
- The folds are pretty straight forward when you see how the card comes together. The folds are – valley at the 1/2″ score line, mountain at the 1″ score line, mountain at the 4 1/2″ score line, valley at the 5″ score line, mountain at the 5 1/2″ score line, valley at the 6″ score line, mountain at the 6 1/2″ score line, mountain at the 10″ score line, and valley at the 10 1/2″ score line. Again, a picture may be more helpful. [Again please note: This picture is from a prior post. Please reference it just for the visual guideline for folding the cardstock. Ignore the die cut circle!]
- For the Christmas card in this post, stamp “Have yourself a merry little Christmas” from the Christmas Quilt stamp set with Versamark onto the bottom middle of the card front. Heat emboss the sentiment with Silver Stampin’ Emboss Powder.
- Use the largest square framelit in the Stitched Shapes Framelits set to die cut a square in the top middle of the card front. See the picture of the Christmas shadow box card above for reference.
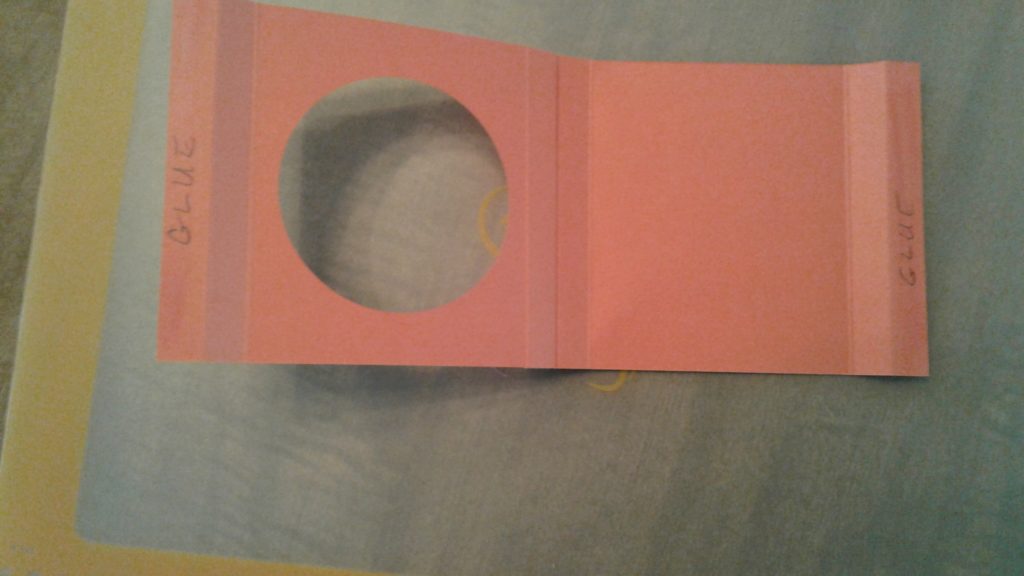
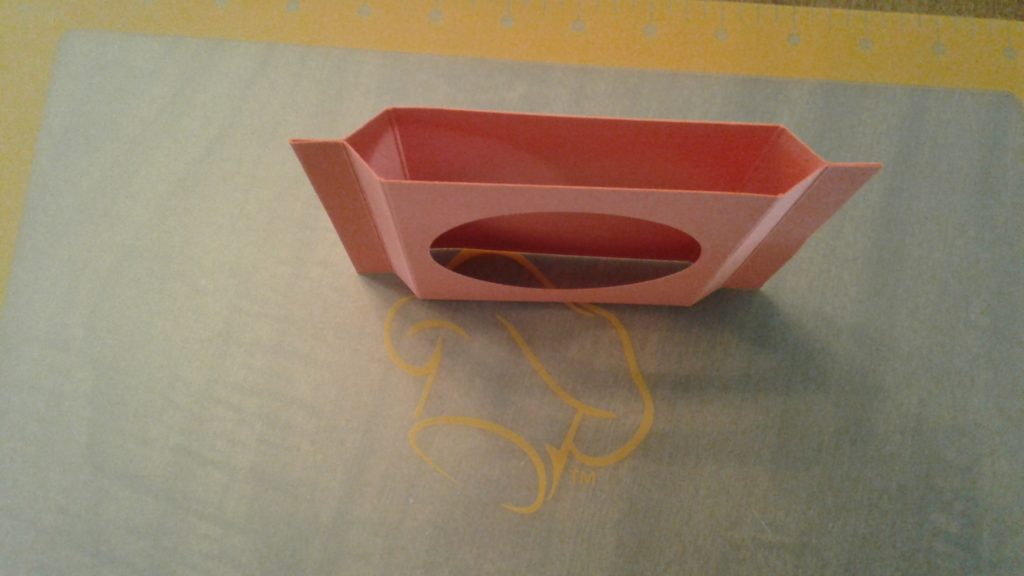
- Now, it’s time to assemble the shadow box card. Start by folding the cardstock in half at the 5 1/2″ score line. Step 1: Put glue between the 5″ score line and the 6″ score line. Adhere the glued areas together, as pictured below. Step 2: Put glue between the 1/2″ score line and the 1″ score line and between the 10″ score line and the 10 1/2″ score line. Adhere the glued areas together, as pictured below. You will then have your shadowbox card built. This card will fit easily into a standard envelope for a 4 1/4″ x 5 1/2″ card. You’ll flatten the card a little before mailing. [You know what I’m going to say! Just use the pictures below for a guideline of where to put your glue!]
- Step 2b
- Use the same square die from the Stitched Shapes Framelits that you used on the card base to die cut a square from a piece of Whisper White cardstock. Then, use the next smallest square die from the Stitched Shapes Framelits to die cut a square from your choice of cards in the Color Theory Memories & More Card Pack. Glue the smaller square into the middle of the larger square.
- Glue the layered square in the middle of the back of the shadowbox card. You can easily line up the square with the die cut square on the front of the card.
- Finish your card with your choice of die cut snowflakes and metal colors. There are three different snowflake dies in the Seasonal Layers Thinlits Dies. Cut some snowflakes from Copper, Gold, and Silver Foil Sheets. Adhere them to the inside and outside of your shadow box card. The Fine-Tip Glue Pen really does the trick to get the snowflakes just where you want them.
- Sit back and admire your work! Shadow box cards are just plain fun. They, literally, stand on their own and add an interesting twist to a Christmas card.
Below are the projects we made at our recent Stamp Club! I’ll share details on the Christmas gift tag in my next post.
Below are the main products that I used to make the shadow box Christmas card. If you click on any picture, you’ll go to my on-line store.
Happy stamping!
Laurie
|
|
|
|
|
|
||
|
|
|
|
|
|
|
|
