Welcome to the April NC Demos blog hop! You probably just hopped over from Sharon Maranich’s post. Doesn’t she just inspire you with her designs?
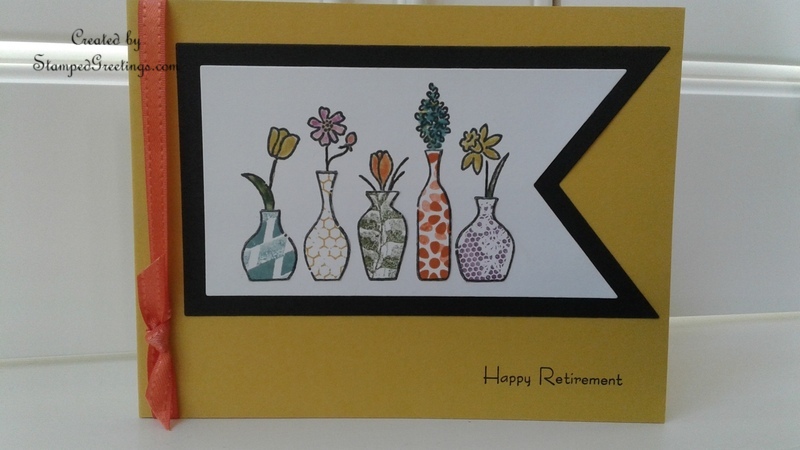
Thanks for continuing your tour and stopping by to see my post for this month’s blog hop. I am focusing on one of my favorite stamps that is retiring at the end of May. I thought it would be fun to put together a Happy Retirement card in honor of the Vivid Vases stamp set. I have also focused on the five colors that are retiring – Hello Honey, Mossy Meadow, Lost Lagoon, Blackberry Bliss, and Tangelo Twist. Here is my card:
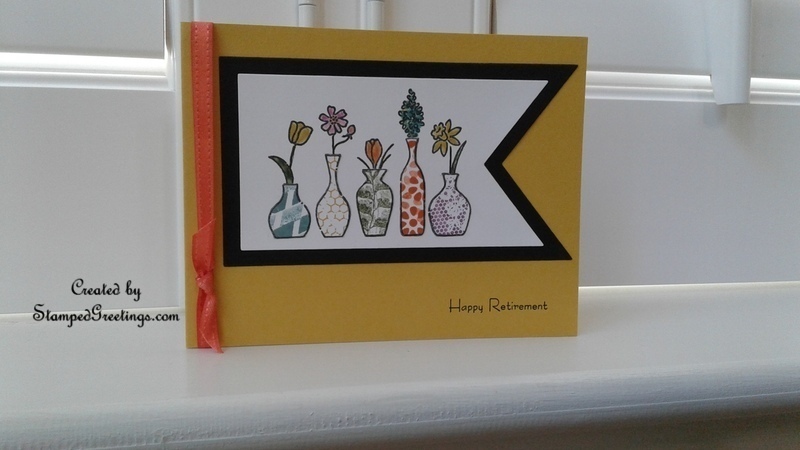
The technique that is featured in the card is paper piecing. It’s a great way to get a new look from some of your favorite stamps. Look for a stamp that has some large, open spaces. For example, the vases in this stamp are perfect.
Let me take you through some of the steps that I used to create this card. First, I did not want to use the words that come with the stamp. I covered them with masking tape before I inked the rest of the stamp. Tip: Get some of the adhesive off the masking tape before you put the tape onto your stamp. I put the tape on the back of my hand first to get the adhesive a little less tacky.
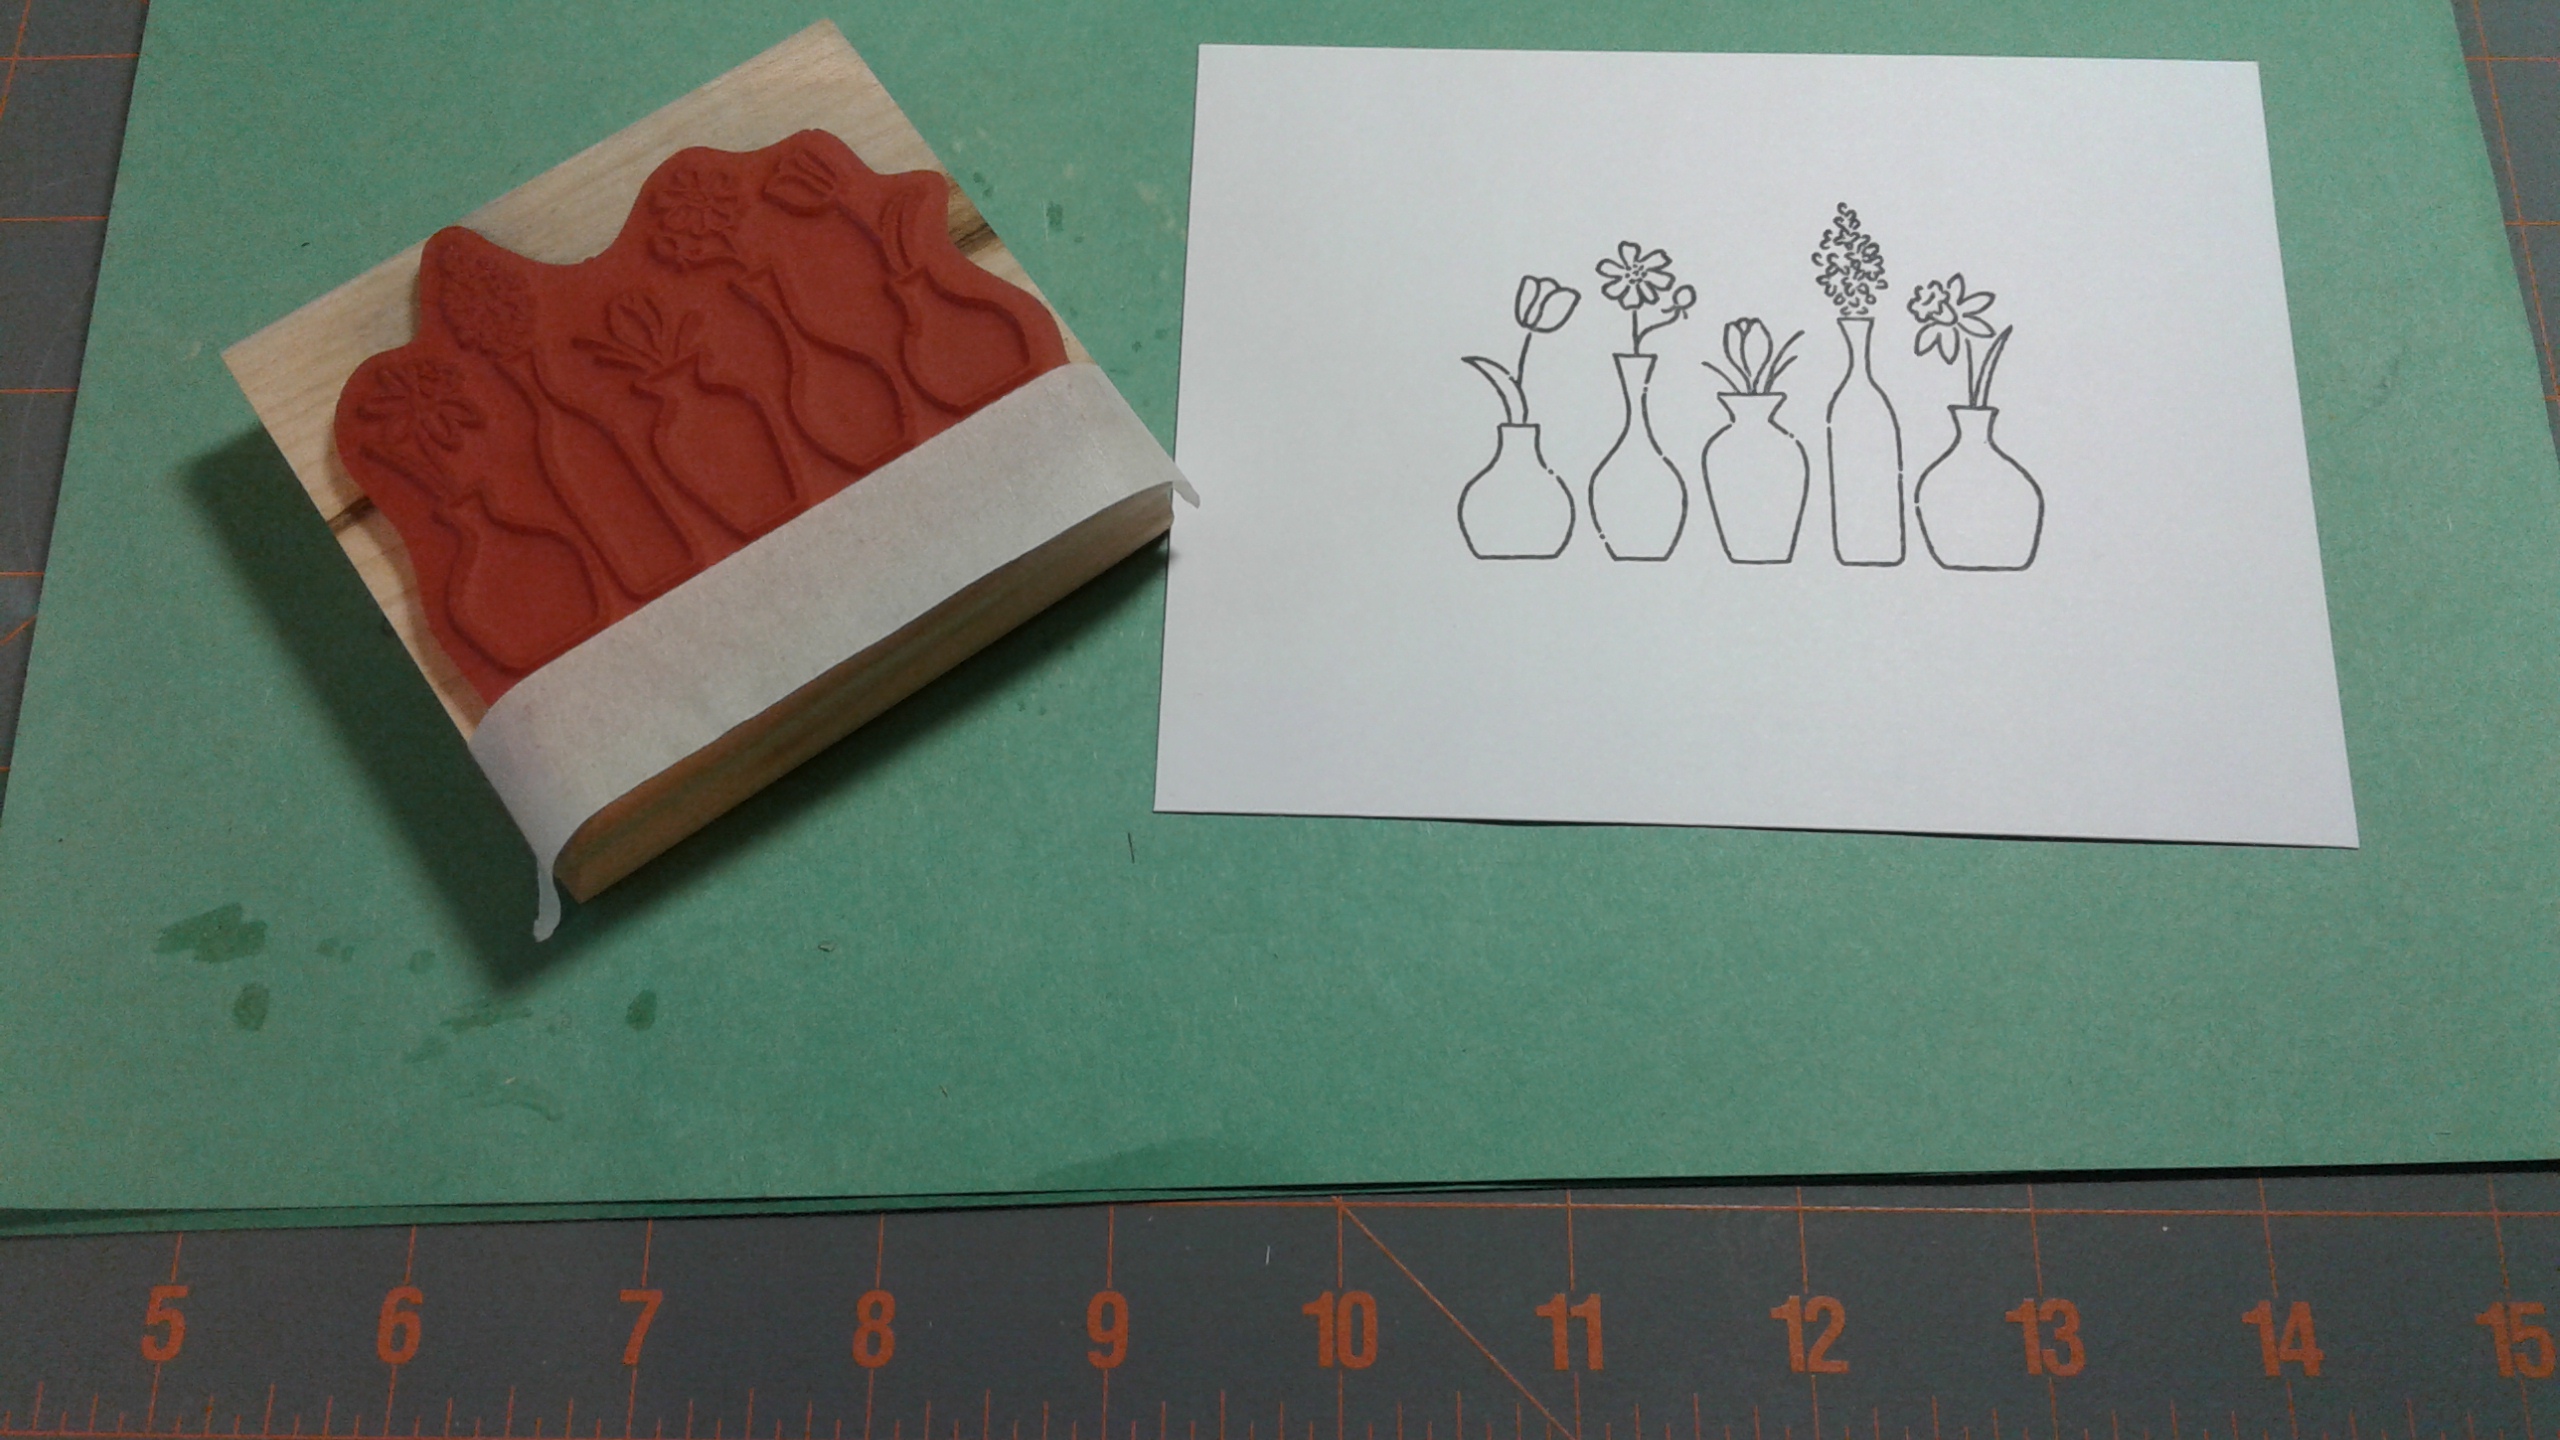
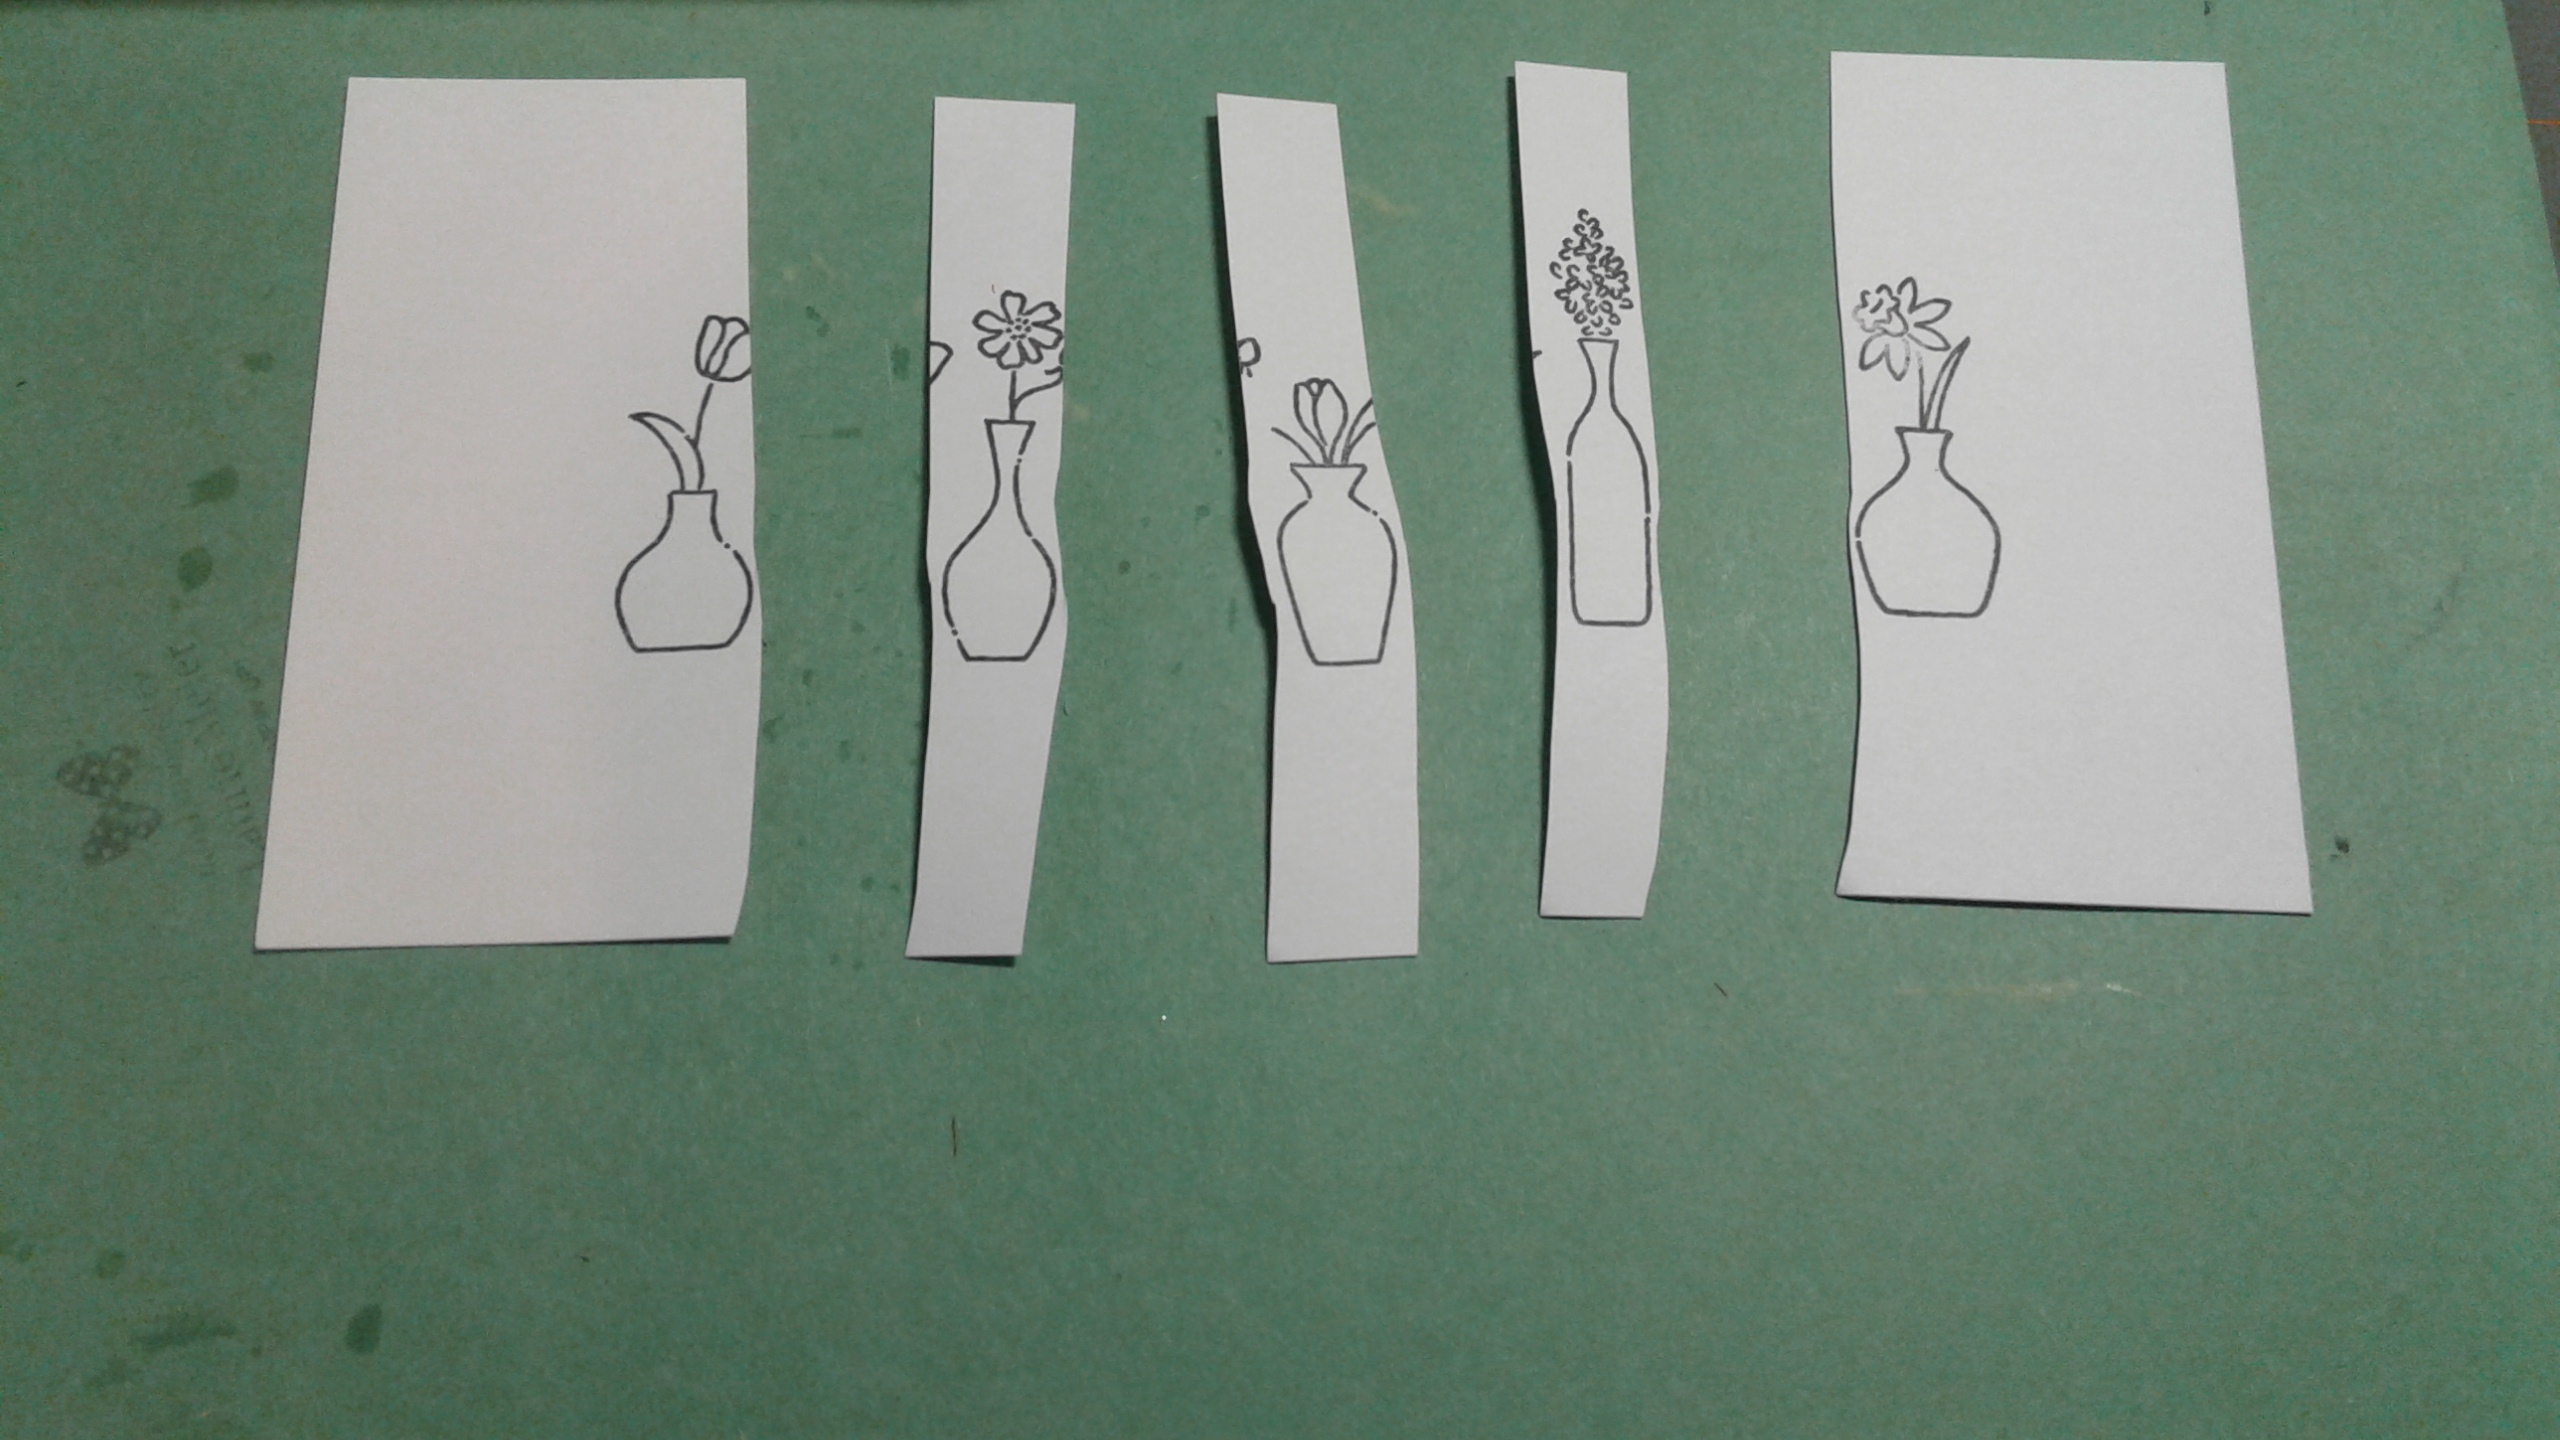
Stamp a few more vases with flowers onto additional pieces of white cardstock. These pieces will become your “experiments” as you design the vases for the paper piecing. Cut the additional pieces as shown below. When you cut the vases out separately, you will have the ability to stamp each vase with different colors and different designs.
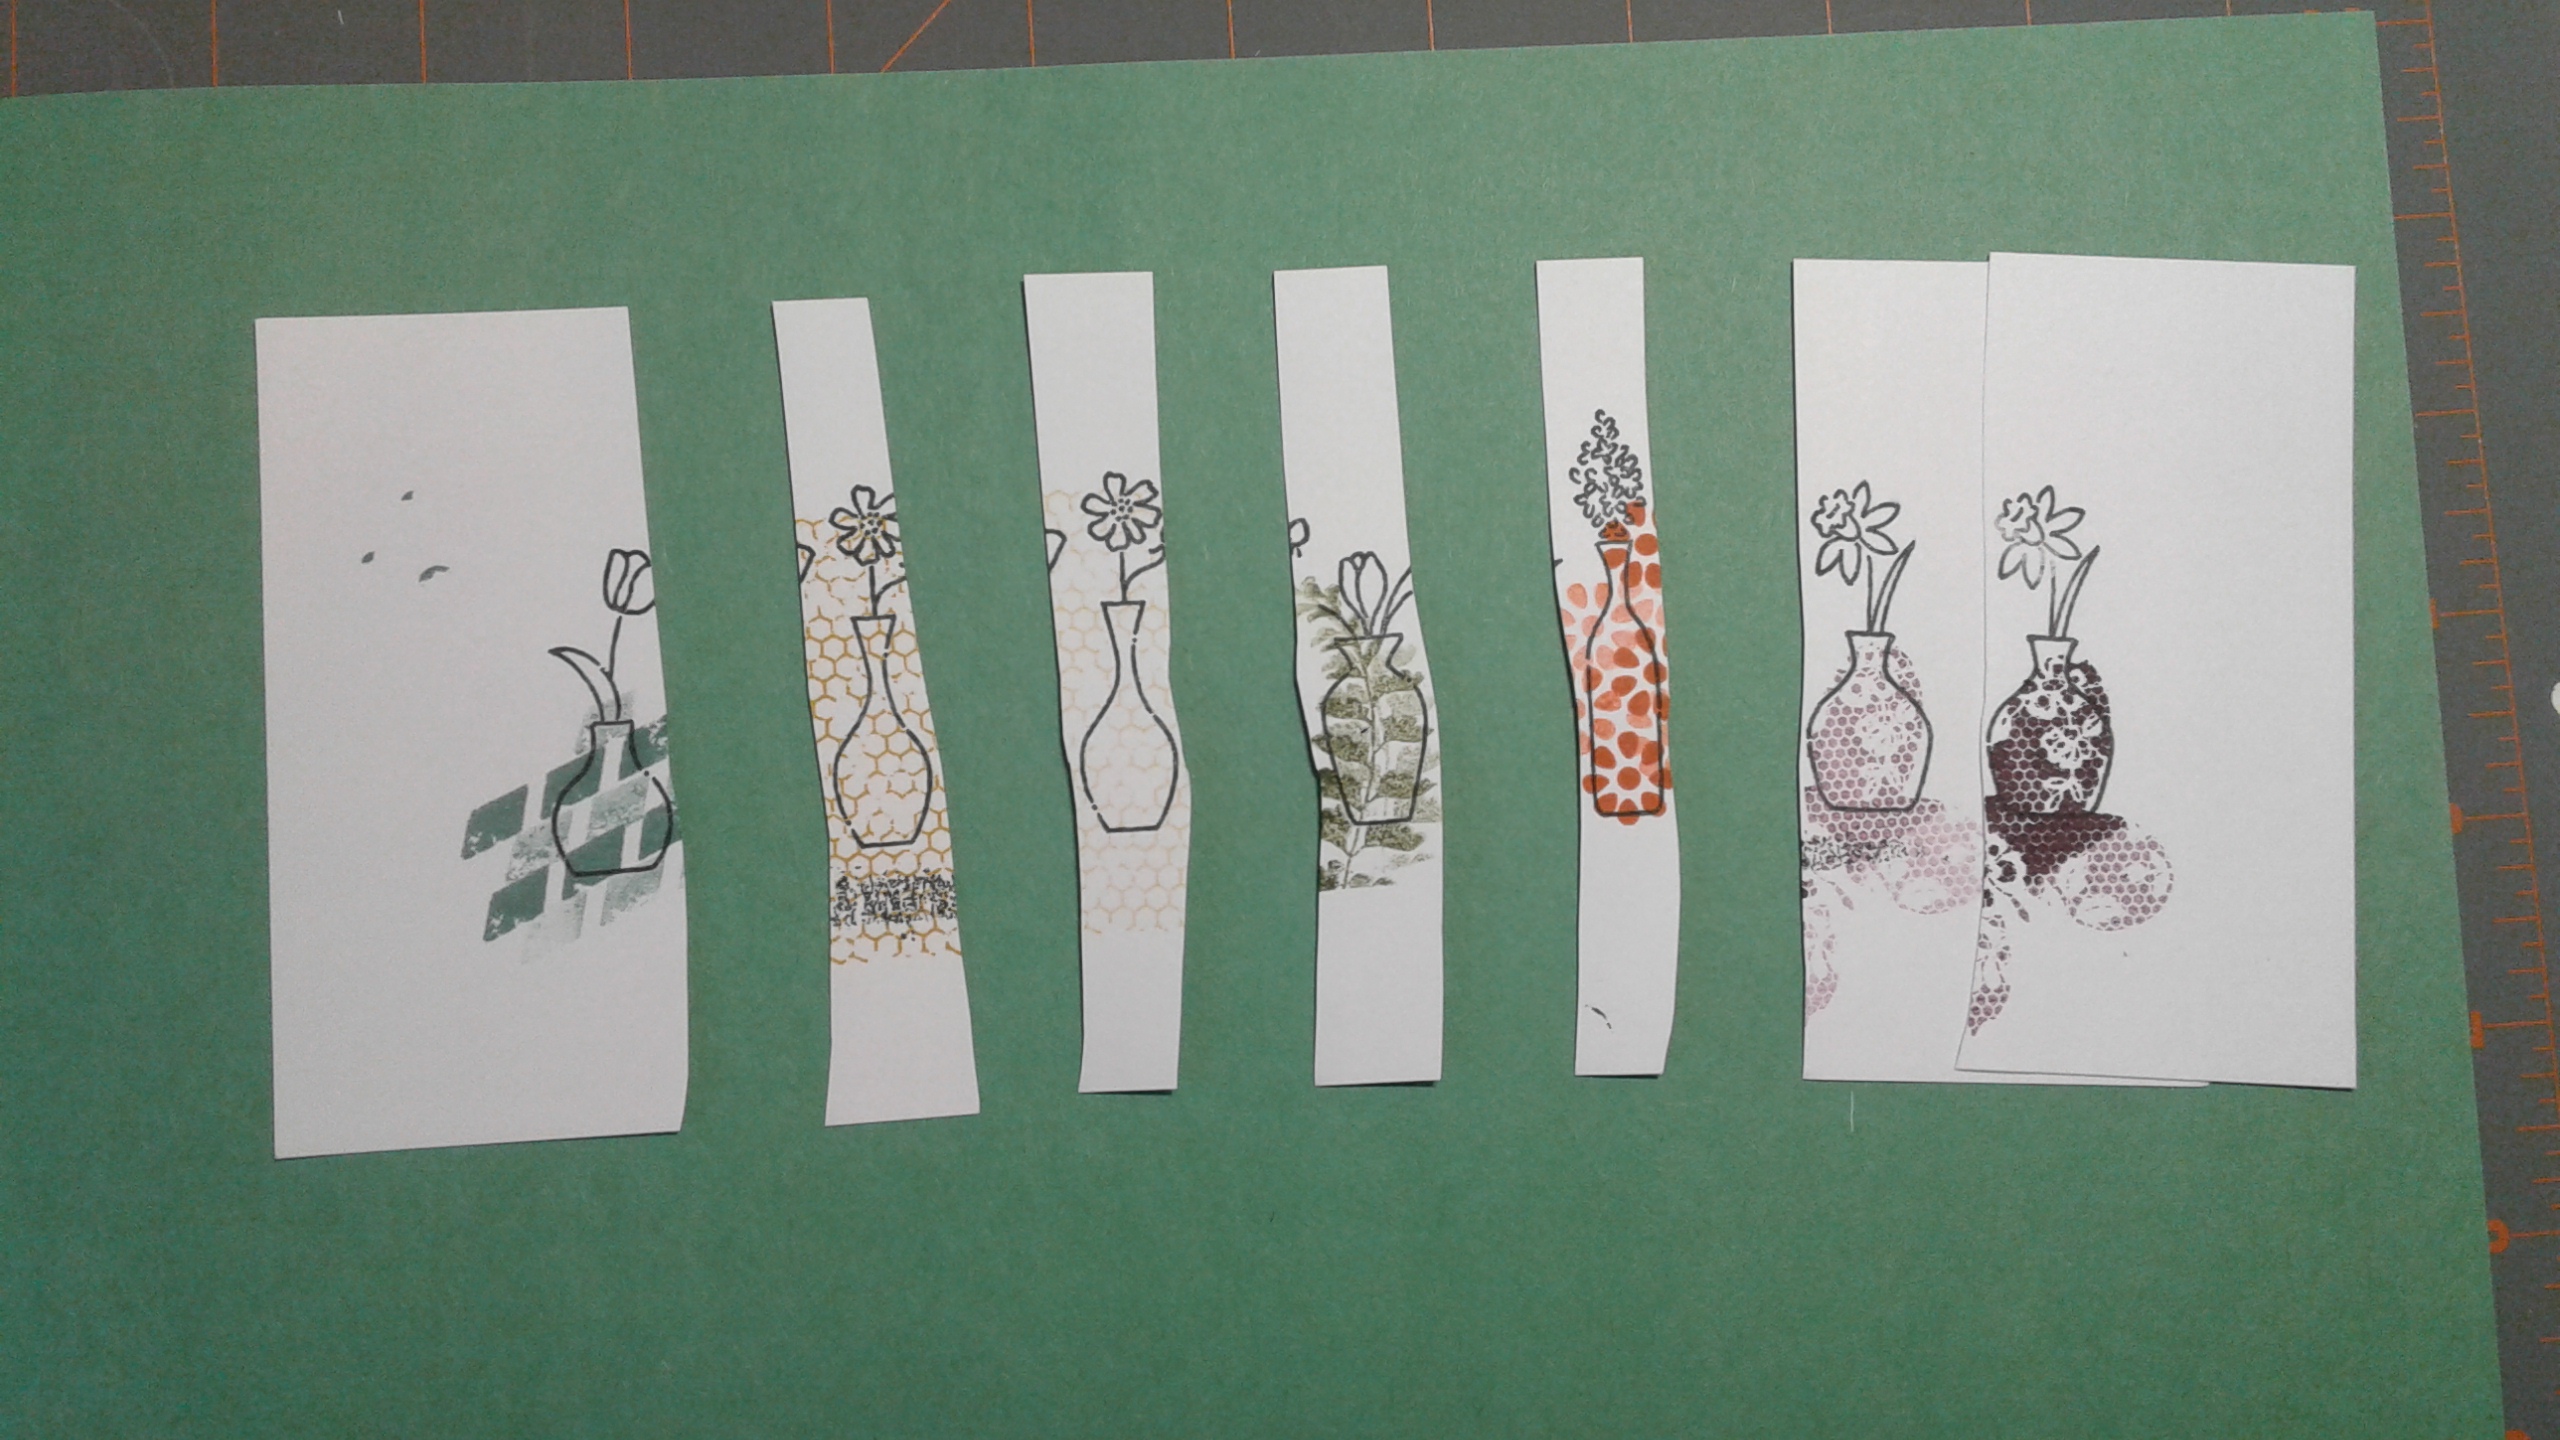
Now – choose the stamp set(s) that you want to use to design your vases. I chose the Butterfly Basics set since there are quite a few stamps in that set that have intricate designs and are perfect for the vases. Check out the picture below to see that I really did experiment with the colors, stamps, and intensity of the colors before finalizing the designs. Take a look at the Butterfly Basics set to see which stamps I used on the vases.
The next step is the real paper piecing part. Get out your scissors and fussy cut each vase. I like to leave the black outline on the cut out pieces. Put the cut out vases to the side while you color in your flowers and leaves.
To color the flowers and leaves, use a combination of stampin’ write markers and blender pens. In the picture below, you’ll see that I tried to include a few colors in the same flower to add a little interest.
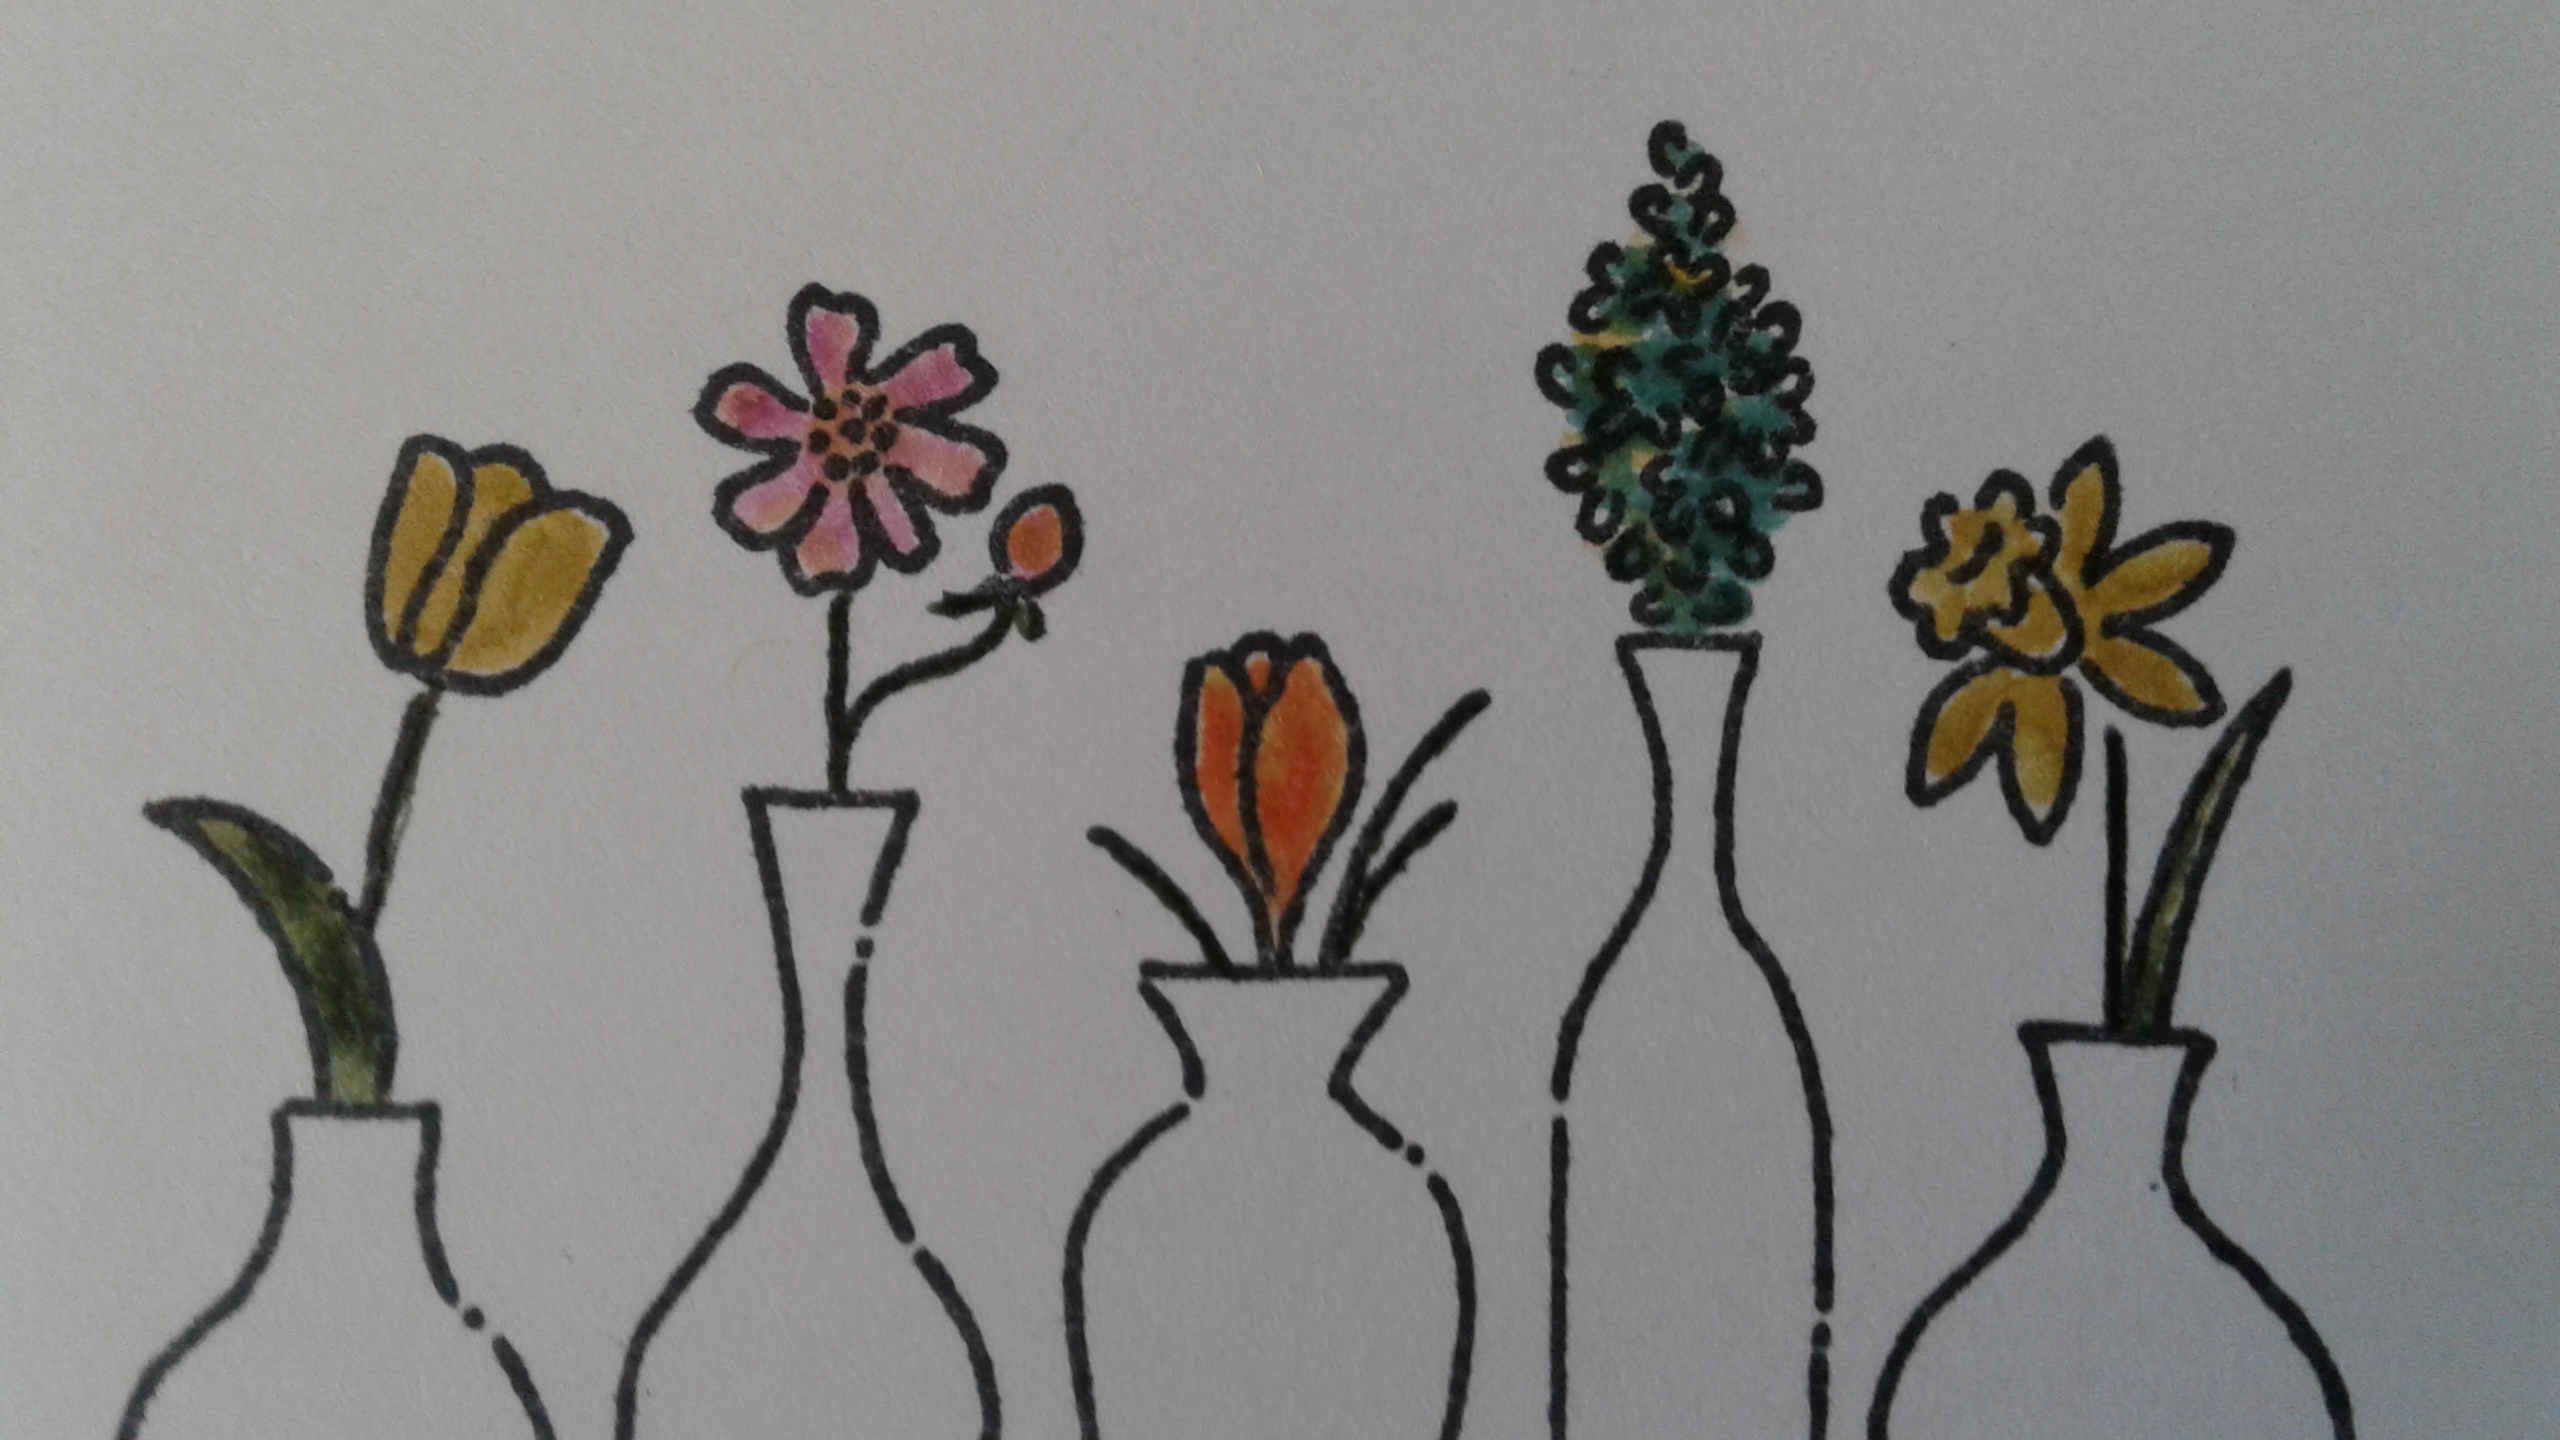
The next step is assembling the pieces. Glue your vases directly onto the “empty” vases. Aligning the vases is pretty straight forward since you have the outline as your guide. Reverse tweezers can be helpful to get everything aligned.
The base of the card is Hello Honey. The “Happy Retirement” stamp from the Teeny Tiny Wishes set did the trick for the sentiment. The card is finished by using the Banner Framelits and a piece of Tangelo Twist ribbon. The largest banner framelit was used to die cut the black banner, and the second largest banner framelit was used to die cut the vases and flowers.
While Vivid Vases may be officially retiring, it will continue to be a go-to stamp in my craft room. Here is one more view of the finished card:
Be sure to hop on over to Sue Root’s post to see her project for this blog hop. Enjoy the rest of the tour!
Below are all the talented artists who are participating in this month’s NC Demos blog hop. Be sure to visit each person’s post to get some inspiration!
Thank for stopping by!
Laurie
NC SU Demo Blog Hop – April 2016
What a great technique for those vases. I love that set but sadly, hadn’t used it in quite a while.
Thank you so much, Sharon. Paper piecing is one of my favorite techniques. Not a lot of work for a lot of wow factor. Hope you have a wonderful week. – Laurie
Love that technique for the vases. I am going to miss Vivid Vases!
Love your idea. Cute card. Great instructions.
Thanks so much! It was fun to put the instructions together. I think I’m going to make a few more of the cards with a Mother’s Day theme and softer colors in the vases. Have a great one!
Laurie, I love your card and the tutorial that you included. Thanks for participating in the blog hop.
Pam, Thanks very much for your comments. I had a lot of fun putting the card together. Thank you for all the work that you do to make the monthly blog happen.
Great card and technique. It’s a good stamp set, but I’m not surprised that it’s going away.
Hi, Jo Anne – Thanks for your comments. I really appreciate them. I love the stamp set also. It has been a fun one to share with my stamp club. Have a wonderful Monday! -Laurie
I’ve never tried paper piecing like this. I’ll have to add it to my ‘must tries’.
I really like your card. Nice job with the instructions.
Also, I noticed that when you mention to hop on over to my blog, it’s not actually linked. Here it is if you need it: http://stampin-with-sue.blogspot.com/2016/04/nc-su-demos-april-blog-hop.html (the one in the list does a route through facebook for some reason). Thanks.
Thanks so much, Sue! I appreciate your feedback. I’ve also updated the link to your blog! Have a great one. -Laurie