Welcome to the NC Demos January Blog Hop! This month, we are all featuring projects that showcase Sale-A-Bration (SAB) products. It really is the most wonderful time of the Stampin’ Up! year! You can choose FREE SAB products with your purchase of $50 or $100 (before shipping and tax)!
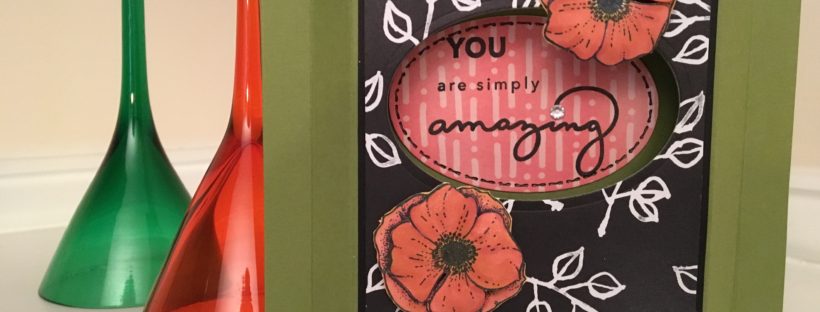
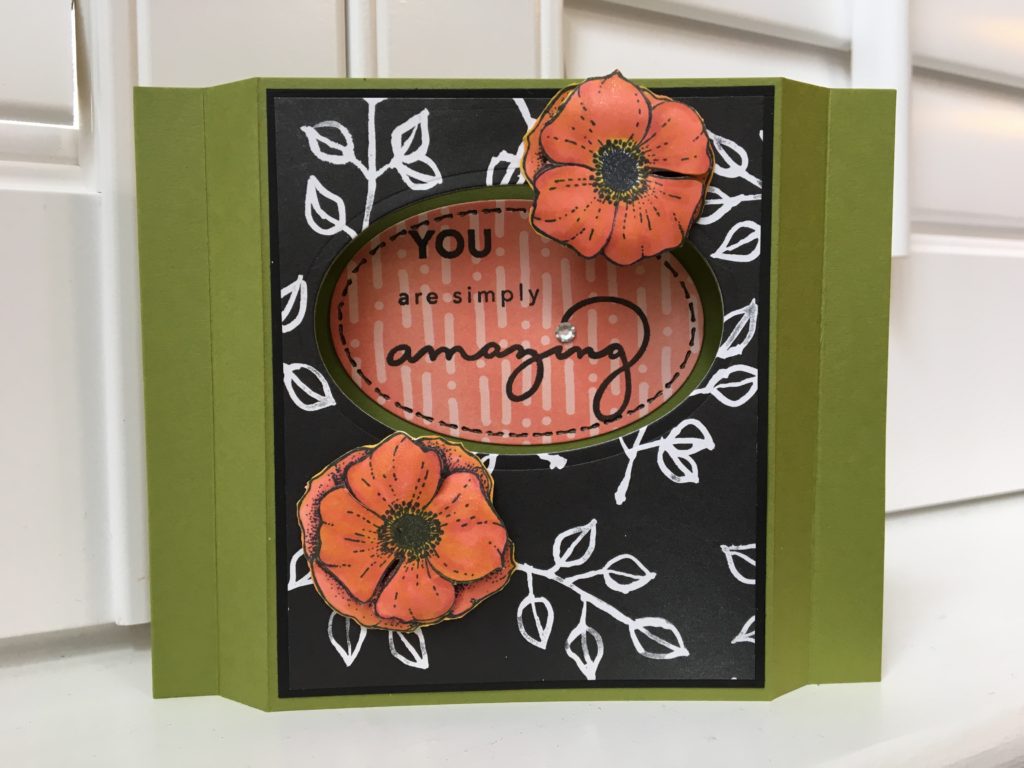
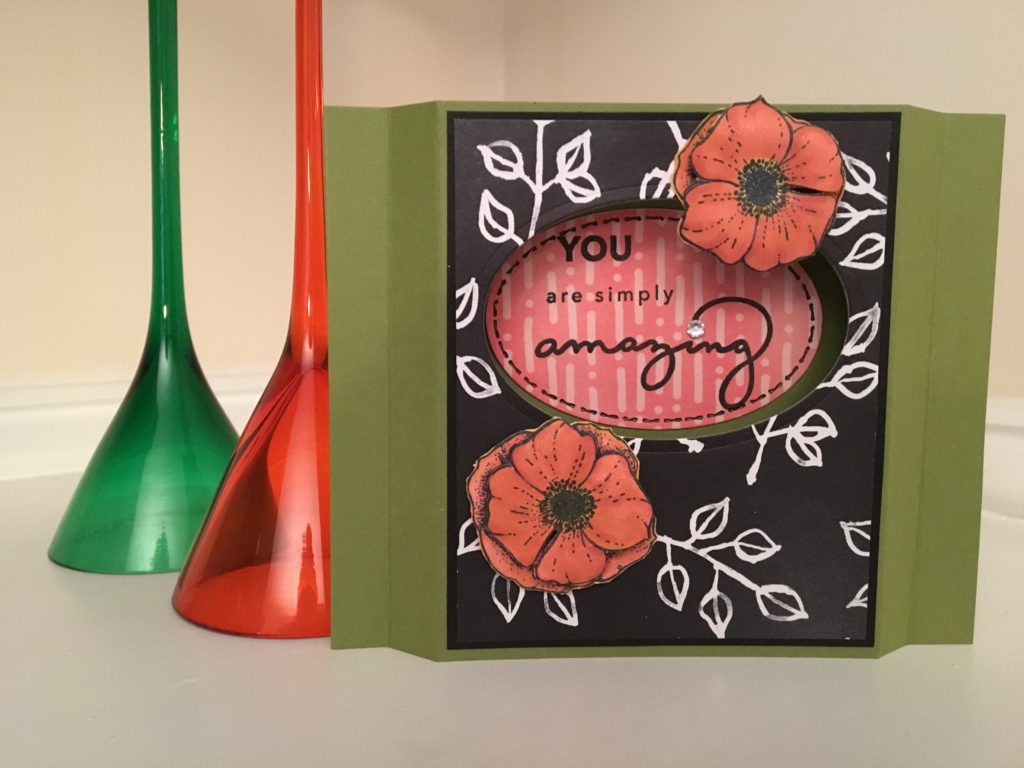
If you’ve just come over from Tracie Evans Langley’s post, I’m sure you enjoyed seeing her project. Thanks very much for stopping by my post. For this month’s blog hop, I have made a card that highlights the wonderful Amazing You stamp set. The stamp set is available as a free SAB product with your $50 purchase (before shipping and tax). It was a lot of fun to work with to make the shadowbox card pictured below.
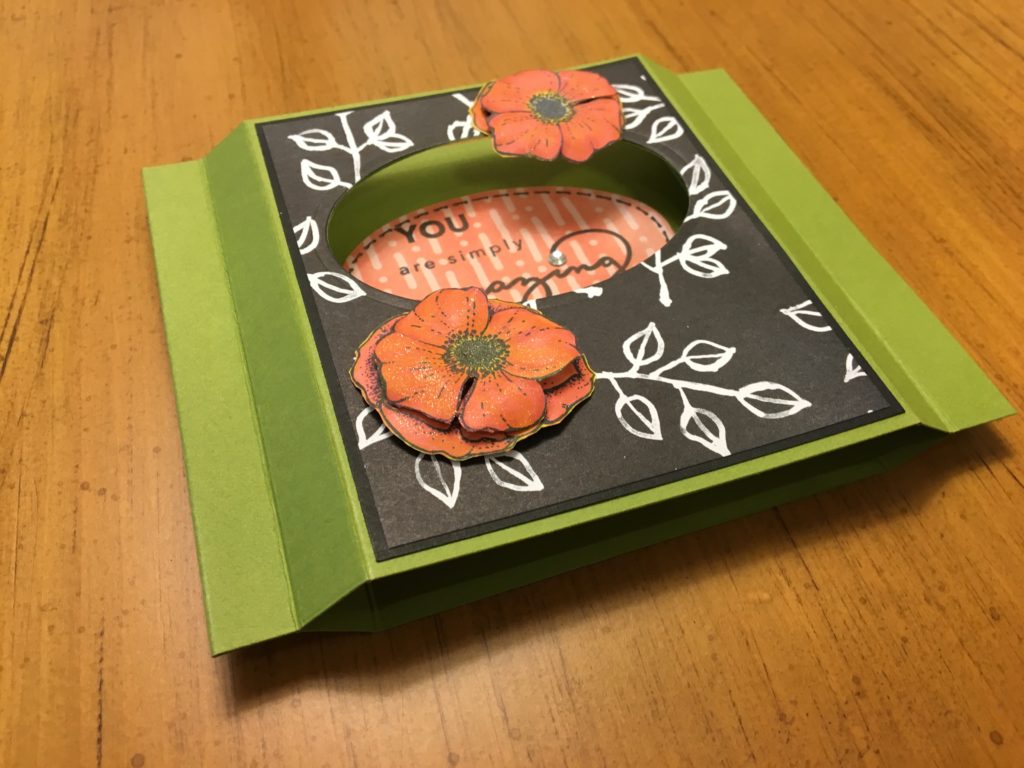
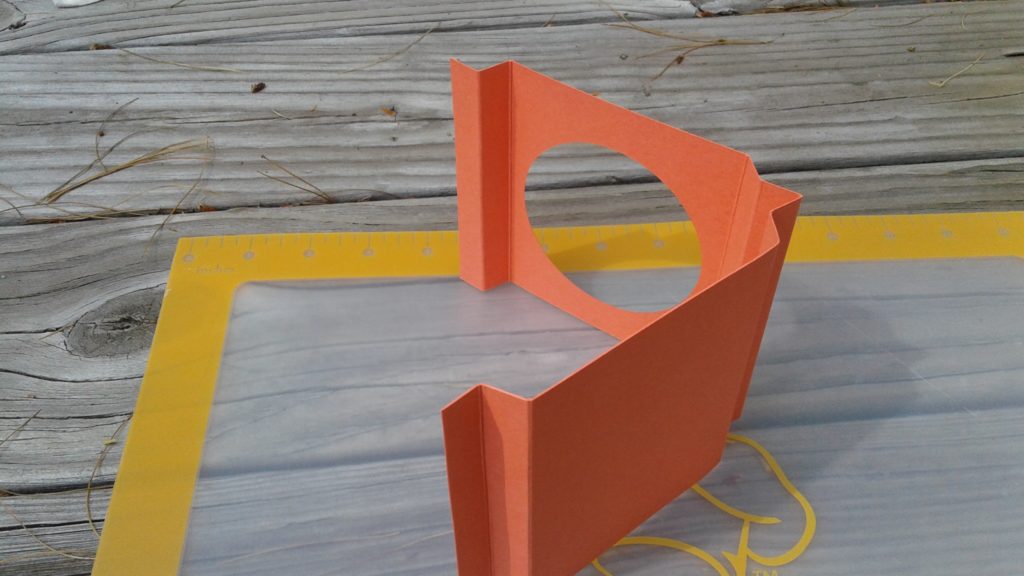
Here is a picture from a different angle to give you a perspective for the shadowbox shape of the card.
Instructions and tips to make this card are detailed below.
- Start with a piece of Old Olive cardstock cut to 4 1/4″ x 11″. You can make two shadowbox cards from one standard size of 8 1/2″ x 11″ cardstock.
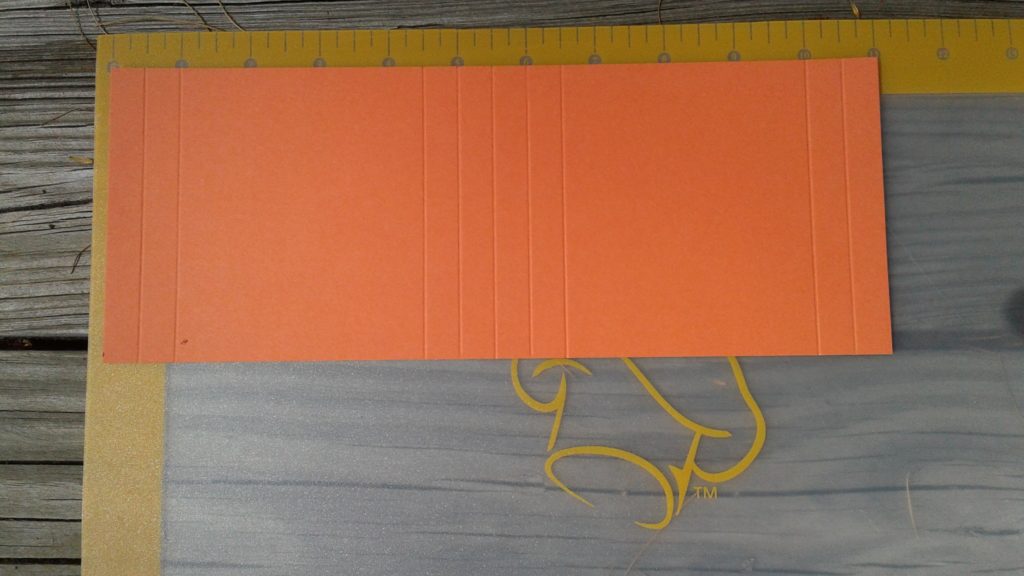
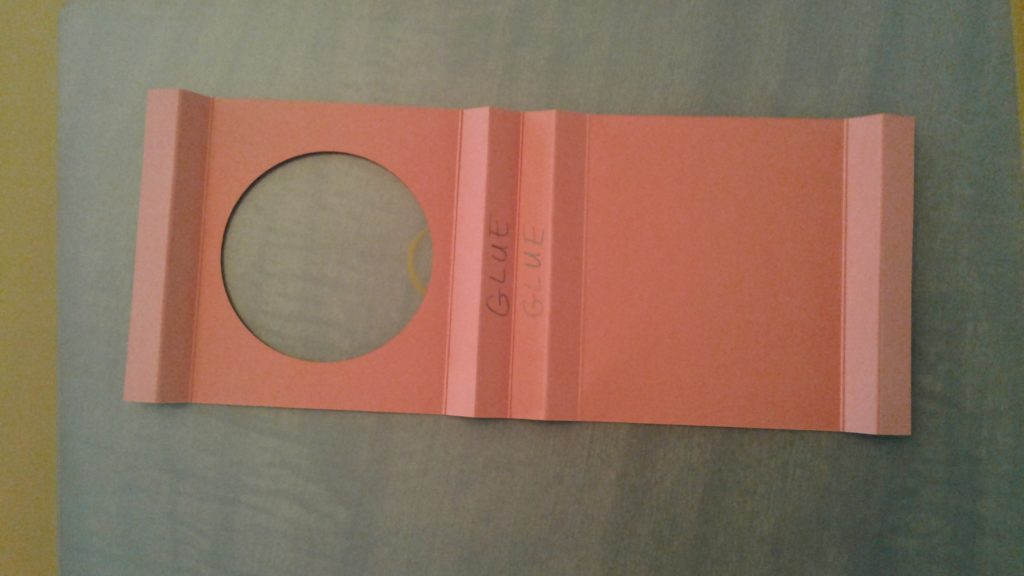
- On the 11″ side, score the cardstock at at 1/2″, 1″, 4 1/2″, 5″, 5 1/2″, 6″, 6 1/2″, 10″, and 10 1/2″. A picture may be more helpful. [Please note: This picture is from a prior post and shows Calypso Coral cardstock!]
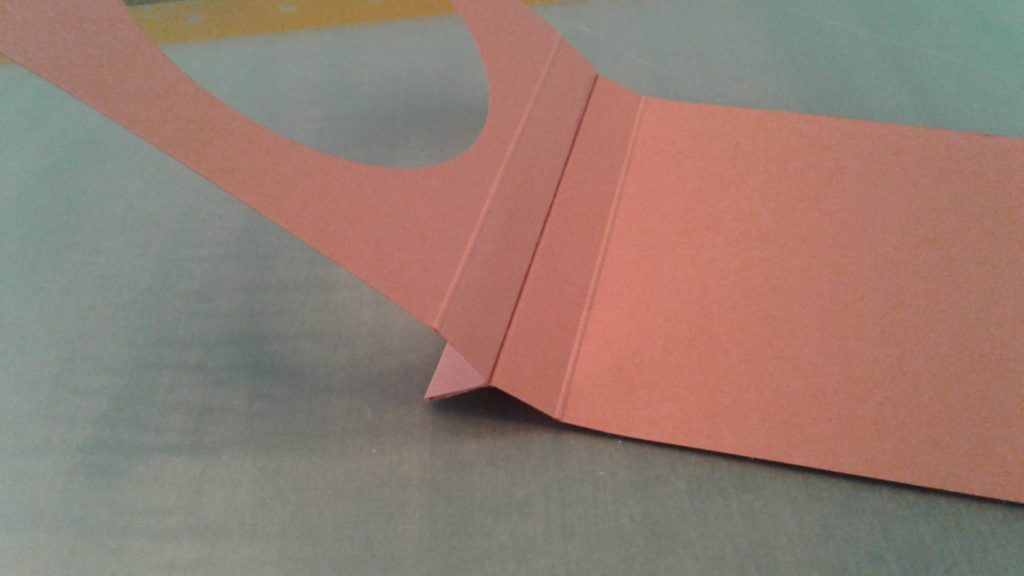
- The folds are pretty straight forward when you see how the card comes together. The folds are – valley at the 1/2″ score line, mountain at the 1″ score line, mountain at the 4 1/2″ score line, valley at the 5″ score line, mountain at the 5 1/2″ score line, valley at the 6″ score line, mountain at the 6 1/2″ score line, mountain at the 10″ score line, and valley at the 10 1/2″ score line. Again, a picture may be more helpful. [Again please note: This picture is from a prior post. Please reference it just for the visual guideline for folding the cardstock. Ignore the die cut circle!]
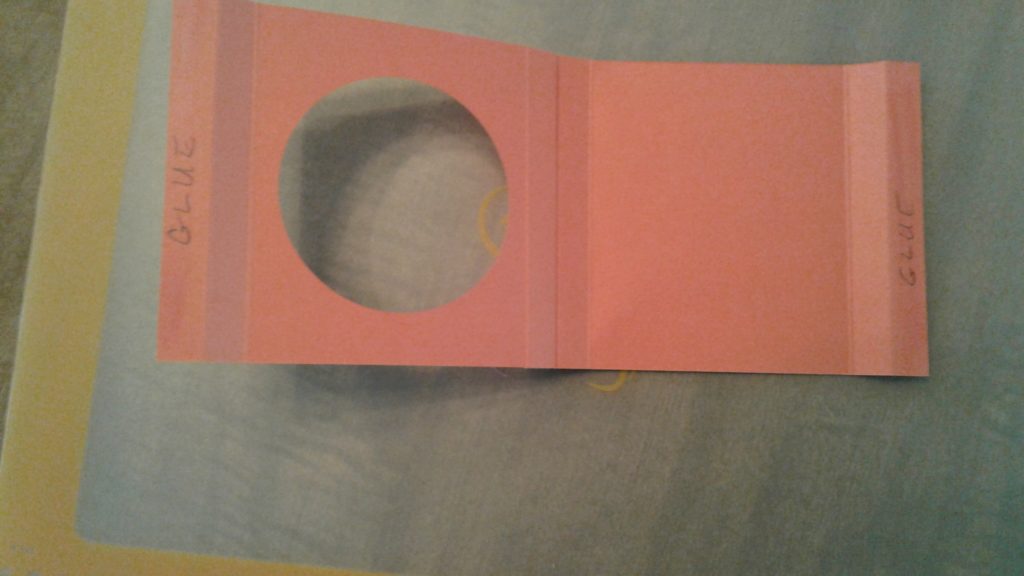
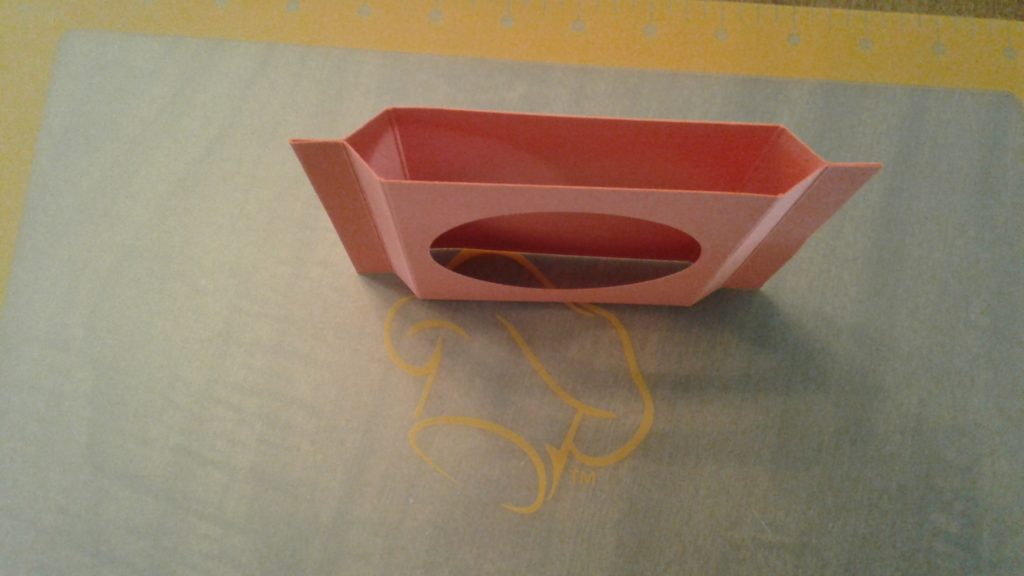
- Now, it’s time to assemble the shadow box card. Start by folding the cardstock in half at the 5 1/2″ score line. Step 1: Put glue between the 5″ score line and the 6″ score line. Adhere the glued areas together, as pictured below. Step 2: Put glue between the 1/2″ score line and the 1″ score line and between the 10″ score line and the 10 1/2″ score line. Adhere the glued areas together, as pictured below. You will then have your shadowbox card built. This card will fit easily into a standard envelope for a 4 1/4″ x 5 1/2″ card. You’ll flatten the card a little before mailing. [You know what I’m going to say! Just use the pictures below for a guideline of where to put your glue!]
- Cut a piece of Basic Black cardstock to 3 3/8″ x 4 1/8″. This will be the frame piece for your DSP.
- Cut a piece of DSP to 3 1/4″ x 4″. I used a piece from the absolutely gorgeous Petal Passion Designer Series Paper. I thought the black background and white leaves would work perfectly with the flower from the Amazing You stamp set.
- I used the second largest oval from the Stitched Shapes Framelits set to die cut the front of the card. This framelits set is an absolute must have! I use it all the time!
- To cut die cut the front, here is what I did:
- Use a few pieces of torn Post-It notes to tack down the DSP piece onto the middle of the front panel of the Old Olive cardstock. Don’t put the Basic Black cardstock behind the DSP. Use the oval framelit to die cut the oval shape for both the Old Olive cardstock and the DSP at the same time.
- Use the same few pieces of torn Post-It notes to tack down the DSP piece that has the die cut oval to the Basic Black cardstock. Use a pencil to trace just inside the oval onto the Basic Black cardstock piece. Then, use the largest circle die from the Stitched Shapes Framelits set to die cut a circle, centering the traced oval in the middle.
- Now, you can put the front of the card together. First, adhere the DSP piece to the Basic Black cardstock. Make sure the DSP is in the center of the Basic Black piece. Then, adhere the Basic Black piece to the front panel of the Old Olive shadow box card. The die cut ovals will line-up when the pieces are adhered together.
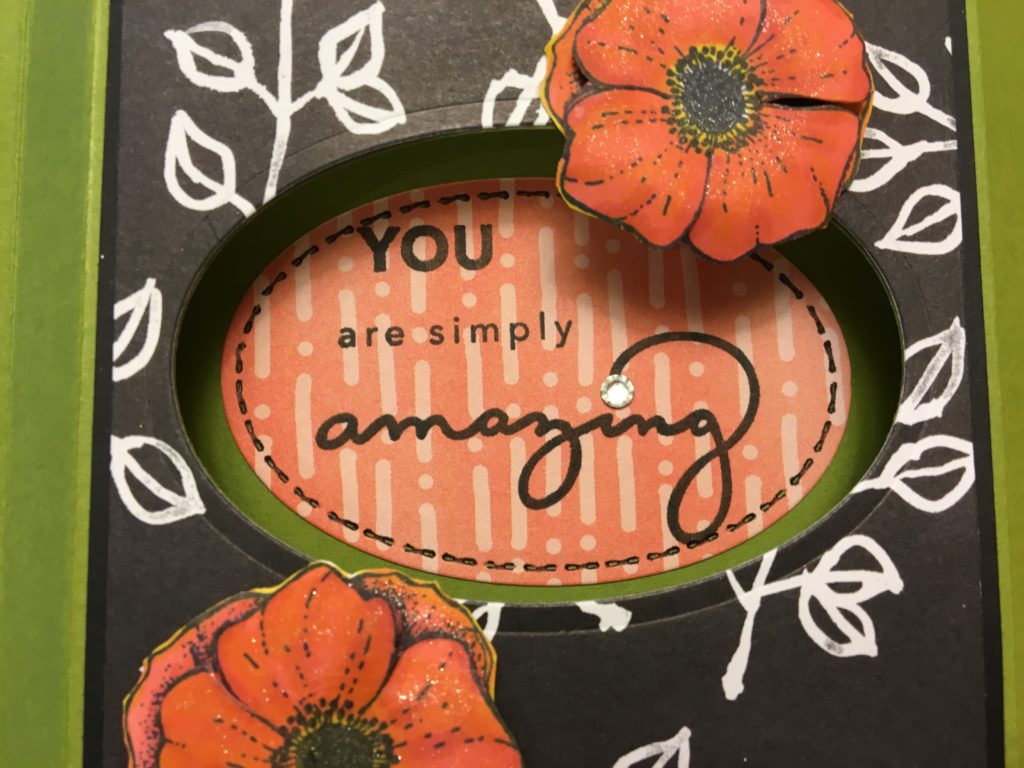
- Use three stamps (YOU, are simply, and amazing stamps) from the Amazing You stamp set for the sentiment. I used Memento Tuxedo Black ink and a piece of DSP from the Delightful Daisy Designer Series Paper. I chose the piece of DSP that has a nice mix of Calypso Coral since I had decided to make my flowers the same color. The sentiment is die cut with the second largest oval from the Stitched Shapes Framelits set. The faux stitching around the die cut is added with a Basic Black Stampin’ Write Marker. Adhere the die cut sentiment from the front of the card to make sure it is aligned with the die cut oval on the card front.
- For a little bling, I added a rhinestone to dot the “i” in “amazing”. The Rhinestone Basic Jewels are another staple for embellishments.
- To finish the card, use Memento Tuxedo Black ink to stamp the flower stamp from the Amazing You stamp set onto Whisper White cardstock. Stamp the flower image at least three times. Color the flower with Calypso Coral and Daffodil Delight Stampin’ Blends. Fussy cut the flowers. Use a bone folder to add a 3-D effect to the flower layers, and adhere the flowers to the card as pictured using Dimensionals. A final bit of bling is added to each flower with a little Clear Wink of Stella.
The shadowbox card is a great technique to have in your back pocket of card styles. It is quick to make and really has that how-did-she-make-this?? WOW effect!
Below are the main products that I used to make this month’s blog hop card. If you click on any picture, you’ll go to my on-line store.
Also below are all of this month’s NC Demos blog hop participants and links to their posts. Be sure to continue your blog hop by going over to see Kat Spencer’s project!
Happy stamping!
Laurie
|
|
|||
|
|
|||
|
|
NC Demos January Blog Hoppers
